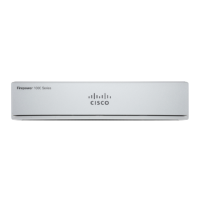
Step 10 Power—Press the Power button on the front of the chassis, and verify that the power status LED is on.
Step 11 Verify— Use the diagram in Front Panel LEDs and their States, on page 2 to check that the front-panel
LEDs reflect a good status.
Perform Initial Setup at the Web Interface for Versions 6.5 and Later
If you have HTTPS access to the management center IP address (either the address obtained from DHCP or
the default 192.168.45.45), you can perform initial setup using HTTPS at the appliance web interface. If you
need to manually set the management center IP address, see Management Center Initial Setup Using the CLI
for Versions 6.5 and Later, on page 15.
When you log into the management center web interface for the first time, the management center presents
an Initial Configuration Wizard to enable you to quickly and easily configure basic settings for the appliance.
This wizard consists of three screens and one pop-up dialog box:
• The first screen forces you to change the password for the admin user from the default value of Admin123.
• The second screen presents the End User License Agreement (EULA), which you are required to accept
before using the appliance.
• The third screen allows you to change network settings for the appliance management interface. This
page is prepopulated with current settings, which you may change.
If you are setting up an appliance after restoring it to factory defaults (see About the Restore Process, on
page 50) and you did not delete the appliance's license and network settings, the prompts will be
pre-populated with the retained values.
• The wizard performs validation on the values you enter on this screen to confirm the following:
• Syntactical correctness
• Compatibility of the entered values (for instance, compatible IP address and gateway, or DNS
provided when NTP servers are specified using FQDNs)
• Network connectivity between the management center and the DNS and NTP servers
The wizard displays the results of these tests in real time on the screen, which allows you to make
corrections and test the viability of your configuration before clicking Finish at the bottom of the screen.
The NTP and DNS connectivity tests are nonblocking; you can click Finish before the wizard completes
the connectivity tests. If the system reports a connectivity problem after you click Finish, you cannot
change the settings in the wizard, but you can configure these connections using the web interface after
completing the initial setup.
The system does not perform connectivity testing if you enter configuration values that would result in
cutting off the existing connection between the management center and the browser. In this case the
wizard displays no connectivity status information for DNS or NTP.
• After you have completed the three wizard screens, a pop-up dialog box appears that offers you the
opportunity to (optionally) quickly and easily set up Smart Licensing.
When you have completed the Initial Configuration Wizard and completed or dismissed the Smart Licensing
dialog, the system displays the device management page, described in “Device Management” in the Cisco
Secure Firewall Management Center Device Configuration Guide for your version.
Cisco Firepower Management Center 1600, 2600, and 4600 Getting Started Guide
12
Firepower Management Center 1600, 2600, and 4600 Getting Started Guide
Perform Initial Setup at the Web Interface for Versions 6.5 and Later
 Loading...
