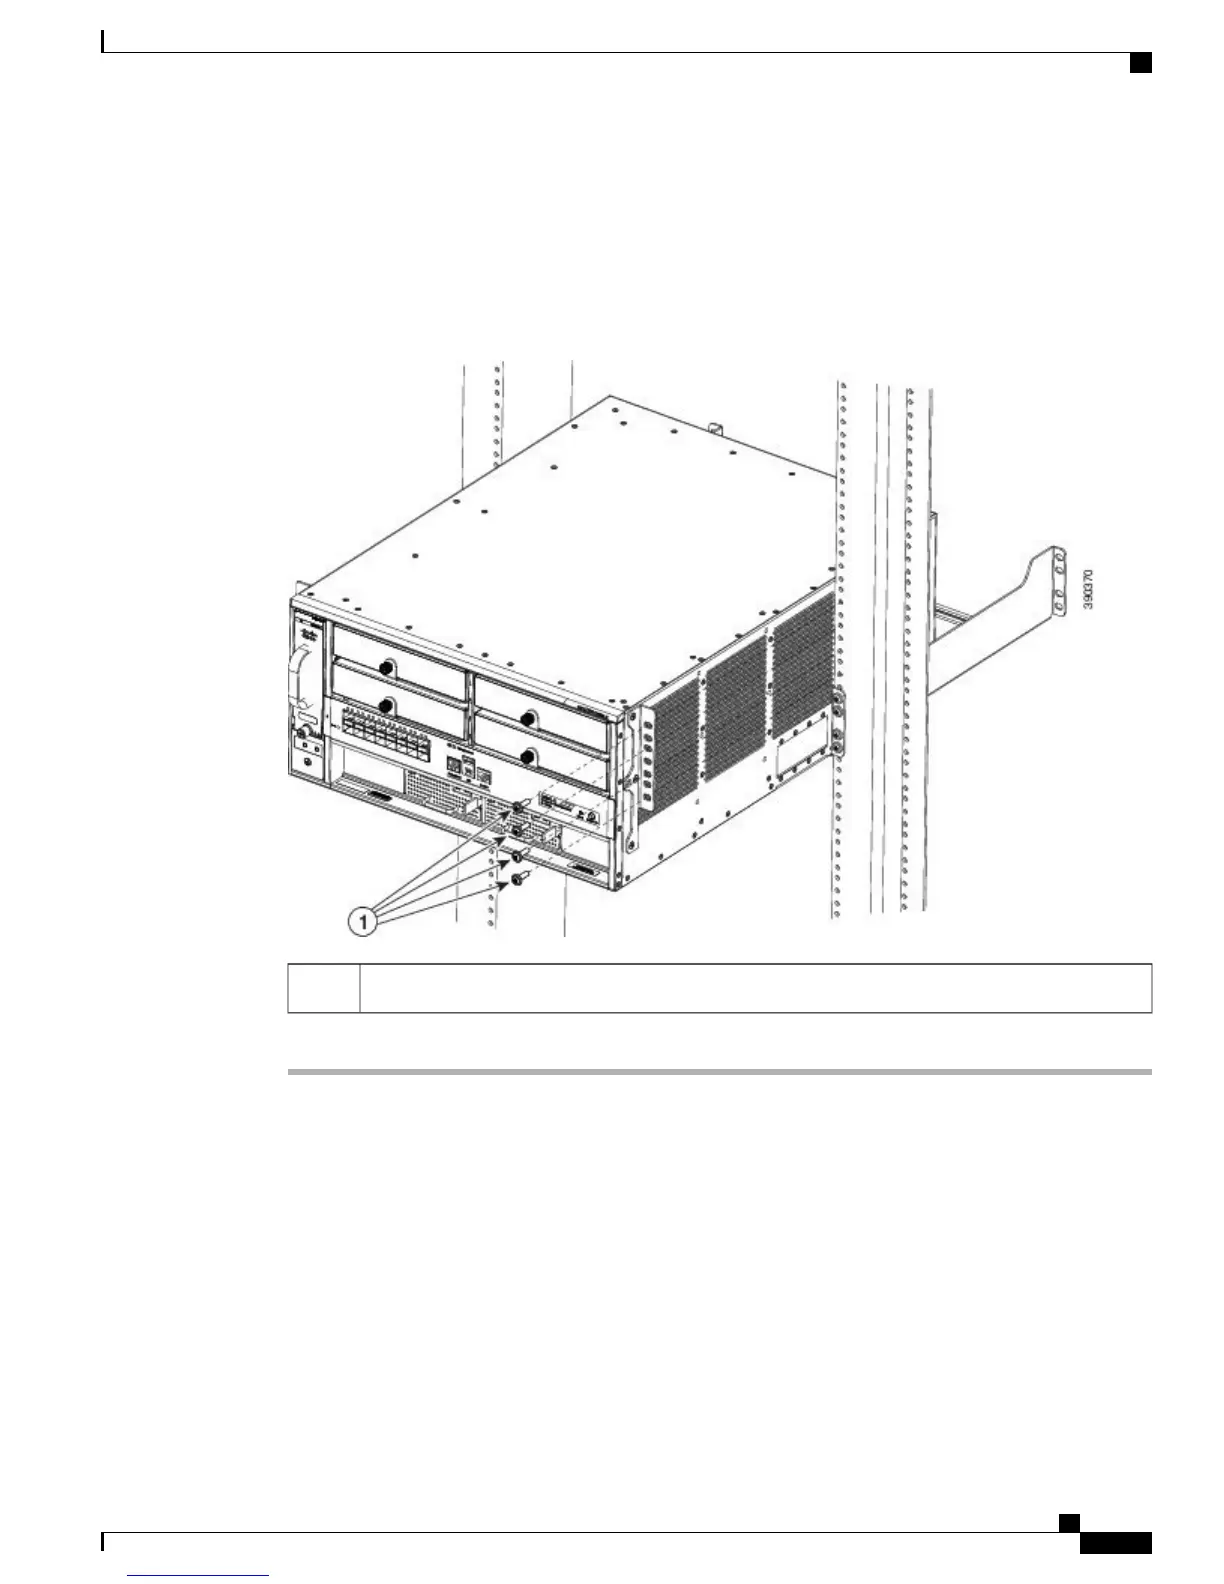
Step 6
Install all eight 10-32 or 12-24 screws (four on each side) through the cable guide mounting holes, rack-mount
L bracket holes, rack post holes, and into the clip nuts to secure the cable guides and the chassis to the rack
post. Tighten the screws securely.
Step 7
Secure the chassis using four screws through the holes in the L bracket and into the rack post holes.
Figure 21: Installing the Cable Mount Guides
10-32 or 12-24 screws1
What to Do Next
After installing the chassis in its location, complete the installation process by following these procedures:
•
Connecting the chassis to system ground. See Establishing the System Ground, on page 28.
•
Installing and connecting the power supplies to source power. For information on how to install and
cable power supplies, see the Installing Power Supplies.
•
Connecting to the switch console port. See Connecting the Switch Console Port, on page 30.
•
Connecting to the uplink ports. Installing SFP and SFP+ Transceiver Modules, on page 31
•
Powering-up the chassis and verifying the installation. See Verifying Switch Chassis Installation, on
page 33.
Catalyst 6880-X Switch Hardware Installation Guide
OL-30827-02 27
Installing the Switch
Rack Mouting the Chassis

 Loading...