Do you have a question about the Cisco Catalyst IE3300 Series and is the answer not in the manual?
Lists critical safety warnings for installation and operation, including jewelry removal and lightning precautions.
Details the essential procedures and requirements for properly grounding the switch.
Step-by-step guide for mounting the switch onto a standard DIN rail.
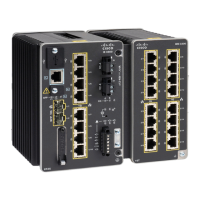
This document outlines the installation and maintenance procedures for a network switch, detailing its function, usage, and maintenance features.
The switch is designed to facilitate network connectivity, allowing for the connection of various devices and ensuring reliable data transmission. It supports 10/100/1000 Ethernet ports, with specific cable length limitations of up to 328 feet (100 meters) for optimal performance. The device is intended for installation in restricted access areas, requiring special tools or security measures for access. It is supplied as "open type" equipment, necessitating mounting within a suitably designed enclosure that meets IP 54 or NEMA type 4 minimum enclosure rating standards to prevent personal injury and protect against environmental conditions. The enclosure's interior should only be accessible with a tool.
The switch offers several usage features that enhance its functionality and adaptability in various environments. It can be installed as a standalone device or with expansion modules, which must be connected before mounting the switch on a DIN rail. The device supports both AC and DC power sources, providing flexibility in power configurations. For AC power, dedicated AC branch circuits protected by two-pole circuit breakers are required. For DC power, the switch complies with safety extra-low voltage (SELV) requirements in IEC60950-based safety standards.
The switch includes two alarm input circuits and one alarm output relay circuit for external alarms. These circuits can be configured as open or closed contacts, with alarm input 1 and alarm input 2, and a reference ground for input circuits. The alarm output circuit features a normally open (NO) output, a normally closed (NC) output, and a common connection. The input voltage source for the alarm output relay circuit must be an isolated source, limited to less than or equal to 24 VDC, 1.0A or 48VDC, 0.5A. Alarm ports must be connected to an IEC60950/IEC 62368 compliant limited power source to reduce the risk of electric shock and fire.
The switch also supports Small Form-Factor Pluggable (SFP) modules, which provide uplink optical interfaces for sending (TX) and receiving (RX) data. These field-replaceable modules allow for flexible network configurations and can be used in various combinations. However, when using commercial SFP modules like CWDM and 1000BX-U/D, the maximum operating temperature must be reduced to 27°F (0°C).
The device features front-panel LEDs that indicate its operational status. A green LED signifies an established link between the switch and the target device, while an amber LED indicates that the Spanning Tree Protocol (STP) is discovering the network topology and searching for loops. If the LED is off, it may suggest that the target device is not powered on, a cable problem, or an issue with the adapter.
Maintenance of the switch involves several procedures designed to ensure its longevity and reliable operation. Proper Electrostatic Discharge (ESD) protection is crucial when handling Cisco equipment, requiring the use of ground straps to prevent damage. Users are advised not to touch connectors, pins, or circuit components inside the switch. When not in use, the equipment should be stored in appropriate static-safe packaging.
For grounding the switch, a 10-gauge copper ground wire and stu size 6 ring terminals (e.g., Hollingsworth part number R3456B) are required. A ratcheting torque flathead screwdriver capable of exerting up to 18 in-lb (2.03 N-m) of pressure is needed to secure the ground screw. The ground connection must always be made first and disconnected last during installation or replacement.
When connecting to DC power sources, UL- and CSA-rated, style 1007 or 1569 twisted-pair copper appliance wiring material (AWM) wire should be used. Wire-stripping tools for 10- and 14-gauge wires are necessary, and a number-2 Phillips screwdriver and a flat-blade screwdriver are also recommended. For better EMC performance, S/UTP or SF/UTP cables are suggested for copper Ethernet ports.
The installation of flash memory cards is an optional maintenance feature. Users can copy Flash to SDFlash and set SDFlash as the primary storage. It is strongly recommended to use the SD card for booting or storing the configuration for easy replacement in case of hardware failure. To install or replace the flash memory card, a Phillips screwdriver is used to loosen the captive screw on the door protecting the card slot.
The switch is designed to mount on a DIN rail conforming to Standard EN60715. To prevent excessive side-to-side movement in high vibration environments, DIN rail stop plates (e.g., Mouser part numbers 653-PFP-M, 651-1201662, or 845-CA402) can be installed on one or both sides of the unit.
Airflow around the switch must be unrestricted to prevent overheating, requiring minimum clearances of 2.0 inches (50.8 mm) on the top, bottom, sides, and front. The equipment is intended for use in a Pollution Degree 2 industrial environment, in overvoltage Category II applications, and at altitudes up to 9842 ft (3 km) without derating. It is considered Group 1, Class A industrial equipment, and appropriate precautions are necessary to ensure electromagnetic compatibility.
For wire connections to power and alarm connectors, UL- and CSA-rated, style 1007 or 1569 twisted-pair copper appliance wiring material (AWM) wire must be used. The captive screws on the power and alarm connectors should be tightened to specific torque values (5 in-lb for power connectors, 2 in-lb for alarm connectors) to prevent electrical arcs if the connector is accidentally removed.
Before applying power, it is essential to ensure that power is removed from the DC circuit. A readily accessible two-poled disconnect device must be incorporated into the fixed wiring. Only trained and qualified personnel are permitted to install, replace, or service the equipment. The product relies on the building's installation for short-circuit (overcurrent) protection, and the protective device must be rated not greater than 15A.
The switch automatically performs a power-on self-test (POST) after power is connected, verifying proper functionality. If the default configuration is satisfactory, no further configuration is needed. Otherwise, users can manage the switch through the Web UI, CLI, an SNMP application like CiscoView, or the Common Industrial Protocol (CIP) management tool.
| Switching Capacity | Up to 128 Gbps |
|---|---|
| Forwarding Rate | Up to 95.23 Mpps |
| Product Type | Industrial Ethernet Switch |
| IP Rating | IP30 |
| Software | Cisco IOS XE |
| Operating Temperature | -40°C to 75°C |
| Mounting | DIN Rail, Wall |
| Management | CLI, SNMP |
| Series | IE3300 |
| PoE | PoE/PoE+ |
| Input Voltage | 12-48 VDC |
| Redundancy | Supports redundant power inputs |