TPM installation is supported after-factory. However, a TPM installs with a one-way screw and cannot
be replaced or moved to another server. If a server with a TPM is returned, the replacement server must
be ordered with a new TPM.
Note
Procedure
Step 1
Install the TPM hardware.
a) Power off, decommission, and remove the blade server from the chassis.
b) Remove the blade server cover.
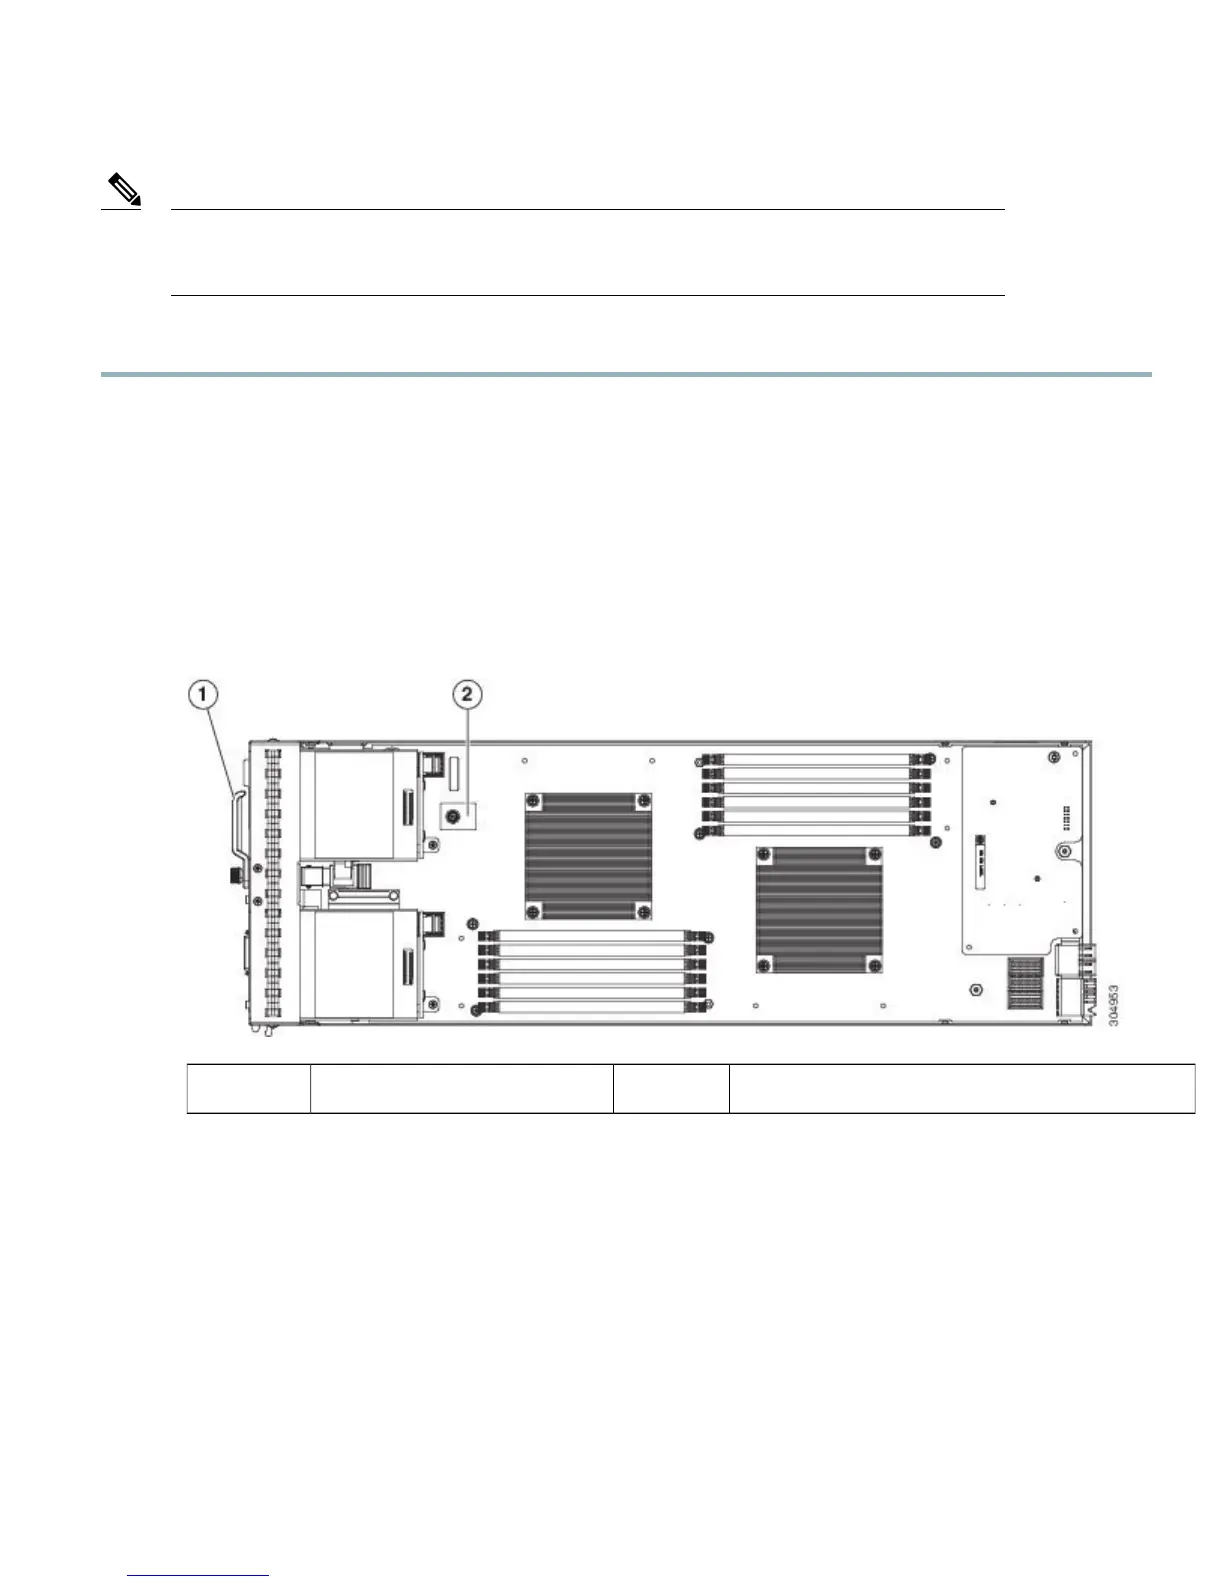
c) Install the TPM to the TPM socket on the server motherboard and secure it using the one-way screw that is provided.
See the figure below for the location of the TPM socket.
d) Return the blade server to the chassis, power it on, and allow it to be automatically reacknowledged, reassociated, and
recommissioned.
e) Continue with enabling TPM support in the server BIOS in the next step.
Figure 20: TPM Socket Location
TPM socket on motherboard2Front of server1
Step 2
Enable TPM Support in the BIOS.
a)
Enable Quiet Mode in the BIOS policy of the server’s service profile.
b) Establish a direct connection to the server, either by connecting a keyboard, monitor, and mouse to the front panel
using a KVM dongle (N20-BKVM) or by other means.
c) Reboot the server.
d) Press F2 during reboot to enter the BIOS setup screens.
e) On the Advanced tab, select Trusted Computing and press Enter to open the TPM Security Device Configuration
window.
f) Set the TPM Support option to Enabled.
27
 Loading...