10
Cisco TelePresence Content Server Release 7.0 Quick Start Guide
Completing the Initial Configuration
Task 7: Configure SQL Settings
Step 1 Remote log in to the Content Server by using the Administrator password.
Step 2 Launch the Command Prompt.
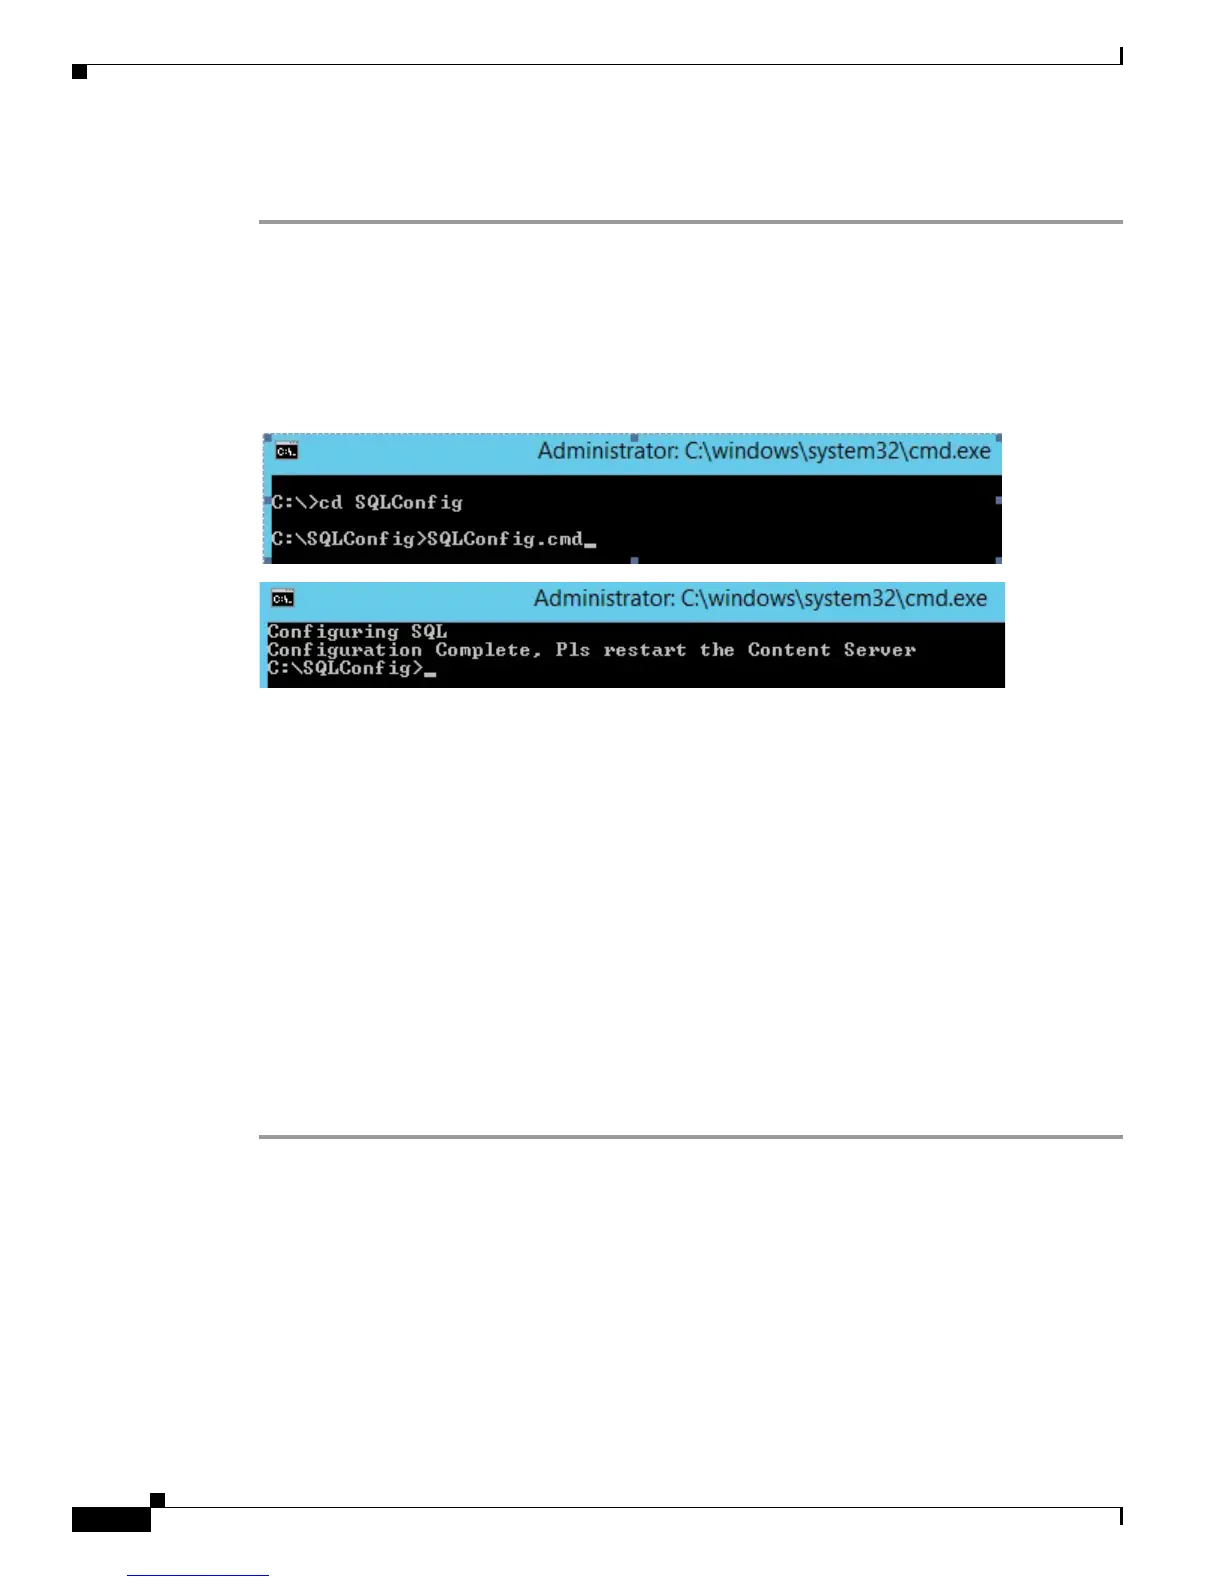
Step 3 On the command prompt, type “cd c:\SQLConfig” to change the current directory to c:\SQLConfig
Step 4 Type SQLConfig.cmd to run the script. See the image, given below:
Figure 5 SQL Configuration
Step 5 Restart the Content Server. Go to Start > Log Off > Restart.
Task 8: Install a security certificate
The Content Server is shipped with a self-signed certificate, which is valid for ten years. Because
self-signed certificates are not from a trusted Certificate Authority, when users log in, most browsers will
display a message that the identity of the site could not be verified.
You can add the server to the Trusted sites list in Internet Explorer, or add an exception in Firefox to
avoid error messages at log in. However, we recommend purchasing a security certificate from a
certificate issuing authority that has a trusted relationship back to a root authority, such as VeriSign or
Comodo. These credentials are most likely to be trusted by browsers, which eliminates the need to add
the server to the list of Trusted sites. The certificate should be generated against the Windows machine
name or the DNS entry associated with the server IP address.
Follow these steps to install a purchased security certificate on the server default website:
Step 1 On your computer, go to Start > All Programs > Accessories > Remote Desktop Connection.
Step 2 In the Remote Desktop Connection dialog box, enter the IP address that you configured in Task 4:
Configure a static IP address.
Step 3 Click Connect. Log in with the administrator password that you set in Task 2: Set the local administrator
password. The Server Manager user interface appears.
Step 4 Go to Start > Internet Information Services (IIS) Manager.
Step 5 Under Connections, click the Content Server Windows 2012 server “machine_name (local computer)”.
Step 6 Click Server certificates in the machine_name Home window.
Step 7 Under Actions, click Import to import a new certificate.