Citrix ADC MPX
Replace a solid‑state drive
Replacement SSDs contain a pre‑installed version of the Citrix ADC soware and a generic configu‑
ration file (ns.conf). However, it does not contain SSL‑related certificates and keys, or custom boot
settings. Configuration files and customized settings must be restored to a replacement drive from a
backup storage location at the customer site, if available. The files to be restored might include:
• /flash/nsconfig/ns.conf: The current configuration file.
• /flash/nsconfig/ZebOS.conf: The ZebOS configuration file.
• /flash/nsconfig/license: The licenses for the Citrix ADC features.
• /flash/nsconfig/ssl: The SSL certificates and keys required for encrypting data to clients or to
back‑end servers.
• /nsconfig/rc.netscaler: Customer‑specific boot operations (optional).
To replace a solid‑state drive:
1. At the Citrix ADC command prompt, exit to the shell prompt. Type:
shell
2. Shut down the Citrix ADC appliance by typing the following command at the shell prompt:
shutdown –p now
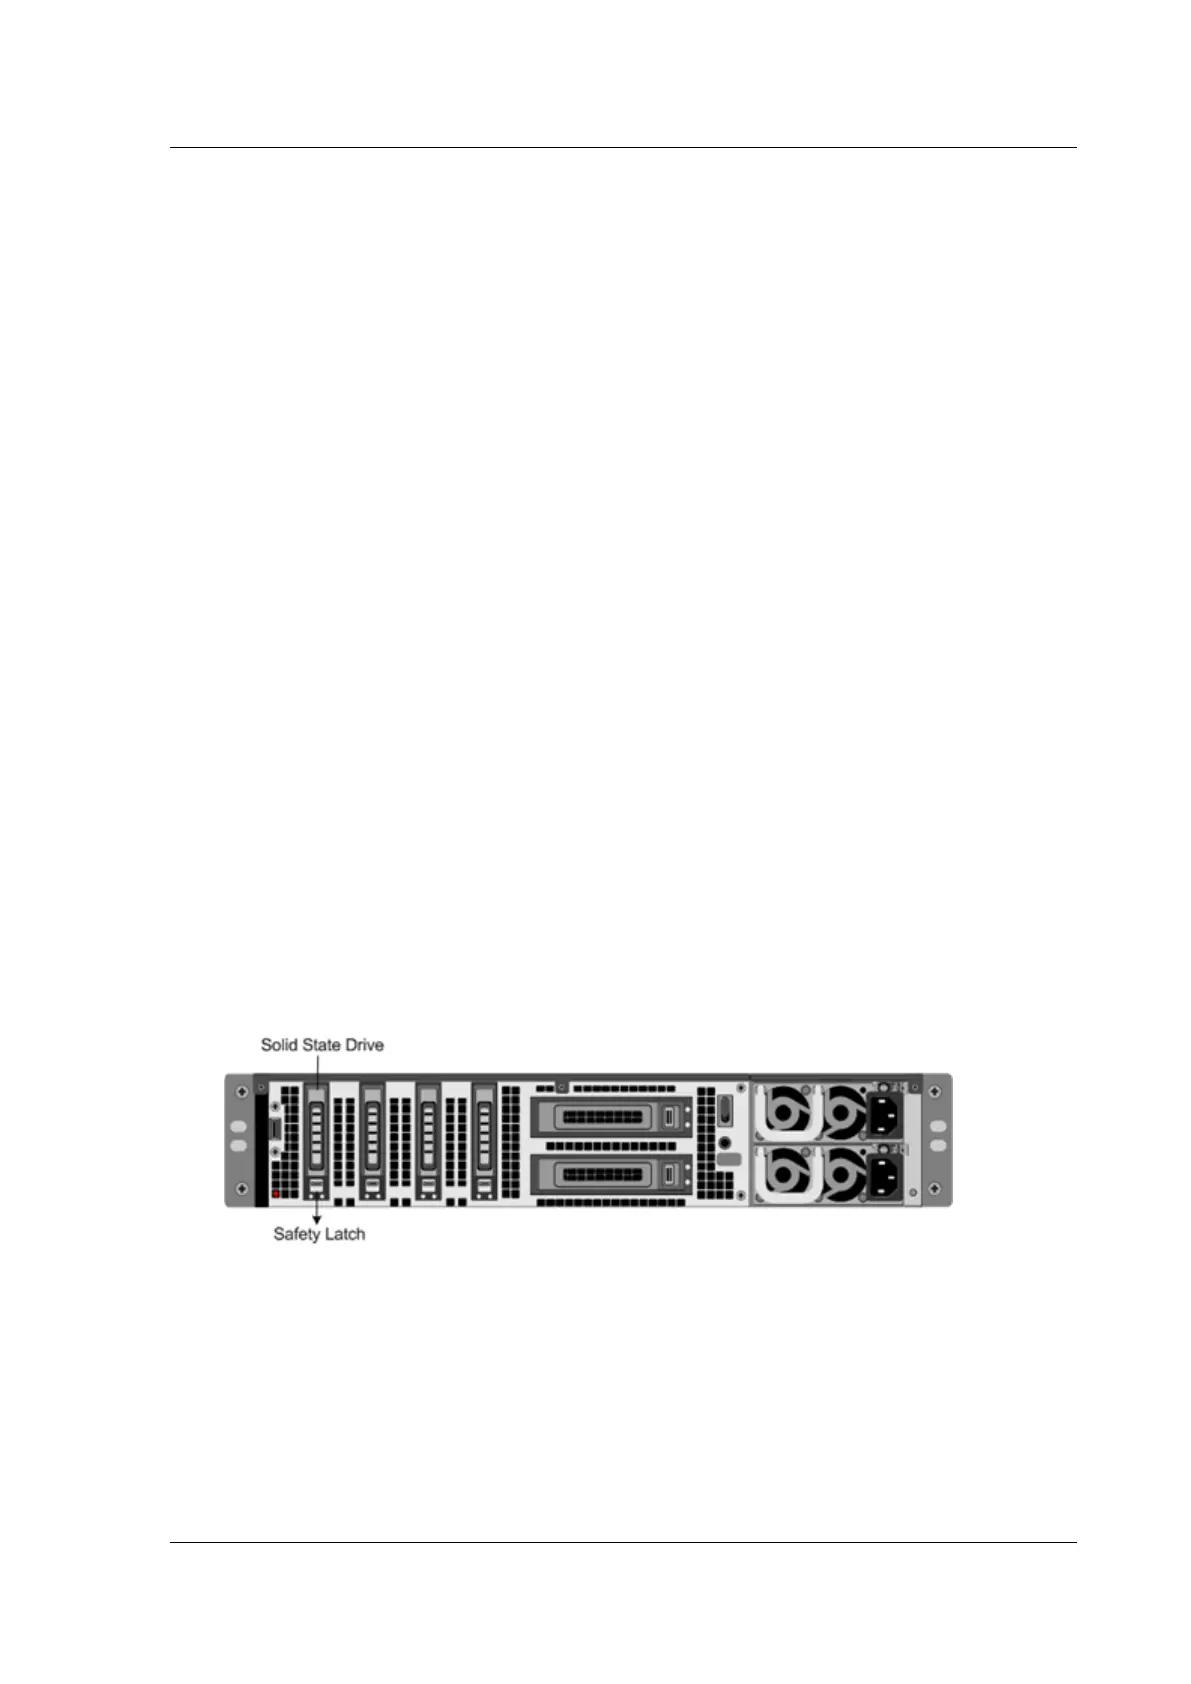
3. Locate the SSD on the back panel of the appliance. Push the safety latch of the drive cover to the
right or down, depending on the platform, while pulling out on the drive handle to disengage.
Pull out the faulty drive.
Note: The illustration in the following figures might not represent the actual Citrix ADC appli‑
ance.
Figure 4. Remove the existing solid‑state drive
4. Verify that the replacement SSD is the correct type for the platform.
5. Pick up the new SSD, open the drive handle fully to the le or up, and insert the drive into the
slot as far as possible. To seat the drive, close the handle flush with the rear of the appliance so
that the drive locks securely into the slot.
Important: When you insert the drive, make sure that the Citrix product label is at the top if the
drive is inserted horizontally. The label must be at the right if the drive is inserted vertically.
© 1999–2023 Cloud Soware Group, Inc. All rights reserved. 118
 Loading...