DCX 18..27
7 Installation Installation
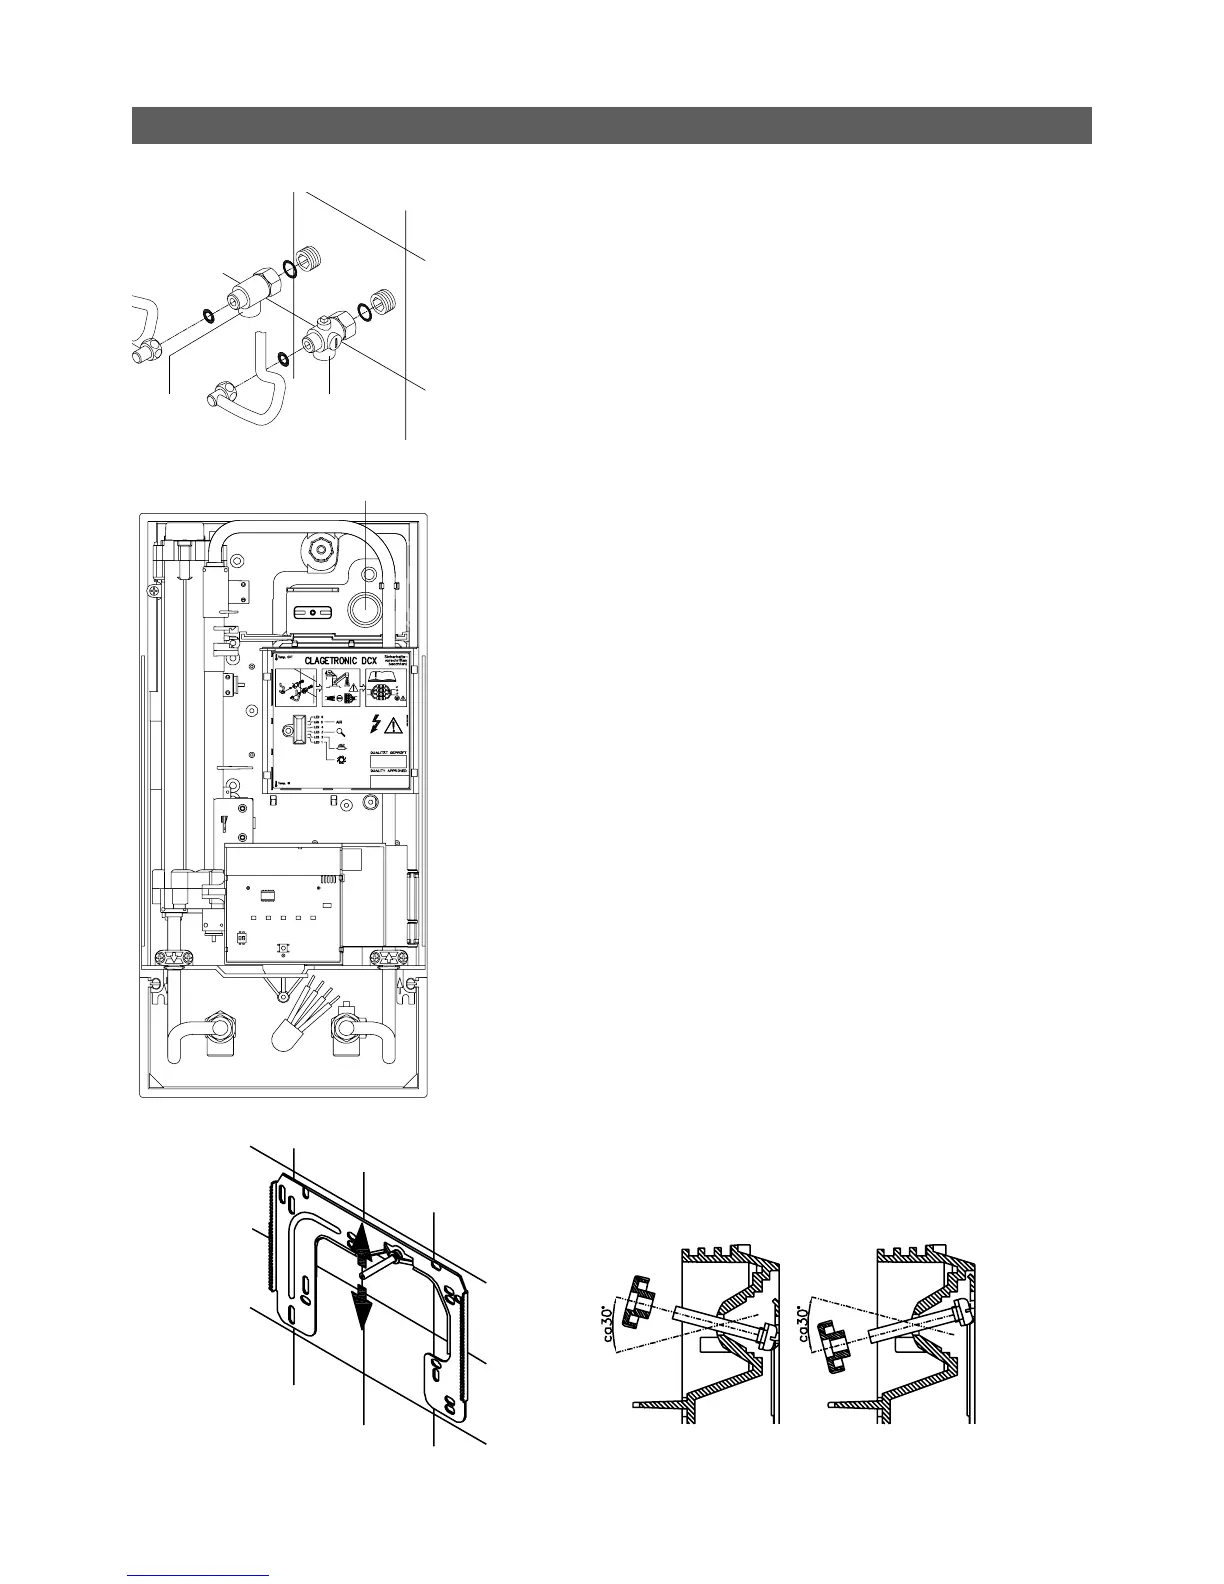
Installing connection pieces
1. As shown in the illustration, screw the
cold water connection piece (19) with
the union nut and the 1/2“ seal onto
the cold water connection.
2. Screw the hot water connection piece
(1) with the union nut and the 1/2“ seal
onto the hot water connection.
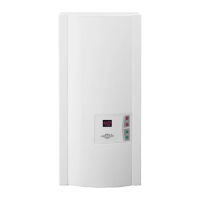
Installing the appliance
1.To open the appliance hood, take off the
faceplate and unscrew the main hood
screw.
• Whenreplacinganappliance,theelec-
tricalpowersupplycablemaybecon-
nectedintheupperpart.Onlyinsuch
case,followtheinstructionsonpage12
“Electricalconnectionfromabove”.
2. Place the appliance on the heater
bracket (9) so that the threaded rod
of the wall bracket fits in the provided
hole of the appliance. If necessary,
slight corrections are possible by care-
fully bending the threaded rod of the
wall bracket. However, it must be pos-
sible to screw on the water connection
pipes of the appliance without applying
force.
3. Screw the two 3/8“ union nuts of the
appliance‘s water connection pipes,
each with the 3/8“ seal, onto the fit-
tings.
Anschlussstücke installieren
1. Schrauben Sie gemäß Abbildung das
Kaltwasseranschlussstück (19) mit
Überwurfmutter und der 1/2“-Dichtung
an den Kaltwasseranschluss.
2. Schrauben Sie das Warmwasser-
anschlussstück (1) mit Überwurf-
mutter und der 1/2“-Dichtung an den
Warmwasseranschluss.
Gerät montieren
1. Zum Öffnen des Gehäuses die Blende
abnehmen und die zentrale Hauben-
schraube lösen.
•ImAustauschfallkannesvorkom
men,dassdieElektrozuleitungim
oberenGerätebereichvorhandenist.
DerElektroanschlusserfolgtdann
gemässderBeschreibungaufS.12
»Elektroanschlussvonoben«.
2. Setzen Sie das Gerät auf den Wand-
halter (9), so dass die Gewindestange
des Wandhalters in das vorgesehene
Loch des Gerätes passt. Durch vorsich-
tiges Biegen der Gewinde stange des
Wandhalters lassen sich gegebenen falls
kleine Korrekturen vornehmen. Die
Wasseranschluss leitungen des Gerätes
müssen sich jedoch ohne Gewalt-
anwendung anschrauben lassen.
3. Schrauben Sie die beiden
3/8“-Überwurfmuttern der Wasser-
anschlussleitungen des Gerätes jeweils
mit der 3/8“-Dichtung auf die installier-
ten Anschlussstücke.
19
S
1
8