ERROR DISPLAY
If an error occurs, one of the following displays is display ed. Take the measures described below to eliminate the
prob lem.
Error Display Cause Measu re
A DISC is loaded upside-down inside the CD deck and
does not play.
Eject the disc then reload it properly.
ERROR 2 A CD inside the CD changer is not loaded. This is a failure of CD changer’s mechanism.
ERROR 3
A CD inside the CD changer cannot be played due to
scratches, etc.
Replace with a non-scratched, non-warped disc.
ERROR 6
A CD inside the CD changer cannot be played beca-
use it is loaded upside-down.
Eject the disc then reload it properly.
If an error display other than the ones described above appears, press the reset button.
A DISC is caught inside the CD deck and is not ejected. This is a failure of CD deck's mechanism.
ERROR 2
ERROR 3 A DISC cannot be played due to scratches, etc. Replace with a non-scratched, non-warped-disc.
CD/MP3/
WMA
CD
changer
ERROR 3 A DISC cannot be played due to scratches, etc. Retry or replace with a non-scratched, non-warped
disc.
ERROR 6 A DISC inside the DVD changer cannot be played be-
cause it is loaded upside-down.
Eject the disc then reload it properly.
ERROR P Parental le vel error.
Set the correct Parental level.
ERROR 2 A DISC inside the DVD changer ca nnot be pl ayed.
This is a failure of DVD mechani sm.
Region code error. Eject the disc and replace correct region code
disc.
DVD
changer
ERROR R
Mode
ERROR 6
FUSE
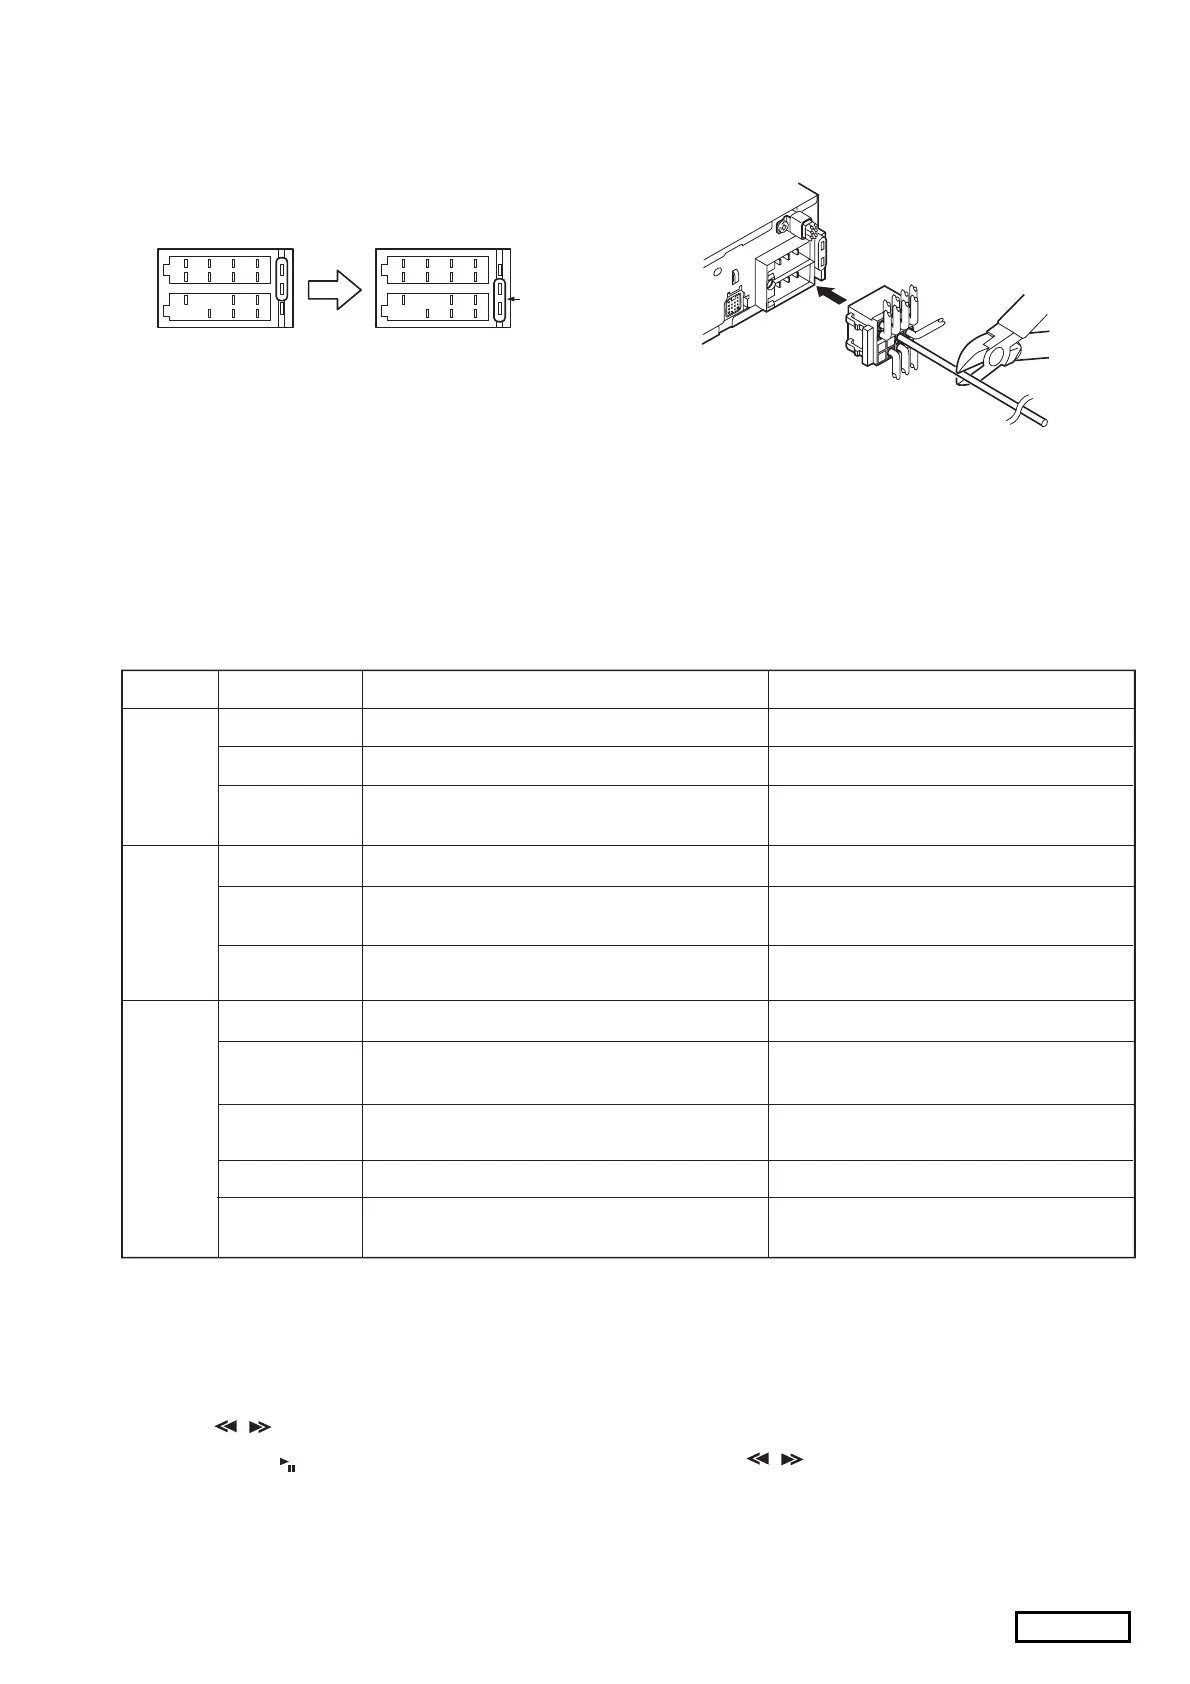
For other vehicles
For VW and Audi vehicles
(initial position)
Main unit side ISO connector
Figure 1
2. When the c ar stereo is in stalled in 19 98 and later Volkswagen
models, make sure to cut the car lead w ire c o nne cted the A-5
terminal.(Abreakdowncouldoccuriftheleadwireisnotcut.)
After cutting the lead wire, insulate the front end of the lead wire
with insulation tape to prevent the risk of short-circuits.
(Figure 2)
Note: Before cutting the lead wire, disconnect the car battery
- (negative) cable.
Figure 2
3. When the Main unit is also connected to an exte rnal amplifier,
connect REMOTE on the external amplifier to remote turn on
lead.
NOTES OF ISO CONNECTOR
1. For VW and Audi vehicles, change the position o f fuse
installation as shown on the diagram.(Figure 1)
ISO CONNECTOR type
1. Press the [ADJ] button to switch to the adjustment selection
display.
2. Press the lever upward or downward to select the
"SYS CHK <E>".
3. Press and hold the button for 1 second or longer.
"SYSTEM CHK" appears in the display, then the unit returns
to the previous operation mode.
ANTI-THEFT INDICATOR
[]
,
[
]
The red Anti-theft indicator is a function for preventing theft.
When the DCP is removed from the unit, this indicator blinks.
1. Press the [ADJ] button to switch to thead justment selection
display.
2. Press the lever upward or downward to select the
"BLINK LED".
3. Turn the [ROTARY] knob to select "ON " or "OFF ".
[]
,
Performing a system check
DXZ558RMP
-3-
 Loading...