12
Excessive back pressures to the engine exhaust can
considerably reduce both engine performance and
life. It is therefore important that exhaust systems
should be the proper diameter and be as short as
possible within the minimum amount of bends. Refer
to Installation & Operating Data for exhaust data.
The installation of the exhaust system should consist
of the following:
Personnel protection from hot surfaces.
Adequate supports to prevent strain on the
engine exhaust outlet and minimize
vibration.
Protection against entry of water and other
foreign matter.
While the engine is running inspect exhaust pipe
outlet outside of the pump room itself for
environmental hazards such as excessive smoke
conditions. The following could be used as a guide
for general engine operating conditions.
1) Blue Smoke – Possible engine oil
consumption.
2) White Smoke – Possibility of water in
cylinders, water in fuel or internal engine
problem.
3.3 LUBRICATION SYSTEM
3.3.1 Checking Sump Oil
Check the sump oil level using the dipstick on the
engine. This level must always be between the
dipstick marks Min. and Max. with the engine not
running.
3.3.2 Changing Engine Oil
1) Operate the engine until it is warm.
2) Stop the engine. Remove the sump drain
plug and drain the lubricating oil from the
sump.
3) Fill the sump to the ‘FULL” mark on the
dipstick with new and clean lubricating oil of
an approved grade. Fit the drain plug tighten
the plug to 34 Nm (25lbf-ft) / 3.5 kgf-m.
4) Return the unit back into service by returning
the AEC selector to “automatic” position and
the manual operating lever to manual stop
position.
5) Dispose used oil properly.
3.3.3 Changing Oil Filter
1. Turn engine off.
2. Put a tray under the filter to retain spilt
lubricating oil.
3. Remove the filter with a strap wrench or
similar tool. Then dispose of the filter
properly.
4. Clean the filter head.
5. Add clean engine lubricating oil to the new
filter. Allow the oil enough time to pass
through the filter element.
6. Lubricate the top of the filter seal with clean
engine lubricating oil.
7. Fit the new filter and tighten it by hand only.
Do not use a strap wrench.
8. Ensure that there is lubricating oil in the
sump.
9. Operate the engine and check for leakage
from the filter. When the engine has cooled,
check the oil level on the dipstick and put
more oil into the sump, if necessary.
10. Return the unit back into service by returning
the main pump controller selector to
“automatic” position and the manual
operating lever to AUTO-OFF position.
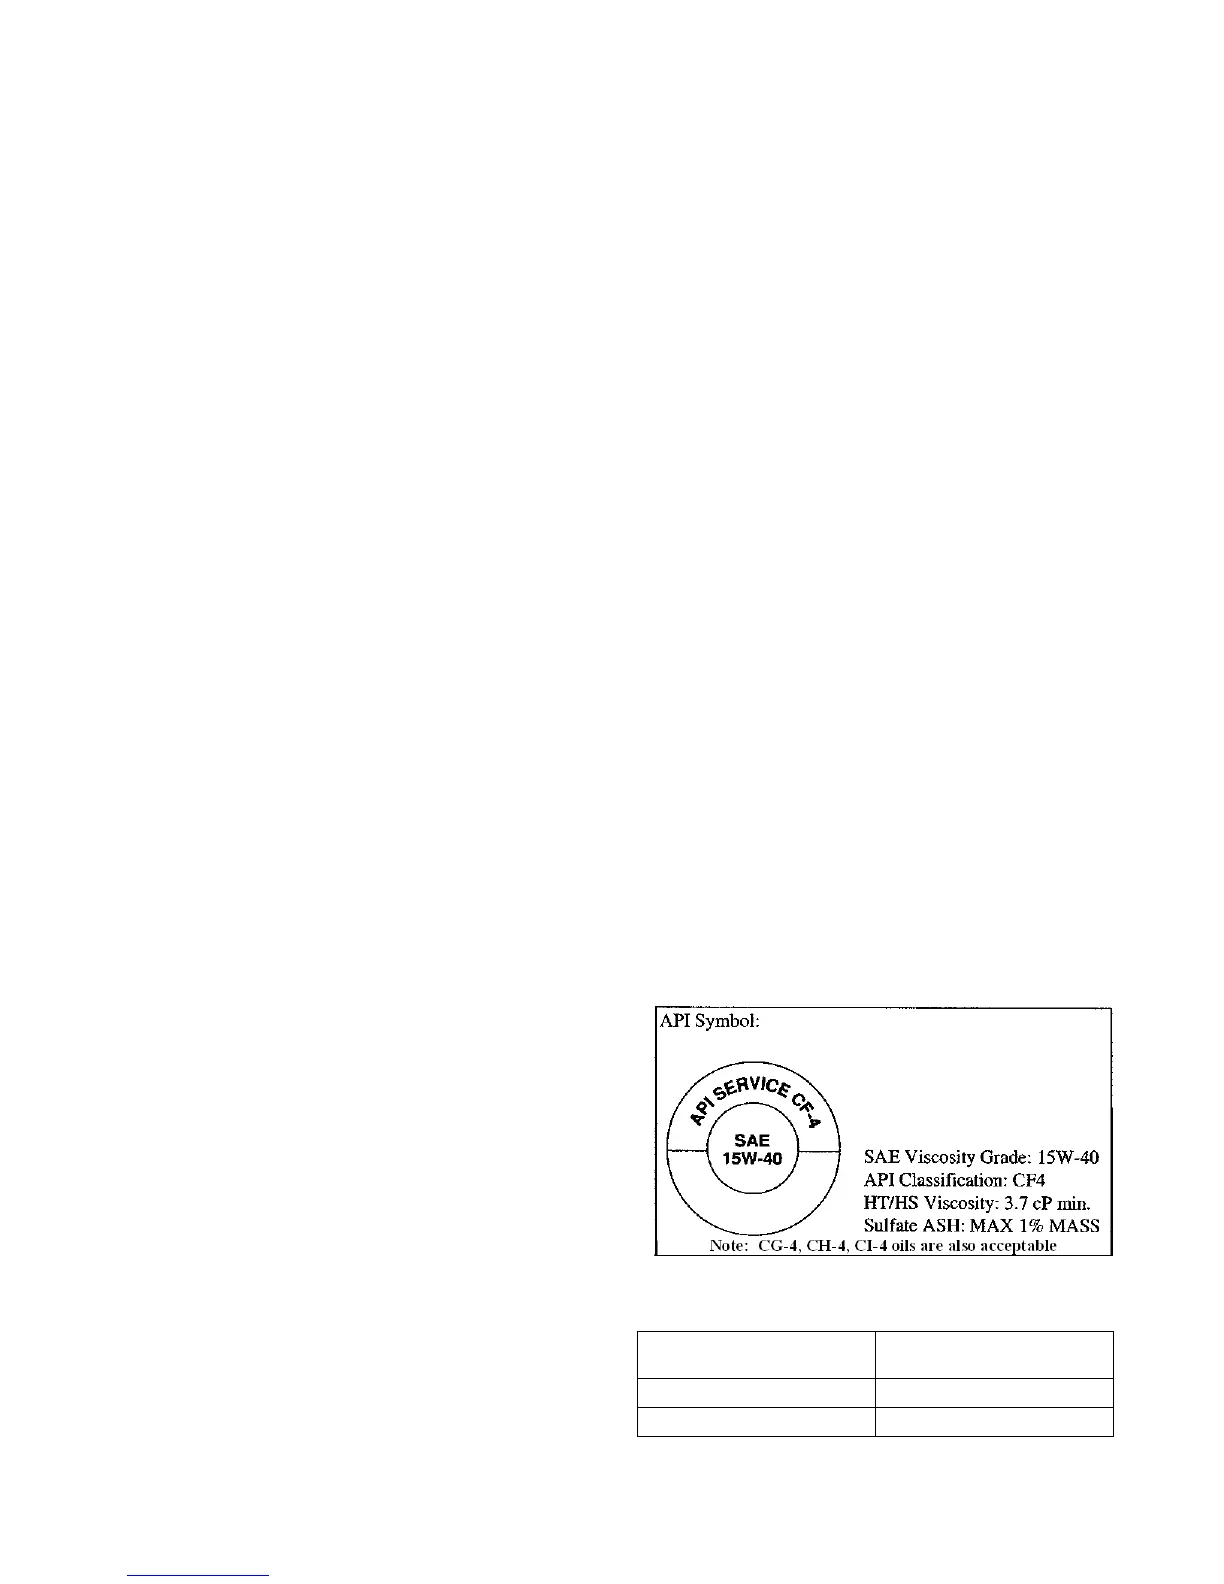
3.3.4 Oil Specification
Important: Do not add makeup oil until the oil
level is BELOW the add mark on the dipstick.
Break-in period is 1 year from engine start-up.
Oil spec to be used after break-in period, all engine
models:
Figure #31
3.3.5 Oil Capacities (Including Filter)
ENGINE
MODEL
OIL CAPACITY
LITERS (QUARTS)
LC2A-LP30
1.8 (1.9)
LC2A-LP60
2.8 (3.0)
Figure #32