15
© Copyright 2020. All rights reserved.
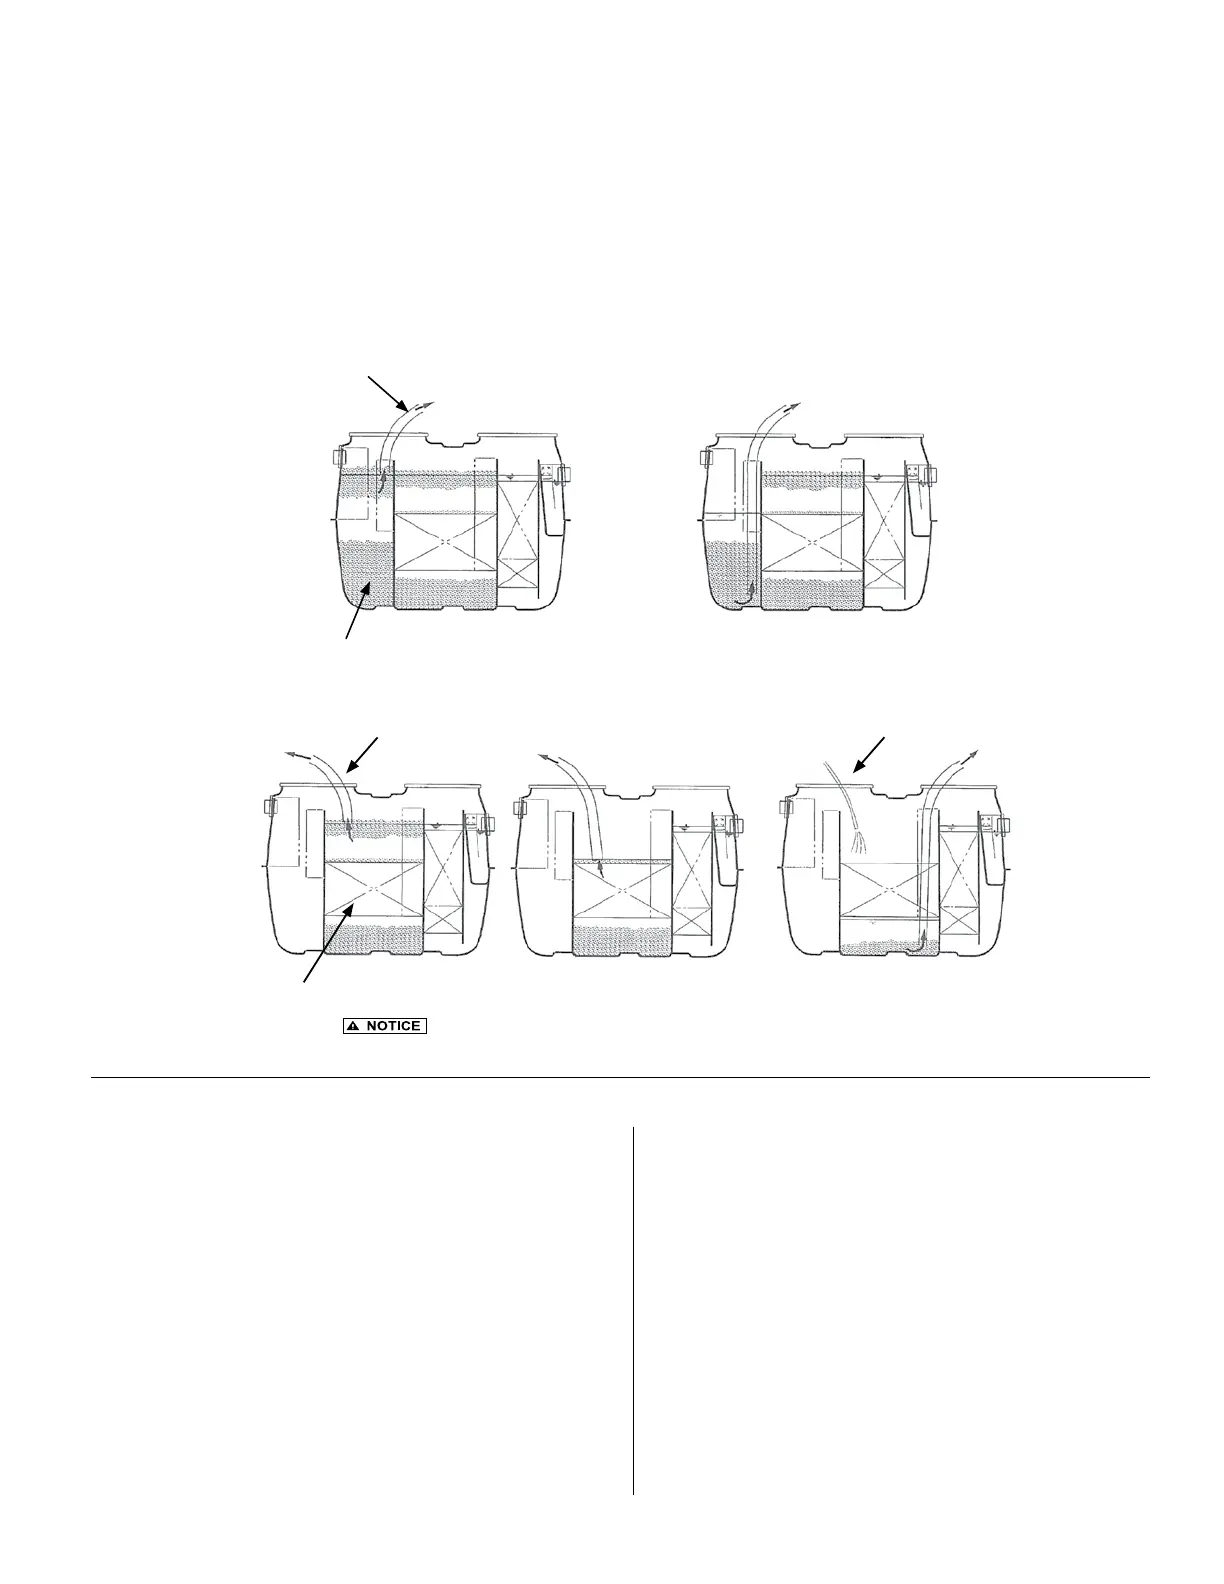
Step 3: Remove the sludge under the media while washing the lter with tap water.
Step 1: Remove the scum.
Step 2: Remove the sludge
1)
2)
3)
Remove the scum rst. If you remove the sludge rst, the water
level will decrease and the anaerobic lter will be blocked by the scum.
Figure 22
- Anaerobic Chamber Pumping
Wastewater entering the Fusion
®
contains organic and inorganic materials. If organic in nature, it is treated and
decomposed by microorganisms during the treatment process. If inorganic in nature, it will be stored within the Fusion
®
.
The stored materials accumulate as scum (oating) or sludge (solids on the bottom) and must be removed periodically to
ensure the performance of the Fusion
®
. Please review the Operation and Maintenance sections part B and C to determine
when the maximum depths of scum and sludge have been reached and pumping is required. Follow the procedures in
Figures 21 and 22 to remove scum and sludge from the sedimentation and anaerobic chambers only. When nished, rell
both chambers with clean water to prevent the possibility of otation.
FUSION
®
PUMPING
Figure 21 - Sedimentation Chamber Pumping
Step 1: Remove the scum.
Step 2: Remove the sludge
1) 2)
ALARM PANEL & BLOWER INSPECTION AND MAINTENANCE
1. Listen for loud rattling sounds. The blower should hum
softly. If a rattle is heard, ensure that all four legs securely
contact the ground or base medium.
For HIBLOW
Blower, inspect the lter once the power
has been disconnected by removing the two screws
from the top cover and removing the top cover from the
unit. Remove the screw from the lter plate, and
lift off the lter plate. Clean the lter by knocking the
dust out, and then handwash in mild, soapy water. Be
sure to dry well before reinstalling lter and covers.
2. Ensure the correct time is shown on the blower's display
screen, keeping in mind that the display shows a 24-
hour clock (not AM/PM).
3. Press the Manual Backwash button and ensure the unit
switches into backwash mode by observing the change in
water ow in the Fusion
®
tank from the recirculation return
line to the sludge transfer line. Be sure to switch the system
back to recirculation by pressing the Manual Backwash
button again, or pressing [SET] on HIBLOW
®
unit.
Inspect the alarm panel for signs of water or odors inside.
Toggle the test switch on the side of the box to check
that both the alarm horn and the alarm beacon light are
operational.
Inspect the blower for proper operation. If the blower is not
functioning, refer to the troubleshooting section near the
end of this guide.
 Loading...