14
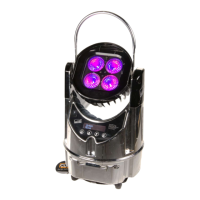
GLOW UP
CHARGE HOURS
Permette di selezionare come visualizzare la carica della batteria sul
display in stato di riposo.
5) Premere ENTER
A
per visualizzare le ore di carica della batteria.
6
) Premere SELECT
S
p
er tornare al Menu precedente.
DMX MONITOR
Displays the DMX input level in bit for each GlowUP channel.
1) Press ENTER
A
– the first channel appears on the display.
2) Use the
B
and DOWN
C
keys to select the channel.
3) Press ENTER
A
to display the channel DMX level (value between 0
and 255).
4) Press SELECT
S
to return to the previous Menu.
FW UPLOADER
Used to transfer software from one projector to all other connected
projectors.
1) Press ENTER
A
use the UP() e DOWN() keys to select:
Cable upload: to start the firmware upload via DMX cable.
Radio upload: to start the firmware upload via wireless
2) Press ENTER
A
to transfer firmware or SELECT
S
to return to the
previous Menu.
SETUP MODEL
Use to change/select the model to be assigned to the projector.
1) Press ENTER
A
– current settings appear on the display.
2) Use the
B
and DOWN
C
keys to select one of the following
models:
COLOR
TUNABLE WHITE
WHITE
3) Press ENTER
A
to confirm the selection (the display blinks for
several seconds) or SELECT
S
to keep the current settings and
return to the previous Menu.
CPU RESET
Used to reset the CPU. Settings will not be reset.
1) Press ENTER
A
– a confirmation message appears on the display
(OK?)
2) Press ENTER
A
to RESET or SELECT
S
to return to the previous
Menu.
TEST
Used to test the correct operations of effects.
1) Press ENTER
A
.
2) Use the
B
and DOWN
C
keys to select the Test function.
3) Press ENTER
A
to confirm the select and start the TEST or SELECT
S
to keep current settings.
RADIO SETUP
Permette di settare il modo di Trasmissione Radio tra i 2 disponibili.
1) Premere ENTER
A
, ed entrare nel sottomenu 'TX mode' premendo
nuovamente ENTER
A
.
2) Con i tasti UP
B
e DOWN
C
selezionare:
G3 - DMX (portata maggiore) oppure
G4 - DMX + RDM (portata inferiore).
3) Premere ENTER
A
per confermare oppure SELECT
S
per
mantenere l'impostazione corrente.
L'accesso al sottomenu 'RDM discovery' viene fatto nel caso di sostituzione
della scheda Radio a seguito di un'anomalia della stessa, serve per attivare
la comunicazione tra la scheda Radio e la CPU del GlowUp.
Continued
➔
ADVANCED MENU
A
dvanced
FW
Uploader
D
MX
Monitor
C
harge
Hours
Setup Model
CPU Reset
Test
Radio Setup