Quick Reference Guide
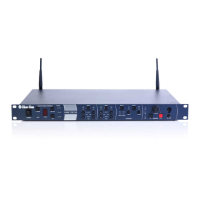
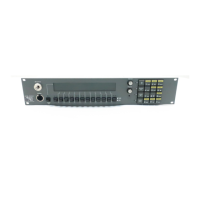
DX410
Power Switch
STATUS AUTO NULLREG
COMMUNICATOR
®
Registration
Audio Channel and
Auto-Null Controls
Local Headset
Controls
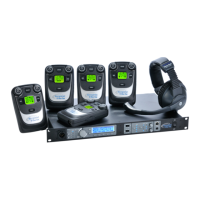
Register Belt Pack or All-In-One Headset
• Make certain the Belt Pack or Headset is turned Off.
• Press REG button on base station.
– STATUS display on the base station shows “o” for registration mode.
• On the Belt Pack and Headset, press and hold ISO while pressing POWER and then release all buttons.
– The power lights blink red, then green and then turn off. One power light remains green.
– The registration number will appear on the base station STATUS display.
AUTO NULL Adjustment (only if using 2-wire interface)
If echo is heard in wireless Belt Packs or All-In-One Headsets on A or B:
• Use pointed object (e.g. pen) to press and hold the A or B AUTO NULL button for 2 seconds.
CAUTION: Before pressing an AUTO NULL button, be certain there are no open microphones on the wired
system. Notify wired system users that a loud noise may occur in their headsets during the auto null adjustment.
The system may be out of operation for approximately 50 seconds during this adjustment.
Local Headset Communication
• SEL button selects communication with A, B or ISO.
– A, B or ISO lights indicate selection.
• TALK button
– Press and release quickly to “latch on” for open communication.
– Press and hold while talking for momentary communication – release when nished.
• VOLUME control adjusts the audio level in local headset ear piece.
• MIC LEVEL control adjusts the audio level going out from local headset microphone.