13
YOURx Multi-Purpose Terminal
__________________________________________________________
Installation Manual
Direct: 763.476.6866 • National: 800.422.2537 • www.SeeCleareld.com • techsupport@clfd.net
Manual 021023 REV A - Jan 2020
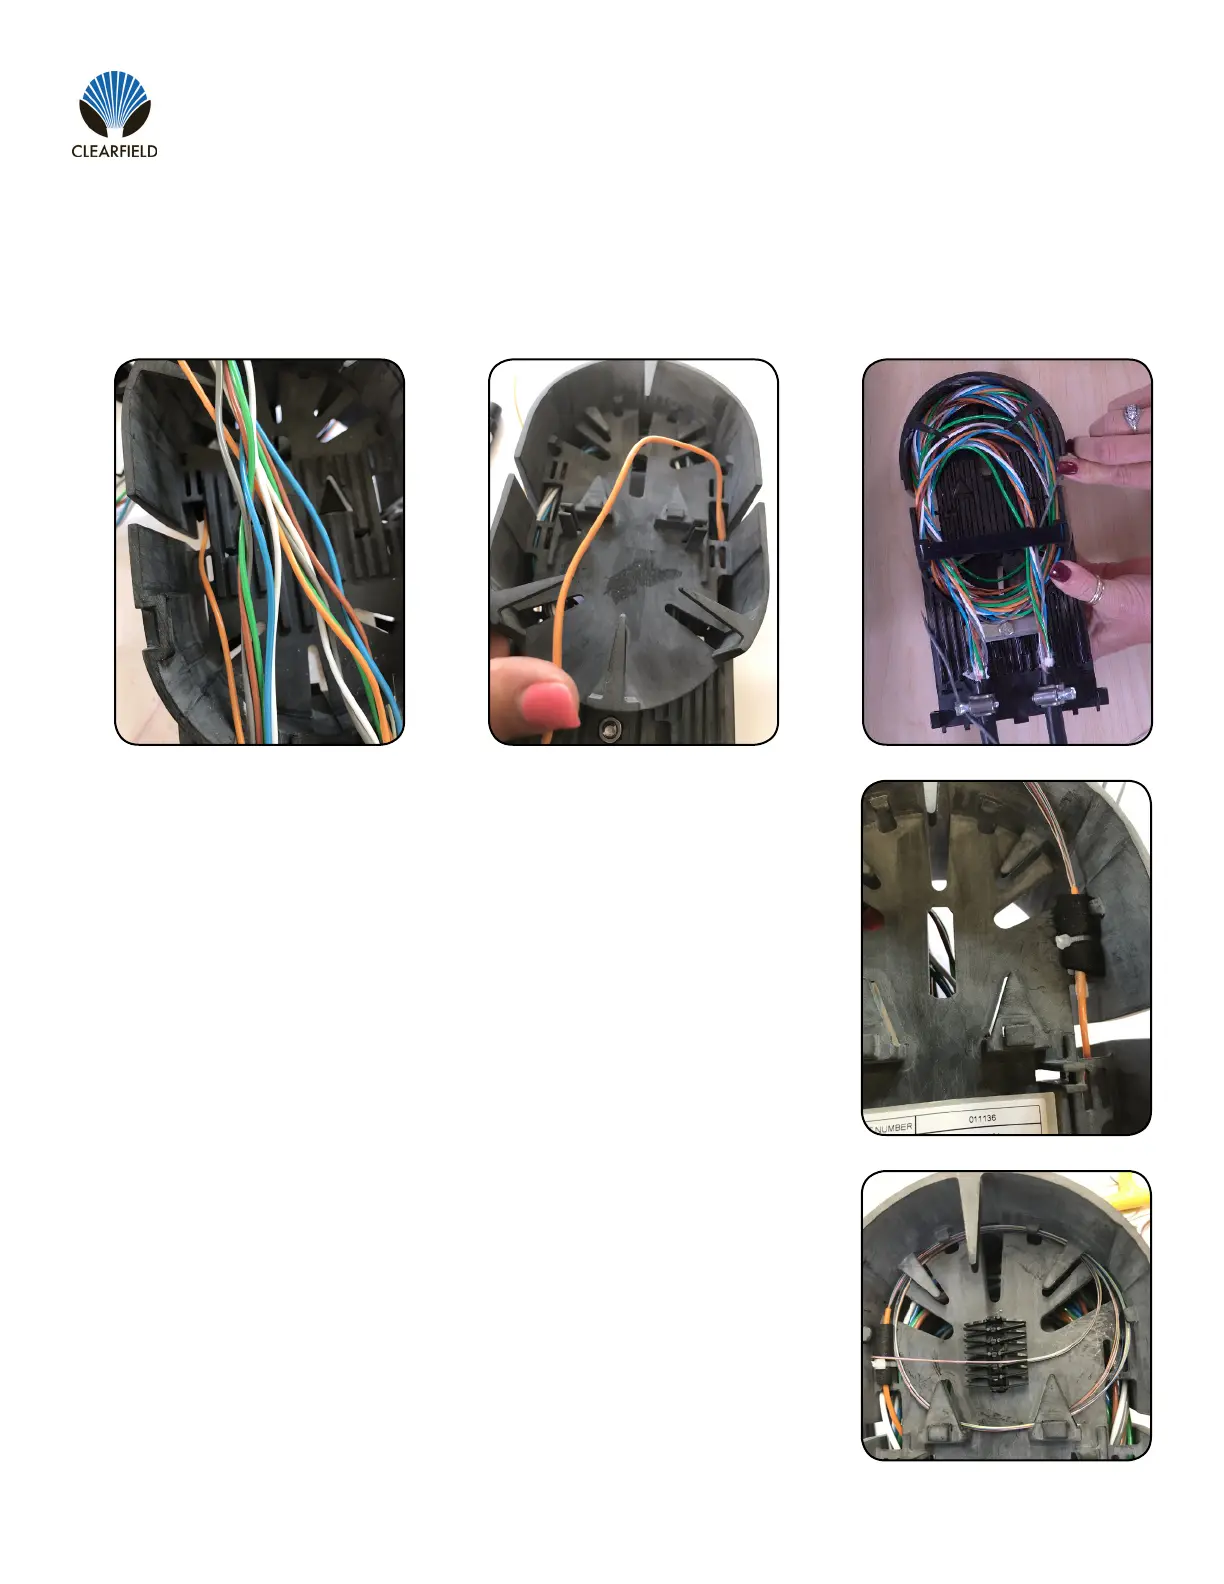
Pass the buffer tubes/ribbons to be splice through the slot on the chosen side of the bulkhead, transitioning the ber
from the back of the terminal to the front. It is recommended to place zip ties/wax string before storing buffer tubes.
Store the remaining buffer tubes in the slack storage area, coiling it neatly into place and securing with a velcro strap
across the top.
8.
9.
Place a zip tie or piece of wax string into the tie-down location in the terminal.
Note that buffer tubes/ribbons can be secured to either side of the splicing area.
From the tie-down location, measure 30 inches and trim your ber. Open up the
buffer tube from after the tie-down location, exposing the 250 micron bers.
Wrap one lap of grommet tape around the buffer tube approximately 1/4 inch
behind the opening, and secure it into place at the tie-down location using the zip
tie or piece of wax string.
10.
11.
12.
Route the bers into the splice tray.
Install the splice chip into the slot at the center of the splice tray.
Route the bers to be spliced (keeping others stored) and bring them into the
splice chip. Trim bers to length at the center of the splice chip.
Note: Cleareld recommends at least 1.5 laps of slack stored in the splice tray.
13.
14.
15.