8 PL12EN-1004 2011-01 en01d441_bedingt.fm, 02.02.2011
Set-Up Guide
1
1.6 Accepting a LiveWire Tool
Live wire communication requires three items; Tool, Controller, and Access point. Each item will require an
IP address. All the IP addresses will be similar in structure such as 192.168.0.100, 192.168.0.110,
192.168.0.120, etc. The access point will also have a SSID name, which will need to be entered in the con-
troller.
Hardware Connections
1. Connect the access point to the controller using the cable provided with the access point. The cable
should be a crossover cable. Plug the cable into the X1 Ethernet port. See Fig. 1-16.
2. Apply power to the controller and access point.
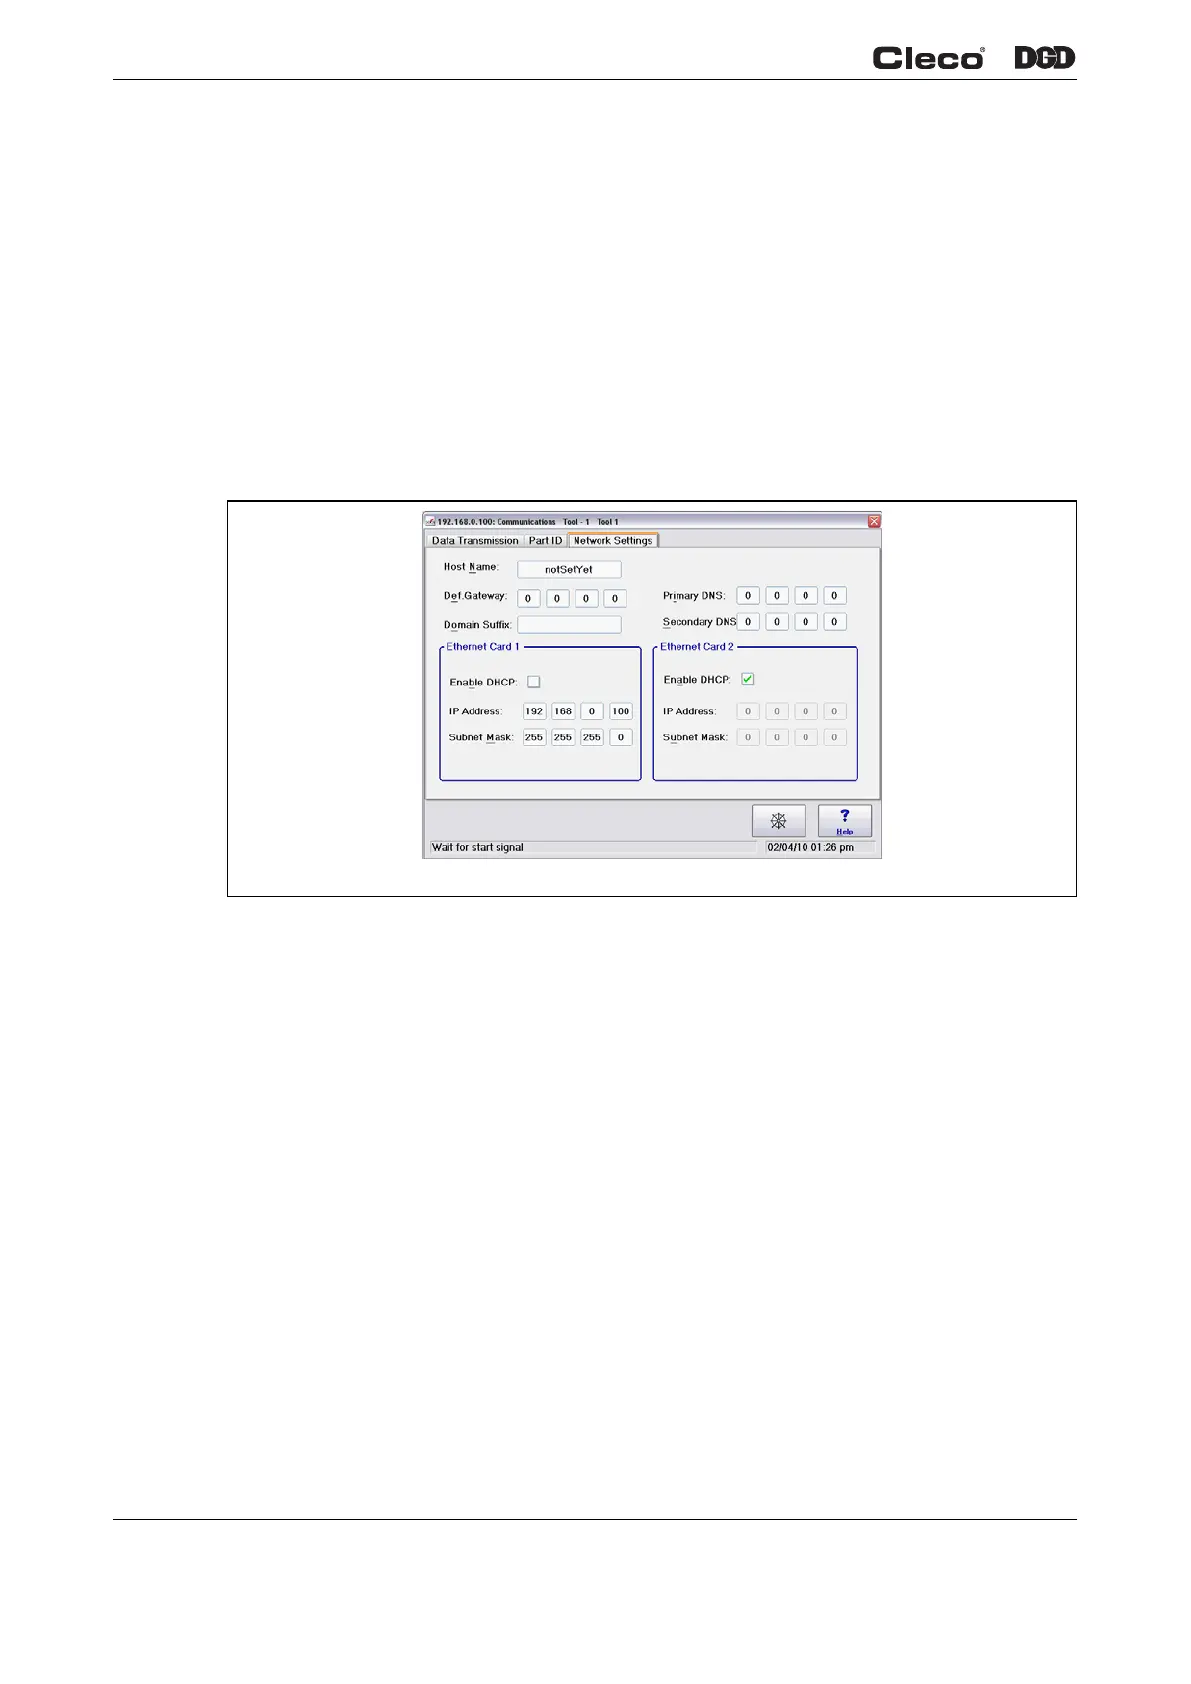
1.6.1 Network Settings
Controller IP address:
Fig. 1-6 Communications – Network Settings
1. Select Navigator > Communications > Network Settings.
2. If not using server assigned addresses disable DHCP for Card One.
3. Enter the IP address and Subnet Mask that will be assigned to the controller.
4. Press <Navigator> key to accept entries.
5. Click <Accept> on the message screen that appears. The screen will return to the Navigator Menu
then begin storing data.
6. A message will appear to restart the controller.
c01213en.png

 Loading...