16
5.3 Daily set-up
Not necessary if an initial installation or reinstallation was performed (see section 5.2).
(1) Air supply.
Start compressor and bring it up to operating temperature
(2) Put on protective equipment.
− Abrasive-resistant clothing.
− Airfed helmet with connection to breathing air supply (air
filter) and adjustment of air volume with an air control valve
attached to belt.
− Leather gloves and safety shoes.
(3) Check moisture separator,
remote control and remove
moisture from blast machine.
− Open petcock on remote control valve RMS-2000A or
RMM-50A.
− Open choke valve.
− Open abrasive metering valve fully.
− Open air valve of compressor.
− Close petcock on remote control valve RMS 2000A or
RMM 50A while depressing deadman handle.
− A few minutes hold deadman handle depressed (pop-
valve closes and air comes out of nozzle).
− Adjust drain of moisture separator, so
of liquid and air is expelled under pressure.
−
Depressurize blast machine (release deadman handle or
open petcock of remote control valve).
5.4 Operation
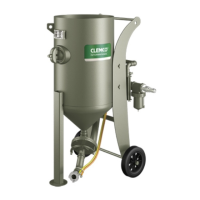
(1) Load abrasive into blast
machine.
− Close abrasive metering valve.
− Open petcock of remote control valve RMS-2000A or
RMM-50A.
− Pour abrasive into concave head of pot (filling port).
(2) Blasting.
− Close petcock of remote control valve.
− Point nozzle to surface being blasted and depress deadman
handle to start blasting.
− Adjust choke valve.
− Open abrasive metering valve for proper air/abrasive blend.
− Blast until pot is nearly emptied of abrasive (
until pot is completely empty because of higher wear).
 Loading...