Disassembly
Removing and Installing the Hard Disk Drive 2 - 7
2.Disassembly
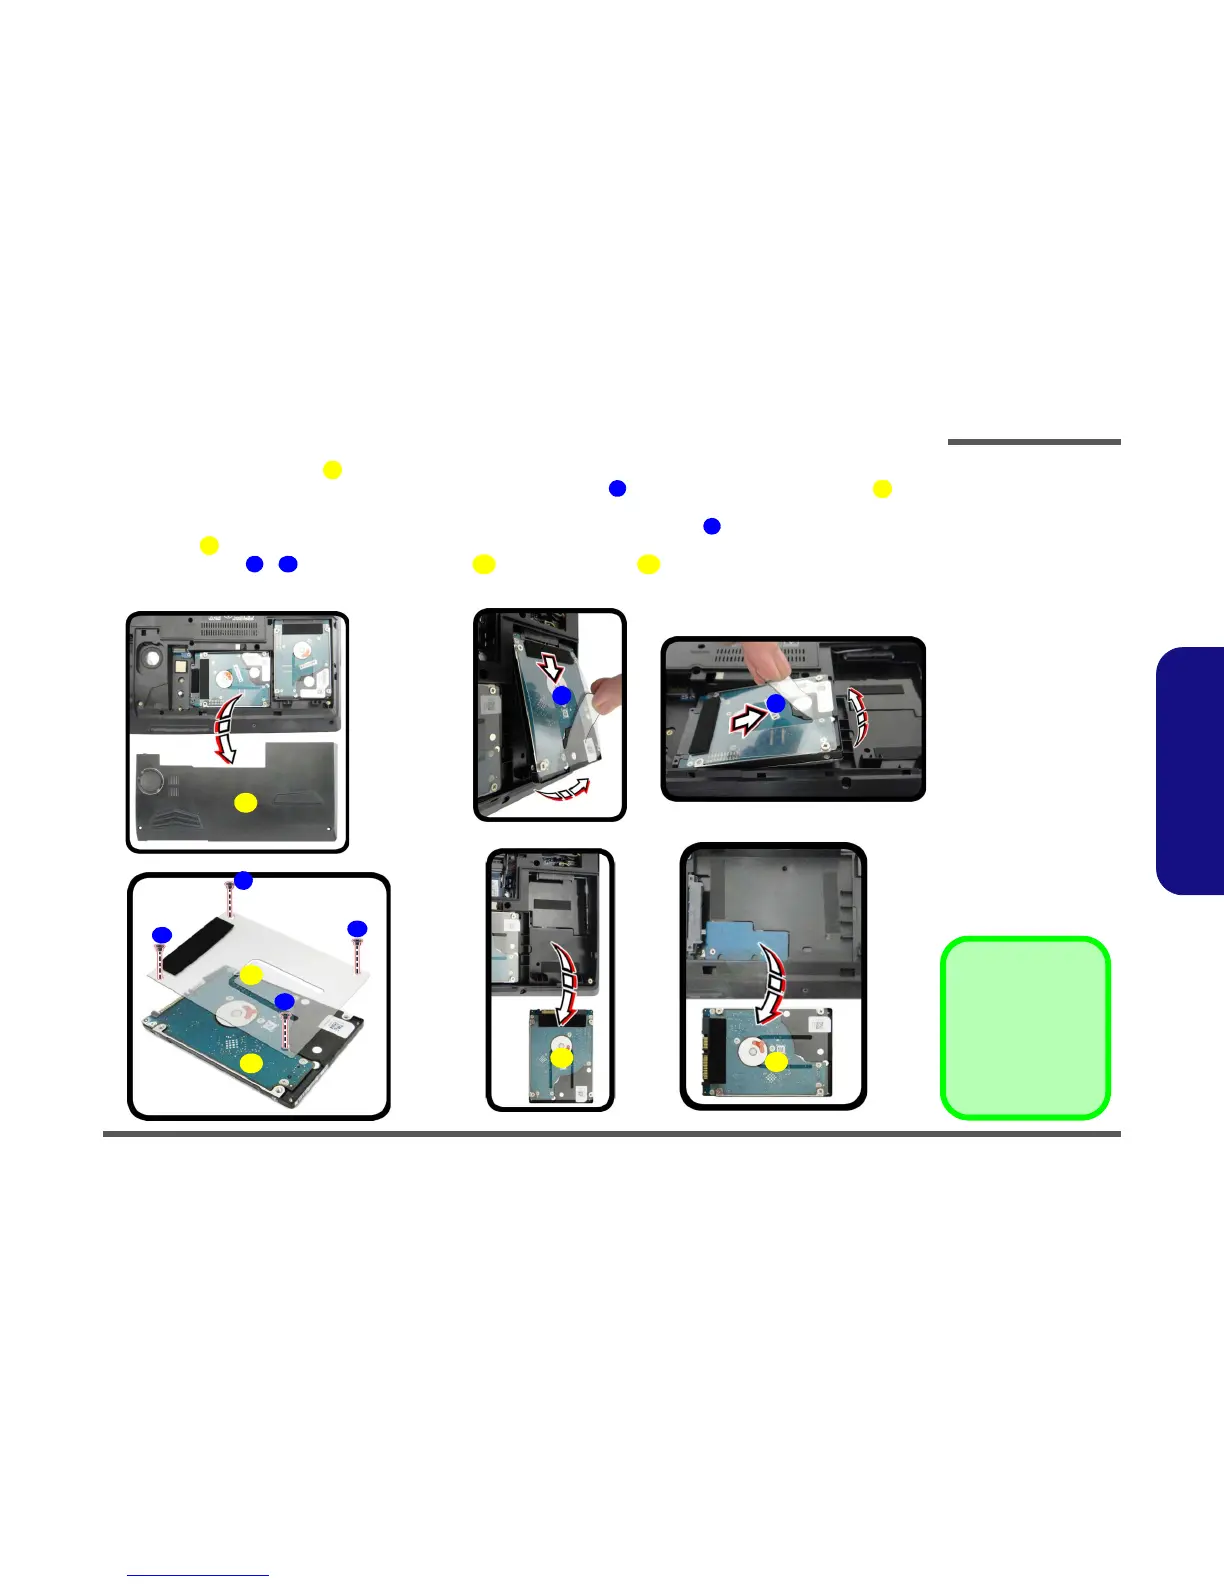
4. Lift the hard disk bay cover off the computer (Figure 3c)
5. Slightly lift and pull the HDD-1 assembly in the direction of the arrow to remove the hard disk assembly (Fig-
ure 3d
).
6. Slightly lift and pull the HDD-2 assembly (if available) in the direction of the arrow
to remove the hard disk
assembly (Figure 3e
).
7. Remove screws - and the adhesive cover
from the hard disk (Figure 3f).
8. Reverse the process to install a new hard disk (do not forget to replace all the screws and covers).
Figure 3
HDD Assembly
Removal (cont’d.)
c. Remove the HDD bay
cover.
d. Lift and pull the HDD-1
assembly in the direction
of the arrow to remove
the hard disk assembly.
e. Lift and pull the HDD-2
assembly in the direction
of the arrow to remove
the hard disk assembly.
f. Remove the screws and
the adhesive cover.