Disassembly
Removing and Installing the Processor 2 - 9
2.Disassembly
Removing and Installing the Processor
Processor Removal Procedure
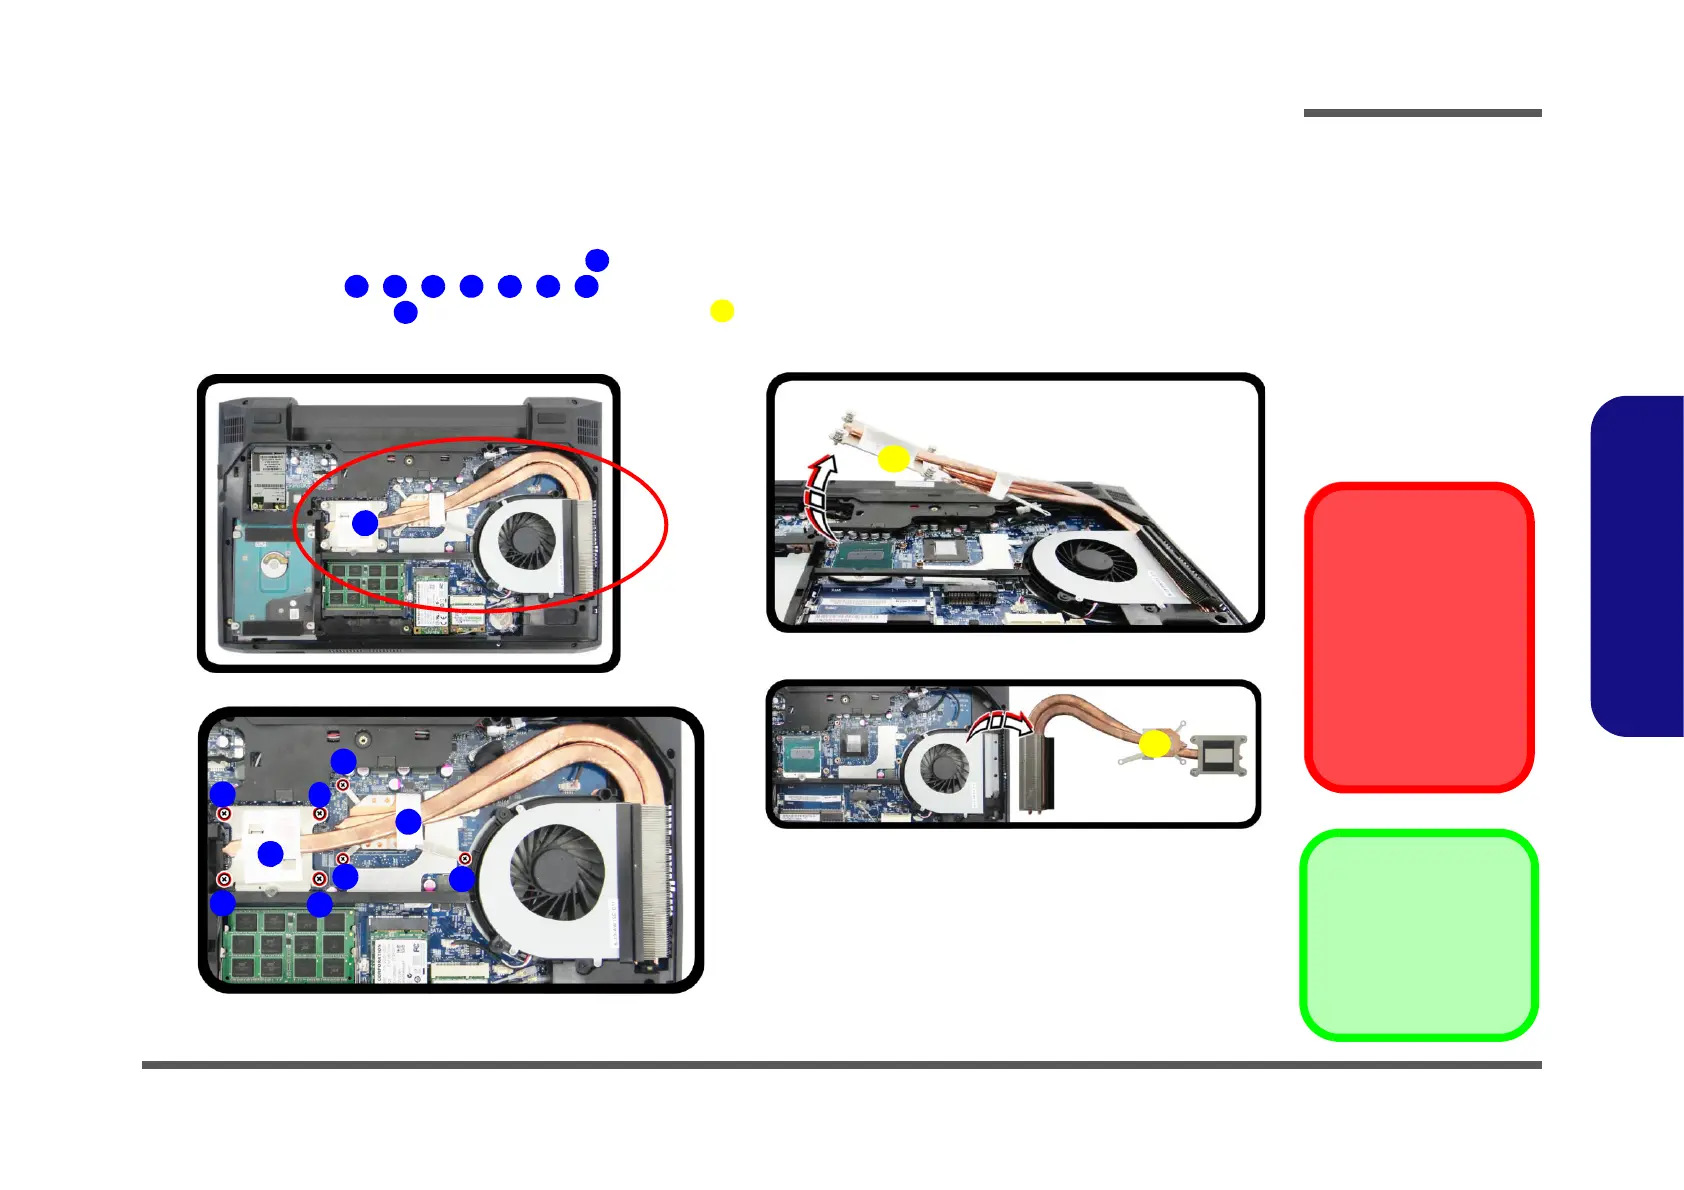
1. Turn off the computer, and turn it over, remove the battery (page 2 - 5), and component bay cover (page 2 - 6).
2. The CPU heat sink will be visible at point on the mainboard.
3. Remove screws , , , , , , , the reverse order indicated on the label
(Figure 5b).
4. Grip the heat sink tab
and carefully lift the heat sink up straight (do angle it as you lift it) about a centimeter
in order to clear the fan unit, and then angle it around 45° to remove it from the computer.
9. CPU Heat Sink
•7 Screws
Caution
The heat sink, and
CPU area in general,
contains parts which
are subject to high
temperatures. Allow
the area time to cool
before removing these
parts.
Figure 5
Processor Removal
a. Locate the heat sink.
b. Remove the screws.
c. Grip the heat sink tab and
carefully lift the heat sink
up and off the computer.
 Loading...