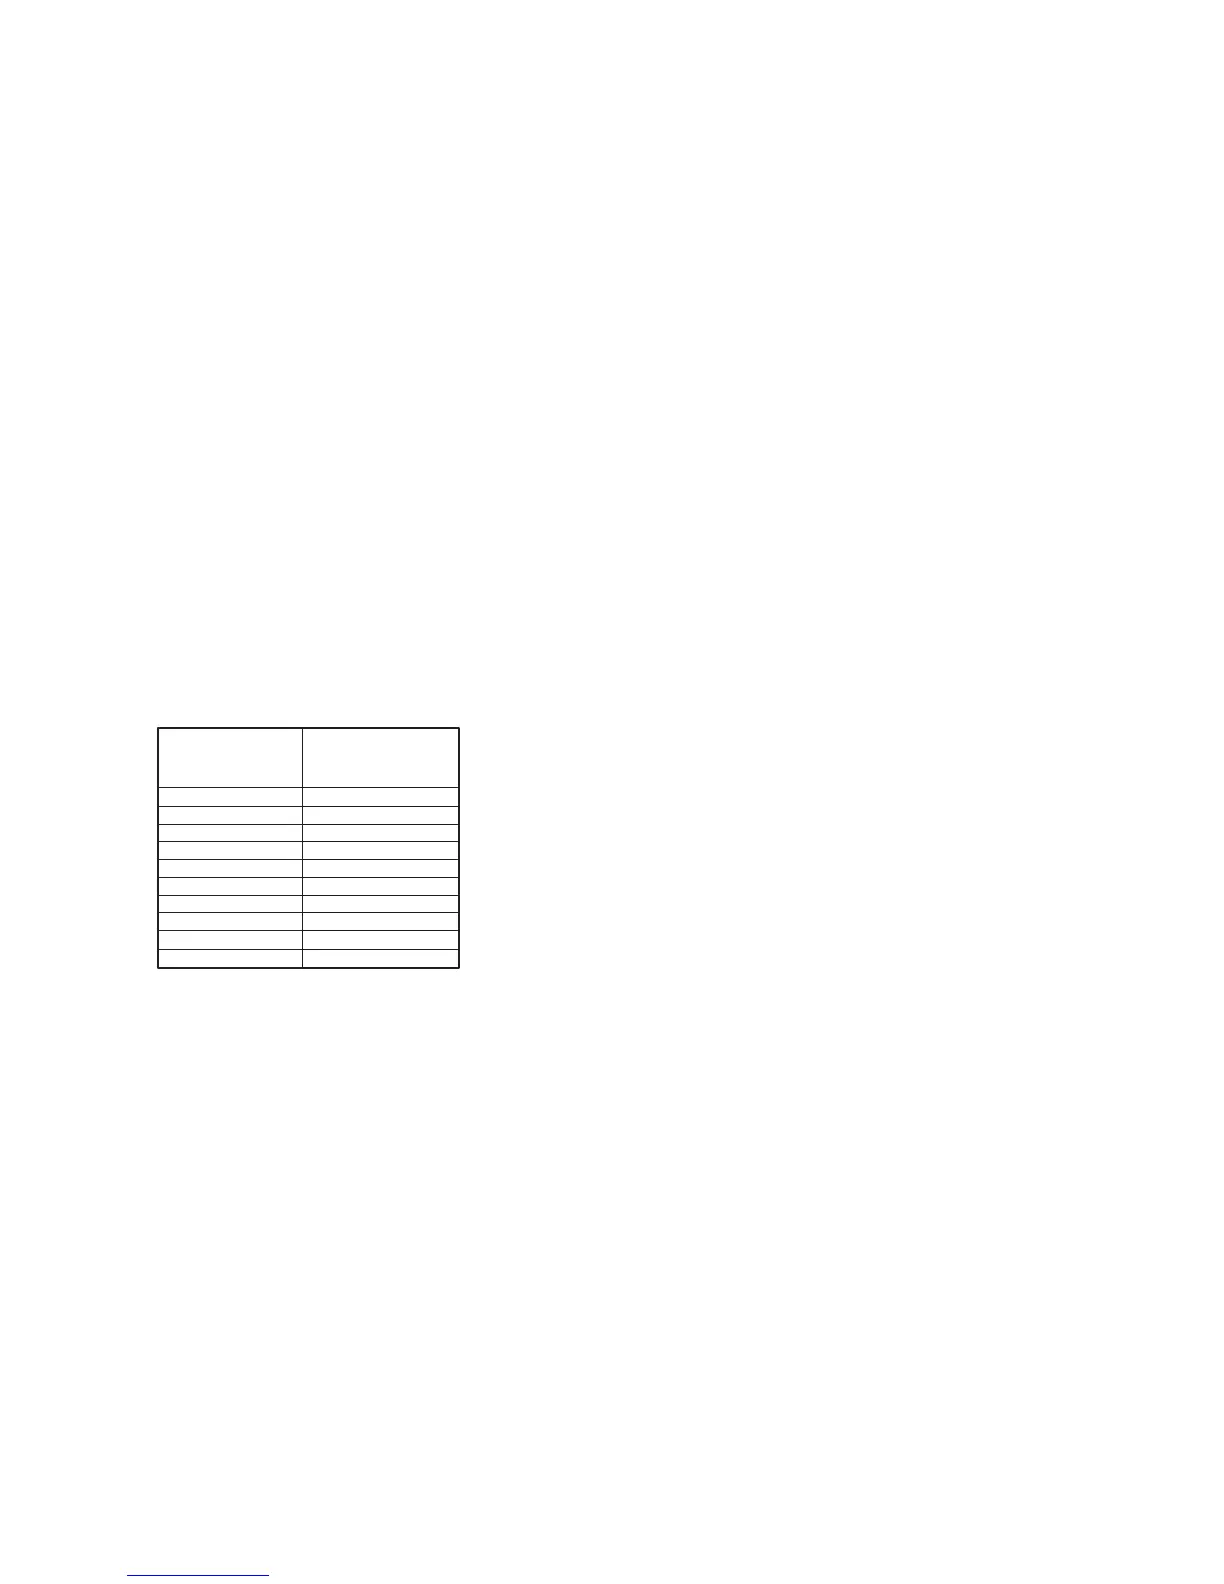
Wire Labeling
• CAUTION! TURN OFF POWER TO THE HEAT PUMP SYSTEM BEFORE YOU ATTEMPT
TO ACCESS THE THERMOSTAT’S WIRING.
• IMPORTANT! BEFORE DISCONNECTING ANY WIRES FROM THE EXISTING
THERMOSTAT, APPLY THE PROVIDED SELF-ADHESIVE LABELS TO THE WIRES.
• Usethe information in Table 1 below and the provided adhesive labels to label the wires.
IGNORE THE COLOR OF THE WIRES since these do not always comply with the
standard.
• Afterlabelingthewires,disconnectthemfromtheexistingthermostatterminals.
• Removeexistingwallplate.Tomakesurewiresdo notfallbackintowallopening,youmay
want to secure them to the wall.
• Iftheholeinwallislargerthannecessaryforwires,sealtheholewithinsulatingmaterialso
that no hot or cold air can enter the back of the thermostat from the wall. This air could cause
a false thermostat reading.
• Awiringdiagramisprovidedonpage40oftheseinstructions.
Table 1
If the terminal letter
on the existing
thermostat is. . .
R, V-VR, or VR-R R
Y, Y1, or M Y1
Y2 Y2
W1, W2, or W-U W2
E E
G or F G
O or R O
B B
L or X L
C, X, or B C (Required)
. . .then mark the
wire with adhesive
label