7
SeeleyInternationalPtyLtd
INSTALLATION
DuctConnections
ExhaustDuctrequirements
ExhaustTransition Assembly
Vibrationabsorbingflexibleconnectionsarerecommendedforallductconnectionstothecooler,foranyductsthatare
attachedtothebuildingstructure.
Allductsattachedtotheflexibleconnectionmustbeindependentlysupported.
Ensuretheexhaustdischargeopeningislocatedandorientedinsuchawayastoavoidexhaustairre-enteringthecooler
inlet.Exhaustairiswarmandheavilyladenwithmoisture.
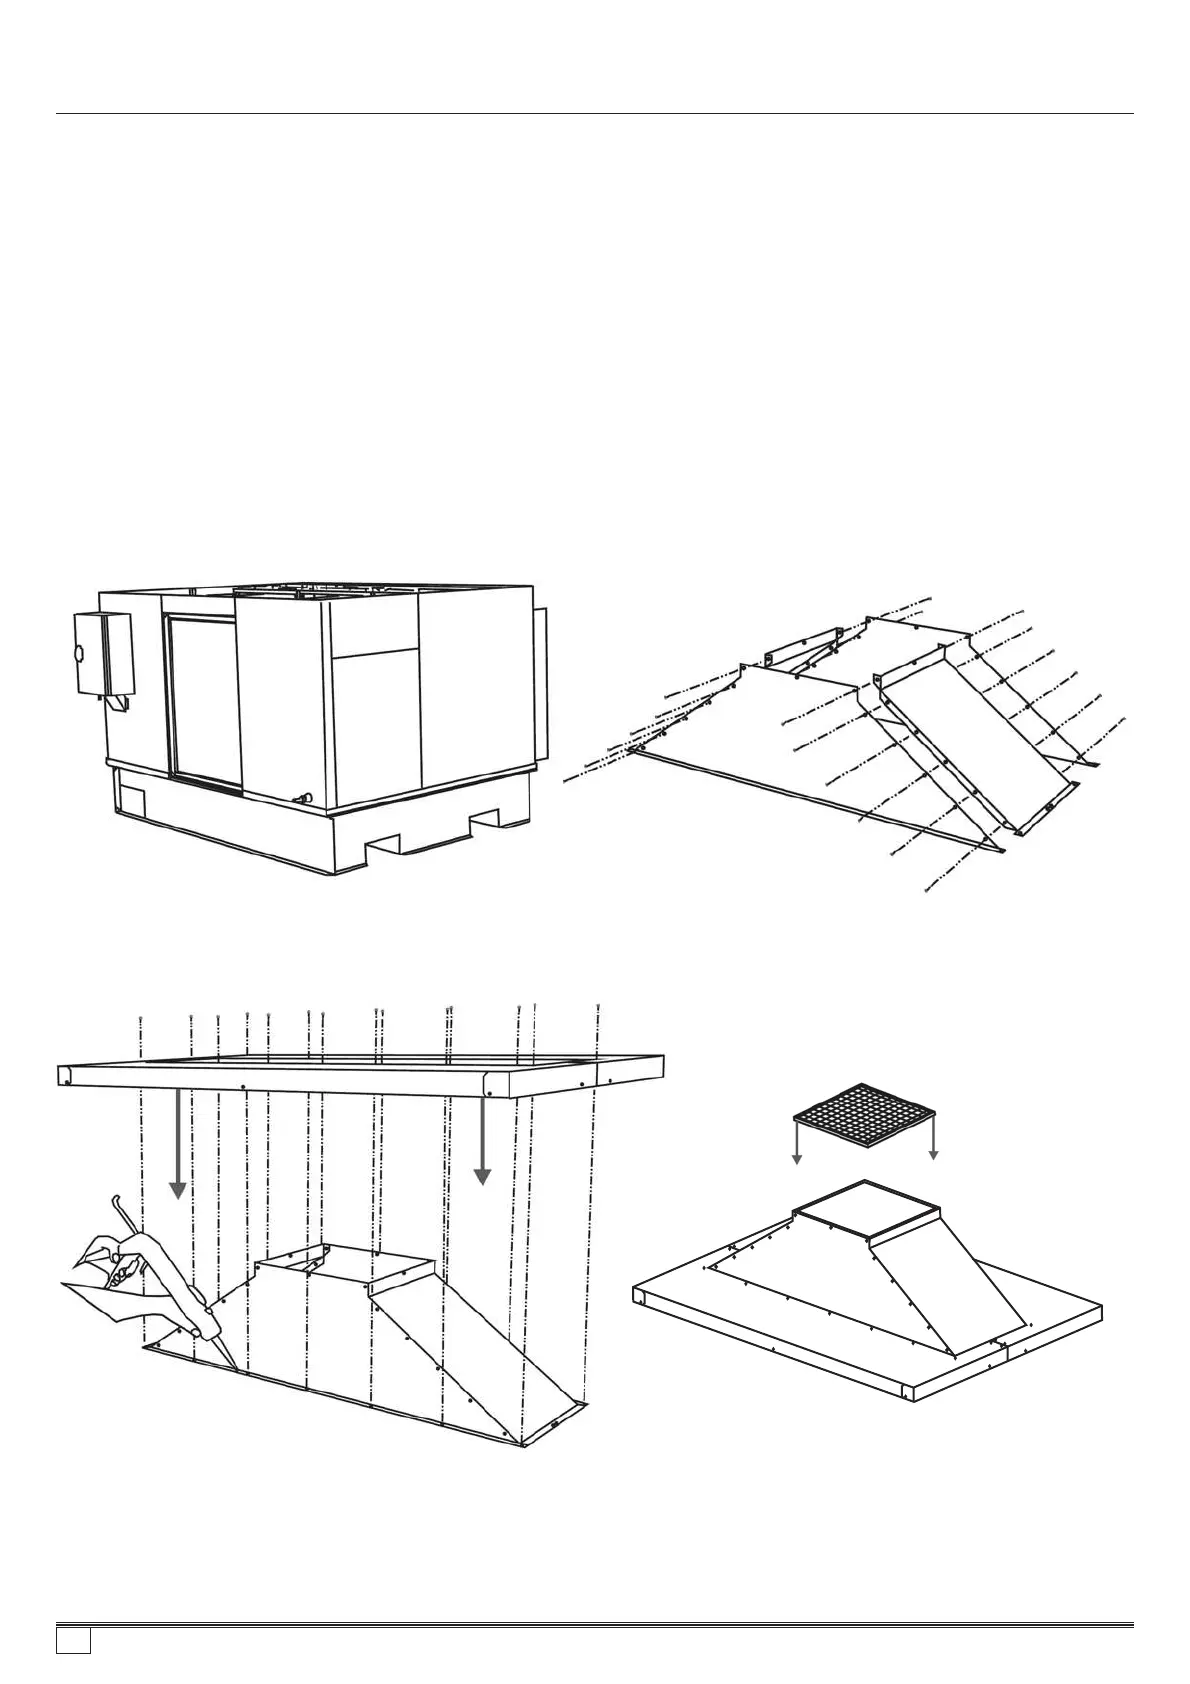
Theexhausttransitionissuppliedinknock-downform;itscomponentsaretobefoundbeneaththelidofthecoolerafter
shipping. Thisrequirestheinstallertoremovethelidofthecooler,removethecomponentryandassembletheExhaust
Transitionandfitittothelidwiththesuppliedfasteners,fittheInlet AirFilterorSafetyGrille,thenrefittheLid/Exhaust
assemblybackontothecooler. Theflangeoftheexhausttransitionmustbefittedbeneaththelidofthecooler.Useahigh
qualitysealantthatisneutralcure,flexibleandhasgoodUVandweatherresistancebetweentheexhausttransition
flangeandthelid.(Fig.3)
1.Removelid,obtainexhausttransition
andinstallationcomponents
2. Assembletheexhausttransition
3. ApplysealanttotheExhaust
Transitionflange.Fitthelid
theexhausttransitionandassemble.
over
4. AssembletheexhaustgrilletotheLidassembly.
859736-A AU1007