1
IP CAMERA / Discovery
Install iDevice Manager
To quickly discover Clinton IP cameras on the network, use the iDevice Manger application. This is a free application
and can be found on the PVM’s product page at www.clintonelectronics.com, via the Downloads tab.
After downloading, follow the setup wizard to complete the installation.
If prompted by Windows Firewall during the installation or first time launching the
application, select the desired network communication options. These settings can be
re-configured via: Control Panel > Update and Security > Windows Security > Firewall &
Network Protection > Allow an app through firewall.
Depending on your computers network settings, the network profile may need to be set to
Private in order to discover devices on the network. If you are unsure, it’s recommended to
check with your IT/Network admin before adjusting settings on your computer.
1
Connect Laptop to Network with PVM
Using ethernet cable, connect Windows PC to PVM via DHCP enabled Server/Router.
2
Installer Laptop
IP PVM w/ CE-PVM2MPF camera
Switch
CAT5E/6 Cable
300’ Max Distance
Router
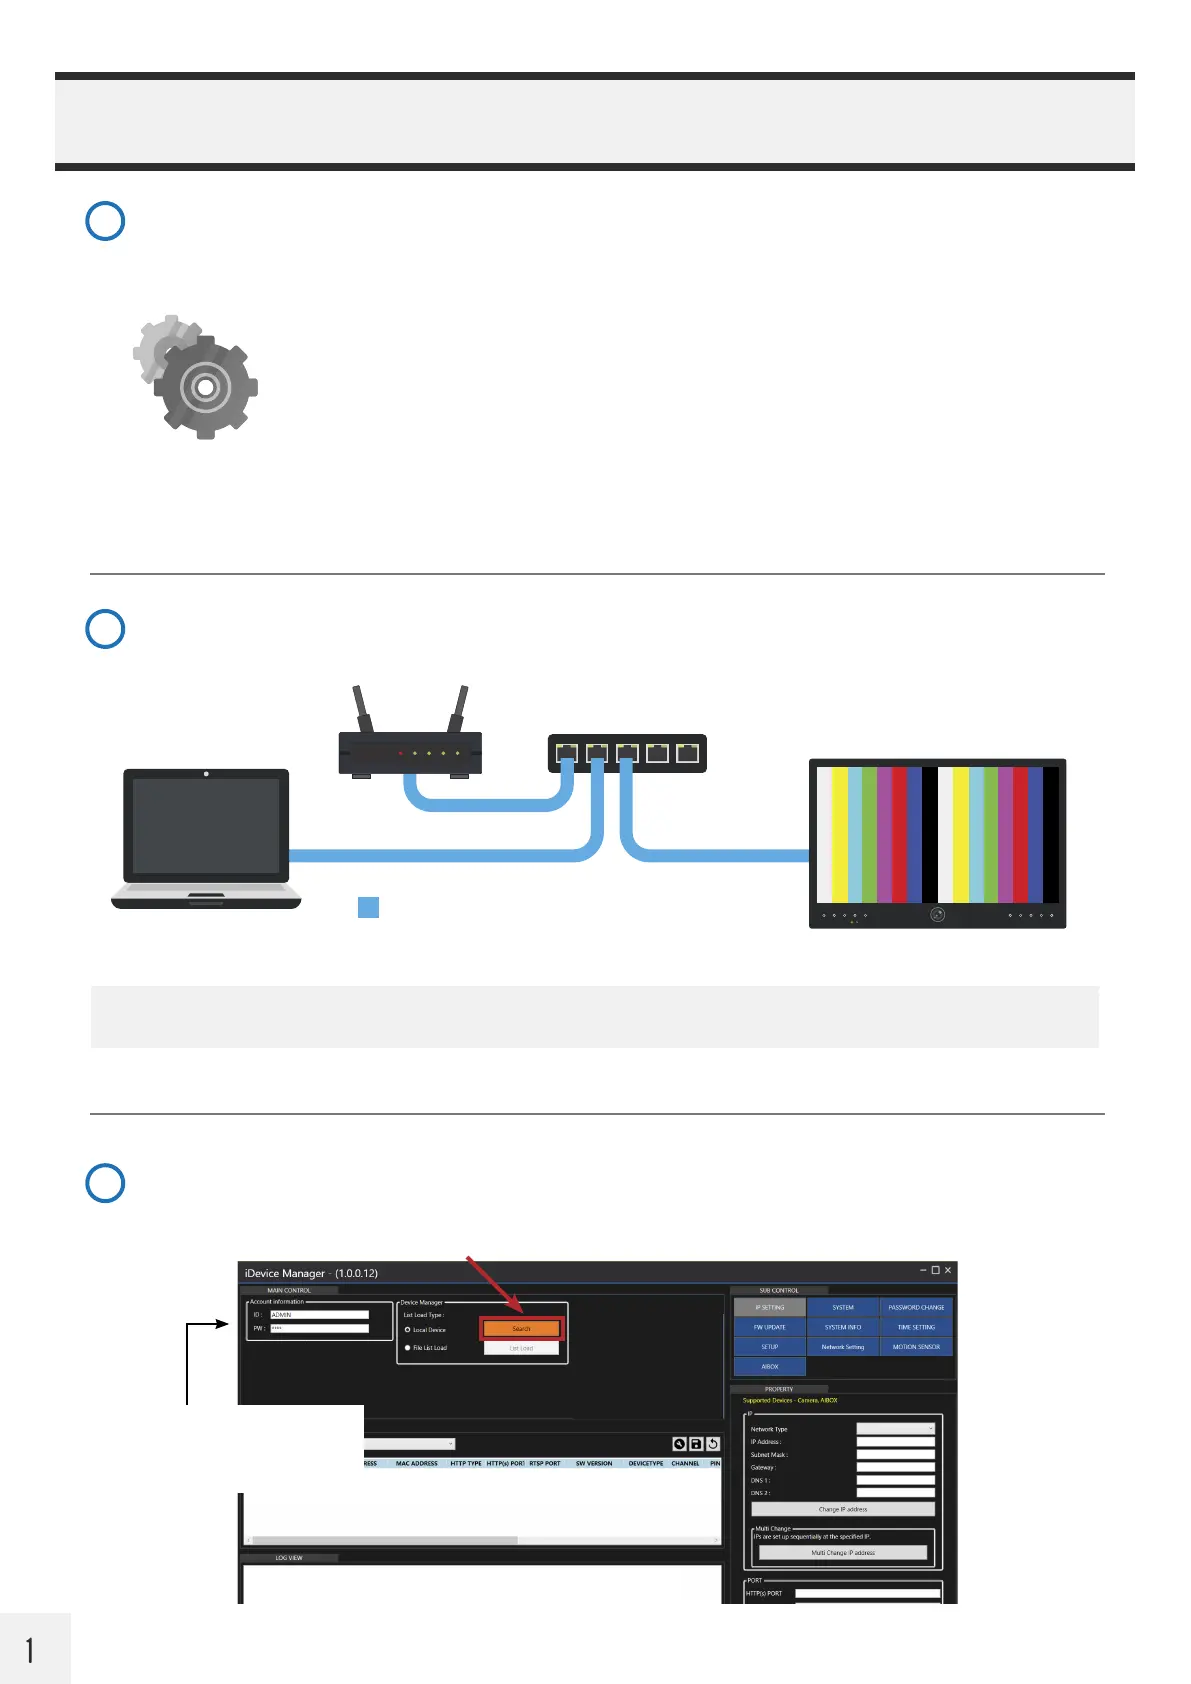
Launch iDevice Manager
If no cameras are shown in the Device List, click the Search button to scan for available Clinton IP cameras and
devices on the local network.
3
Static
10 1 3 104
iDevice
Manager
NOTE: If the network does not support DHCP, the camera’s default IP address is: 192.168.1.90
If you know the ID and password for
the camera, enter the credentials
in the Account Information panel
before hitting Search.
 Loading...