3
IP CAMERA / Discovery
TIP: Bulk IP Address Assignment
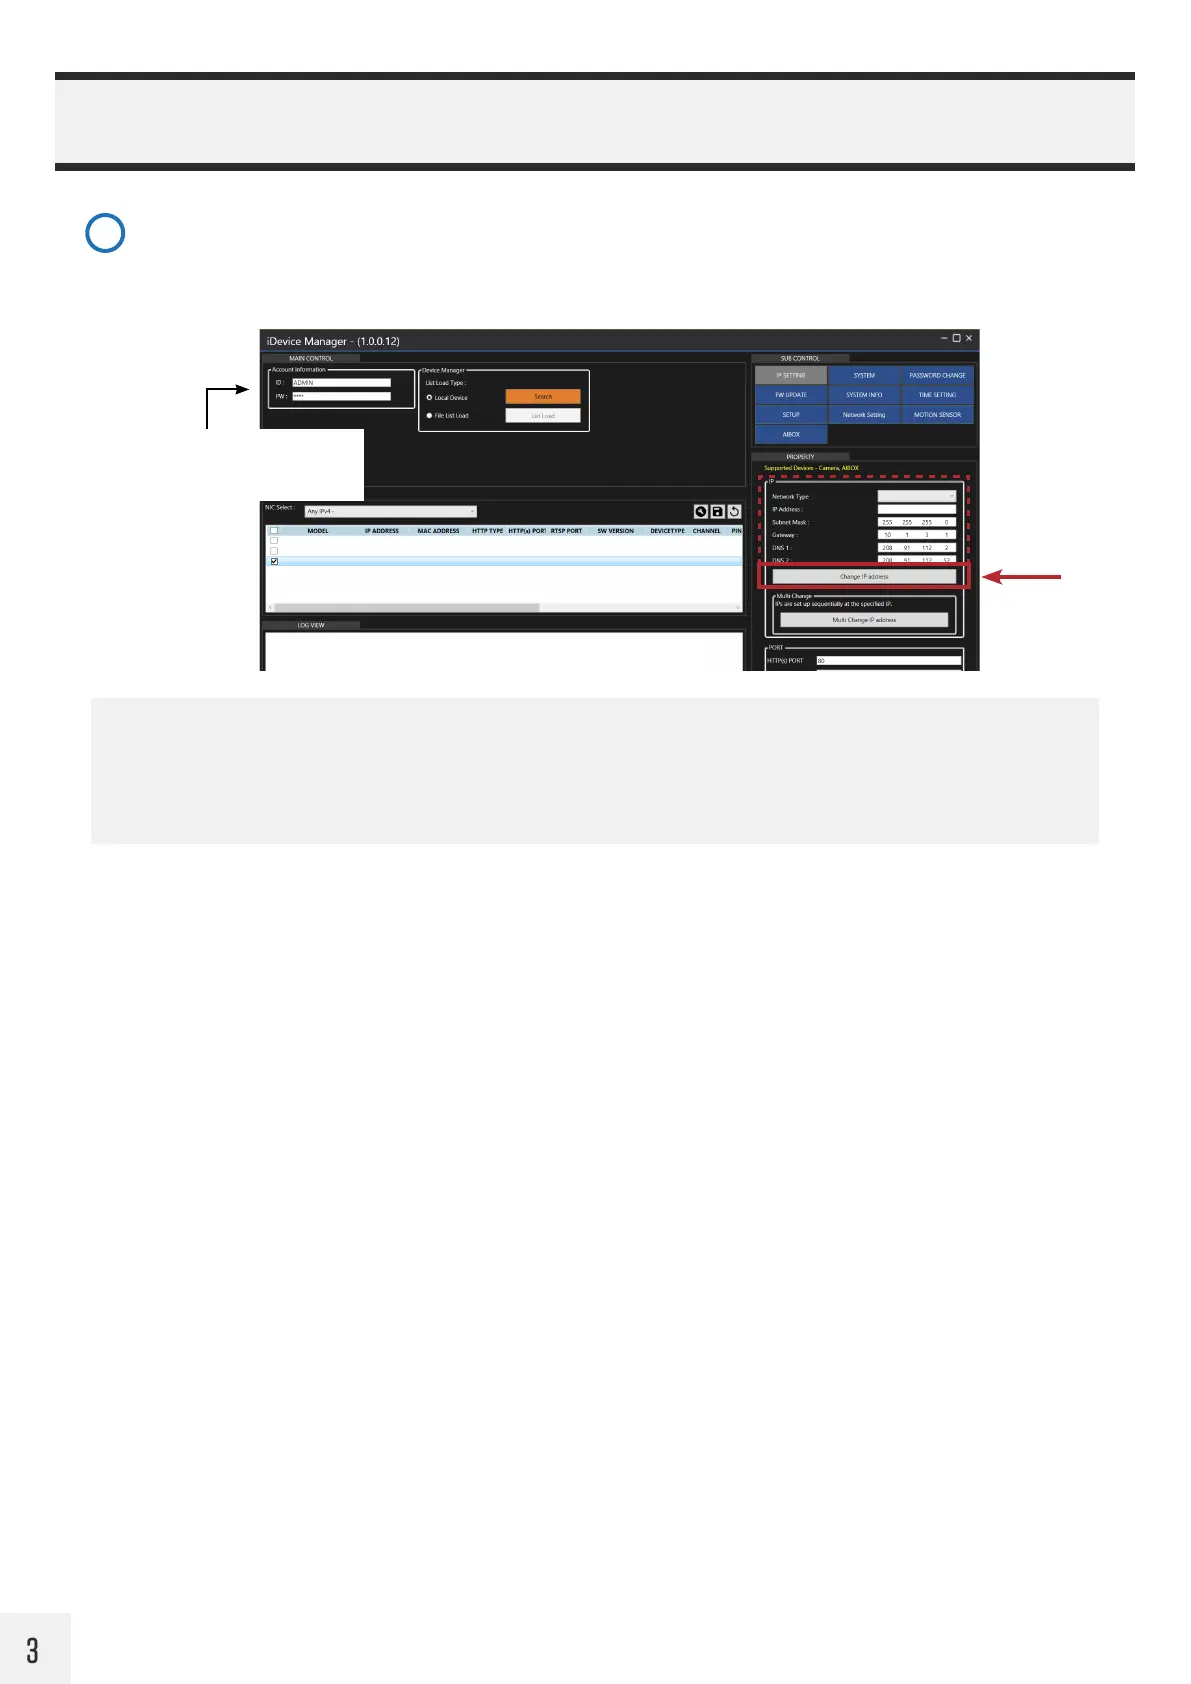
To assign IP addresses to multiple devices simultaneously, click the check box on the desired cameras, then enter
the IP Address information in the property panel. Next click the ‘Multi Change IP address’ button to assign the
new IP addresses to the selected cameras.
Set IP Address Info: (requires set password on camera)
If desired, change the IP address of the camera by editing the info in the IP Setting Property panel. It’s
recommended to change the Network Type from DHCP to Static after the desired IP address has been set. Click
the ‘Change IP Address’ button after making adjustments to save IP address settings.
6
CE-PVM2MPF 10.1.3.103 C4:A1:0E:B0:00:2B HTTP 80 554 90100.1.0249.100 CAMERA - OK
CE-E04HDA 10.1.3.221 C4:A1:0E:B0:00:1A HTTP 80 554 90100.1.0249.100 NVR/DVR
DHCP
10 1 3 104
OK
CE-PVM2MPF 10.1.3.104 C4:A1:0E:B0:00:3C HTTP 80 554 90100.1.0249.100 CAMERA - OK
Static
10 1 3 104
Enter the new ADMIN password in
the Account Information panel, then
hit Search.