Need help? c-m-p.com/support 9
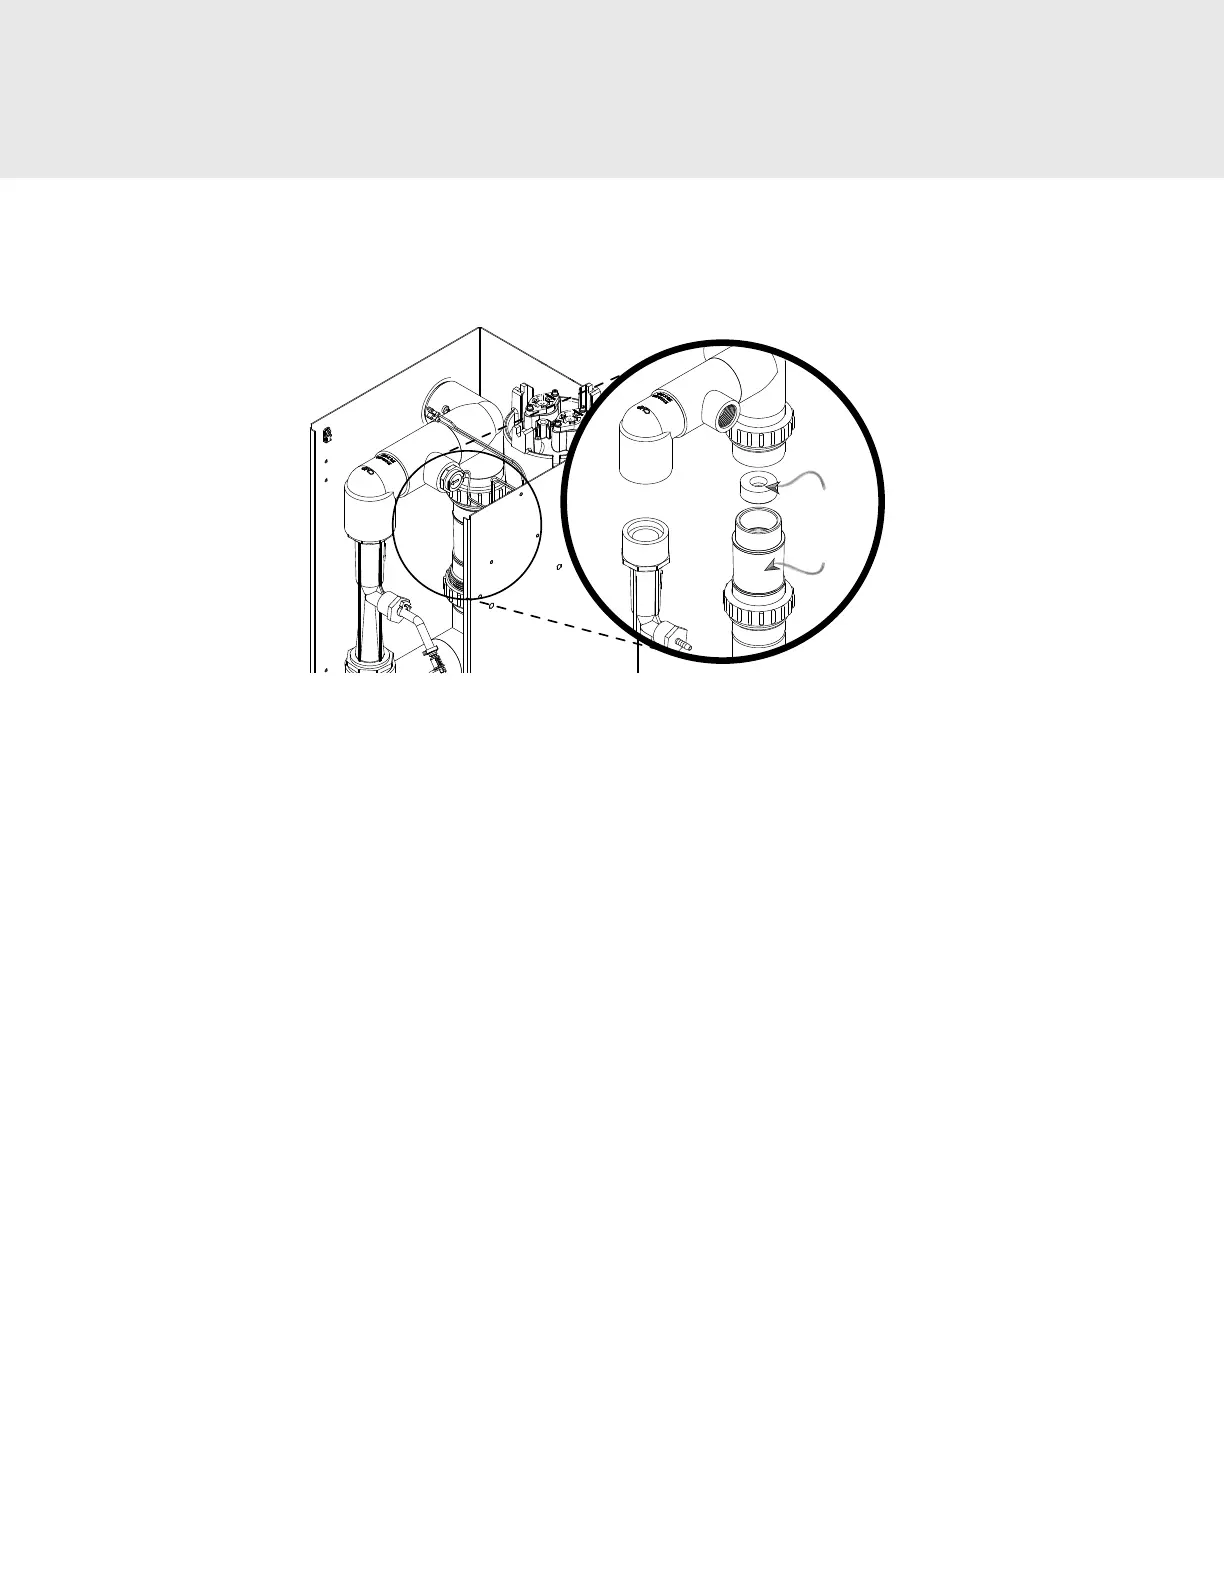
2. Orice Plate Installation (Fig 6b).
a. Loosen the union ttings on both the inlet and outlet of the check valve to remove it from the system.
b. Insert the orice plate on top of the check valve with the cone shape downward.
c. Reinstall and tighten union ttings.
Figure 6b : Orice Plate Installation
2C-5. Leak Test
Turn on pool circulation system and run at highest normal operating pressure. Check for leaks outside and inside of the AOP
system. Correct any leaks outside of the system. If any leaks are found inside the AOP, contact Customer Service at c-m-p.
com/support.
2D. ELECTRICAL
2D-1. Main Power
• Connect to the pool timing clock so that the DEL AOP operates simultaneously with the pool pump.
• An access hole is provided for a 1/2” conduit tting. Install tting (not provided) and run wire to terminal block inside
unit.
• Connect Line 1, Line 2 or Neutral, and Ground to the terminal block as indicated by the label on the electrical panel
located on the inner right side of enclosure (see Figure 7).
• If there is no timing clock or automation system available, the system can be installed on the line voltage along with
the variable speed pump.
Refer to the IMPORTANT SAFETY INSTRUCTIONS at the beginning of this manual for important wiring information.
2D-2. Grounding Lug
Using a solid copper conductor, connect to the grounding lug on the right side of the DEL AOP to an appropriate earth
contact.
2. INSTALLATION