22 • Important:Always read and follow the on-screen operating instructions.
VViiddeeoo BBaallaanncceerr
MMaacchhiinnee SSeellff--ccaalliibbrraattiioonn
aanndd SSeerrvviiccee AAddjjuussttmmeennttss
The wheel balancer provides step by step on-screen
instructions for MACHINE SELF-CALIBRATION and
SPECIAL ADJUSTMENTS. Choose MACHINE SELF-
CALIBRATION when on numerous wheels a one-spin
balance is not achievable. Choose SPECIAL ADJUST-
MENTS when components are added or replaced that
may effect machine dimension measurements.
Machine Self-calibration
Important:
Prior to performing the machine self-cali-
bration, refer to the functional check for calibration on
the back cover.
To access the Machine Self-calibration menu, press
the key, then select SPECIAL FUNCTIONS
option and choose MACHINE SELF-CALIBRA-
TION selection
.
Follow these instructions on-
screen:
1. DO NOT CALIBRATE UNTIL YOU HAVE
CHECKED THE FOLLOWING:
• Check Stub Shaft Tightness
• Check for Proper Mounting of Tire/Wheel and for
Speed-Nut Slippage
• Manually Check Wheel Dimensions: Check That
It Matches The Wheel Dimension Icon Within
Approx. 1/4-inch
• Perform Functional Check Per Procedure
• Check for Proper Phase at Machine Self-Test
Screen
To check for these causes press EXIT or press NEXT
to continue.
2. Mount a 14", 15", or 16" steel wheel with tire. A
balanced tire/wheel works best. Press NEXT option
to continue.
3. At this DIM screen manually set the dimensions
carefully before proceeding. See MANUALLY SETTING
WHEEL DIMENSIONS (DIM) on page 19 for further
instructions. Press NEXT option to continue.
Important:
Dimensions must match the “calibration
wheel”. A dimension cannot be zero.
4. Position offset arm at clip-on weight location on
wheel, hold at location and press NEXT option .
5. Return arm to home position, lower the hood;
then press the key.
6. Raise the hood and add test weight to outside
flange at any location: 4.00 oz. (Be sure there are no
weights at same location on the inside rim flange.)
7. Lower the hood; then press the key.
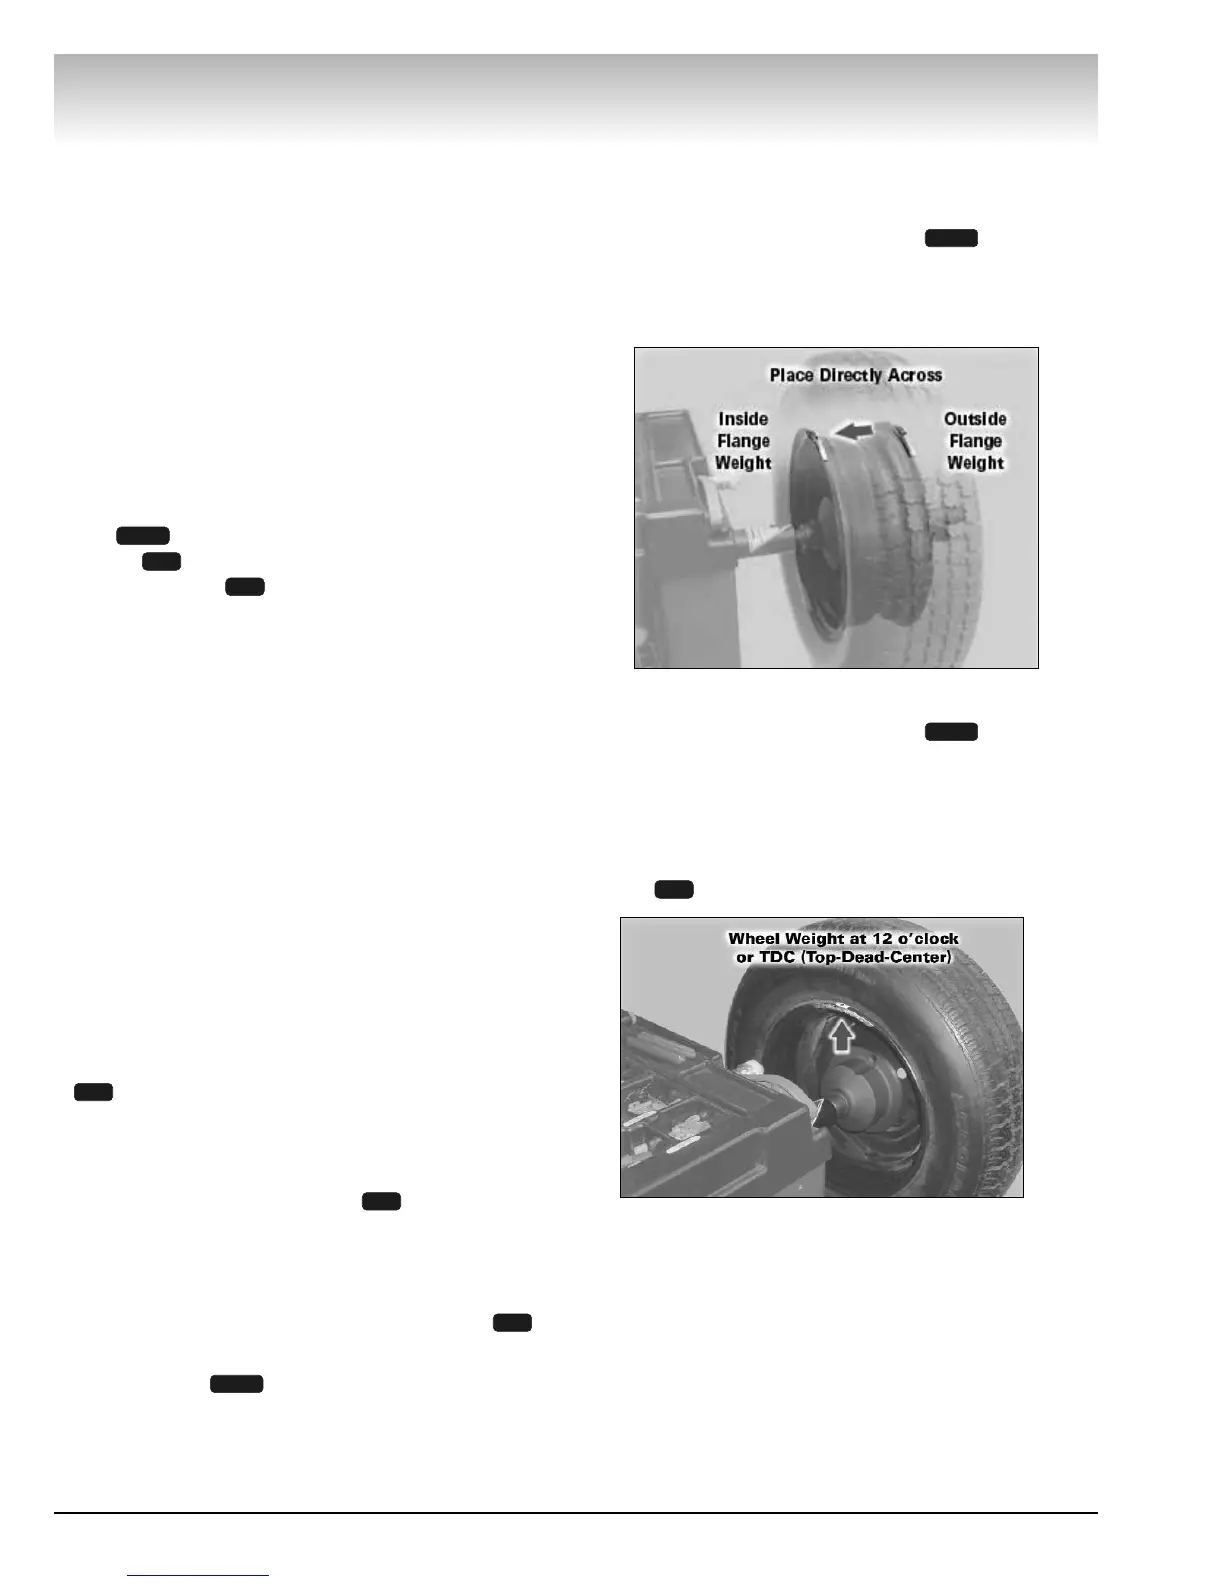
8. Raise the hood and remove the test weight on the
outside flange and place it directly across on the inside
flange.
Figure 36 - Test Weight Inside Flange Position
7. Lower the hood; then press the key.
8. Raise the hood, rotate the wheel until the test
weight is at 12 o’clock or TDC and hold at this position.
Note: Step 8 is important, do not skip it.
9. While holding at the TDC position, press NEXT
option .
Figure 37 - Test Weight Inside Flange Position
10. Calibration Accepted.
1
START
START
START
1
1
1
6
7
MENU
 Loading...