Intro Operation Customer
Assistance
Warranty
Notice
Main Icons
Secondary Icons
Caution Warning
Installation
Customer
Assistance
5
4
Installation and Start-Up
Intro Operation Customer
Assistance
Warranty
Notice
Main Icons
Secondary Icons
Caution Warning
Installation
Customer
Assistance
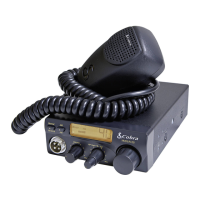
Microphone Connector
Allows for convenient removal of the microphone plug
when storage is required. The microphone MUST be
connected to the unit at all times, when in use, for
proper operation.
External Speaker
The speaker jack on the rear panel is used for an External Speaker.
The external speaker should have an 8-Ohm impedance and be rated
to handle at least 4 watts. When the external speaker is plugged
in, the internal speaker is automatically disconnected.
Microphone Connector
External Speaker Jack
Installation
Power Cable
Installation
Power
These wires supply power to the CB radio. This cable is permanently
attached to the radio and terminates in a connector for a quick installation
of the included 12V vehicle power adapter or to connect to the hardwire
kit provided.
Fuse
The DC power wires and the 12V vehicle adapter includes a fuse (in the
tip) of the following type: include an inline fuse holder that contains the
following fuse type: F2AL 125V - UL rated.
NOTE: Cobra external speakers are rated at 15 watts.
WARNING:
The 19 MINI AM/FM external speaker output is a
Bridge Tied Load (BTL) design. Do not short the speaker wires to
ground as it may damage the speaker amplifier.
Notice
Select a location for the CB radio and microphone bracket that is convenient for operation.
In automobiles, the CB is usually mounted underneath the dash panel, with the microphone bracket
beside it. Avoid areas near airbags and mount to an area that is secure enough to hold it in place.
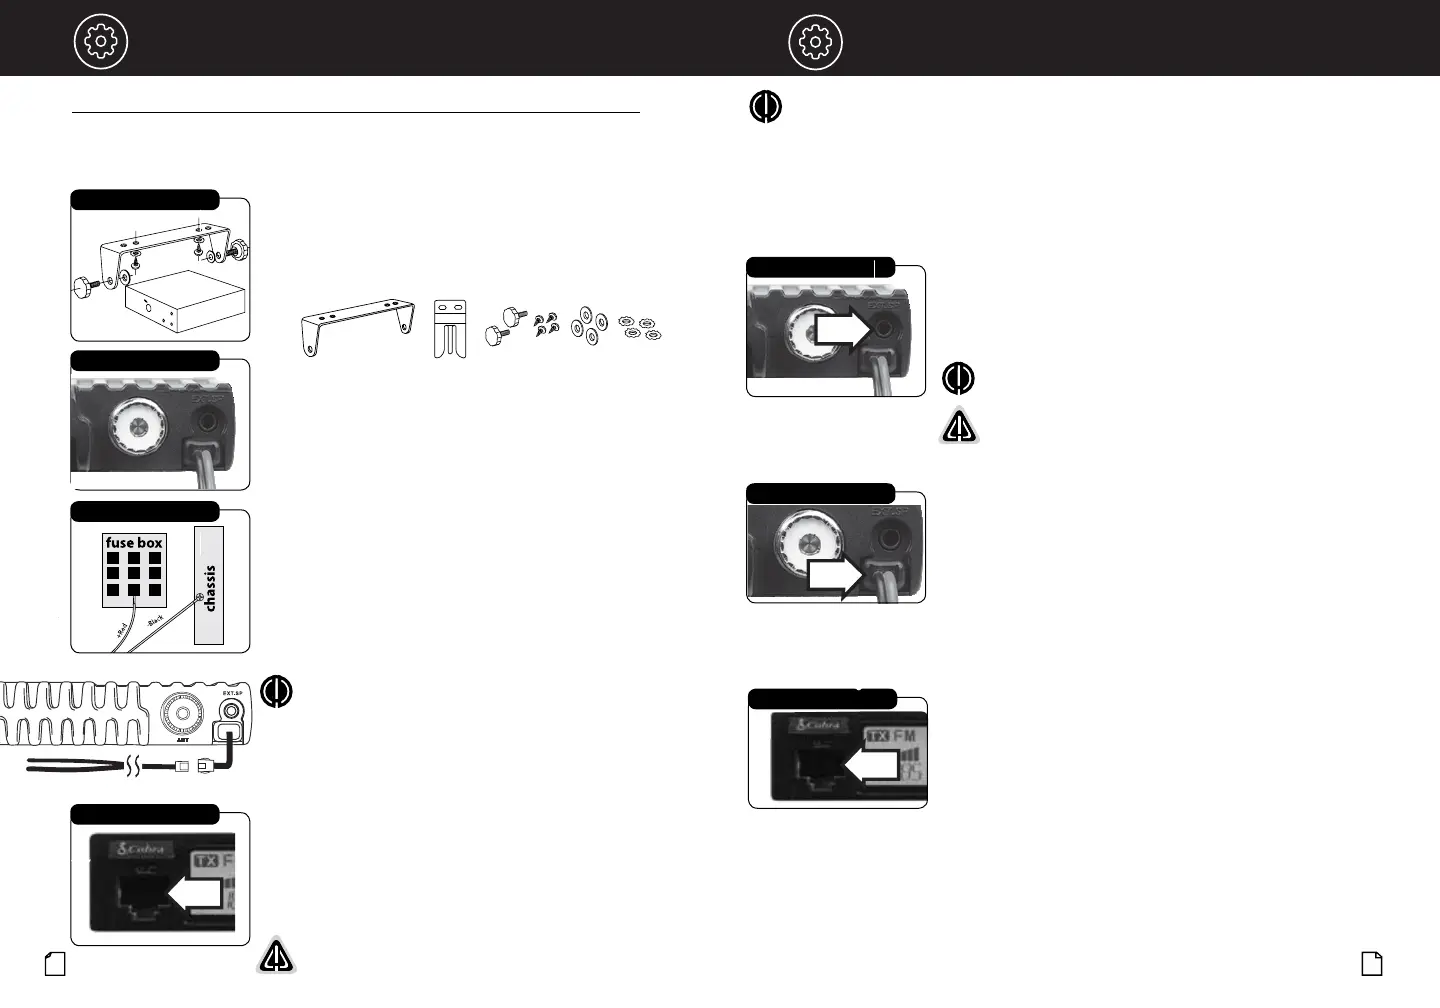
One (1) universal mounting bracket is supplied along with one (1)
microphone bracket, four (4) self-tapping screws and star washers.
The CB is held in the universal mounting bracket by two (2) thumb
screws, permitting adjustment to the most convenient angle.
To Mount and Connect Your Transceiver:
1. Hold the radio with mounting bracket in the exact location desired.
Remove the radio and use the mounting bracket as a template to
mark the location for the mounting screws.
2. Drill necessary holes and secure the mounting bracket in location.
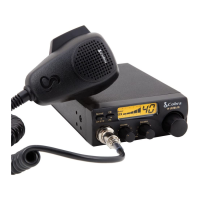
3. Connect the antenna cable plug to the receptacle on the back
the unit.
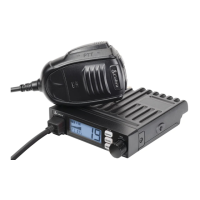
4. Connect the red lead of the DC power cord to an accessory
12 volt fuse.
5. Connect the negative or black lead to the the frame of the vehicle.
NOTE: The battery is bonded to the vehicle frame most commonly
called the "chassis." Sometimes this requires removing paint to
get to a location with good electrical contact. Installation
requirements can vary depending on the vehicle.
6. Connect the CB and hardwire connectors.
7. Mount the microphone bracket in a convenient location that does
not interfere with vehicle operation using the two supplied screws.
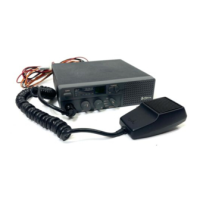
8. Connect the microphone plug to the RJ-45 front panel jack.
9. Power the CB ON to use.
WARNING: Do not operate the CB without an antenna. This may
damage the transmitter.
Secondary Icons
CB Radio Bracket
Fuse Connection
Antenna Connector
Microphone Connector
NOTE: For improved CB radio performance, connect the radio power leads directly to the
vehicle battery. This helps to ensure:
1. Reduces conducted power line noise into radio by taking advantage of the mechanical filtering
properties of the vehicle battery;
2. By using the correct wire gauge between the battery and radio, voltage drops to the radio transmitter
section are minimized and transmitter RF output power is maximized.
Questions or Need Help? Please call Cobra Customer Care at 800-543-1608.
Mounting and Connections
CB Radio Bracket
Microphone Bracket
Mounting Hardware
Installation and Start-Up
Hardwire Kit Total Cord Length 60” (5’)