Power Valve
Disassemble to remove cylinder
Disassembly
1. Remove the bolt that holds the PV clamp to the
frame.
2. Remove the PV clamp by rotating it upward.
3. Remove the load spring and the cap.
4. Disconnect the electrical connector.
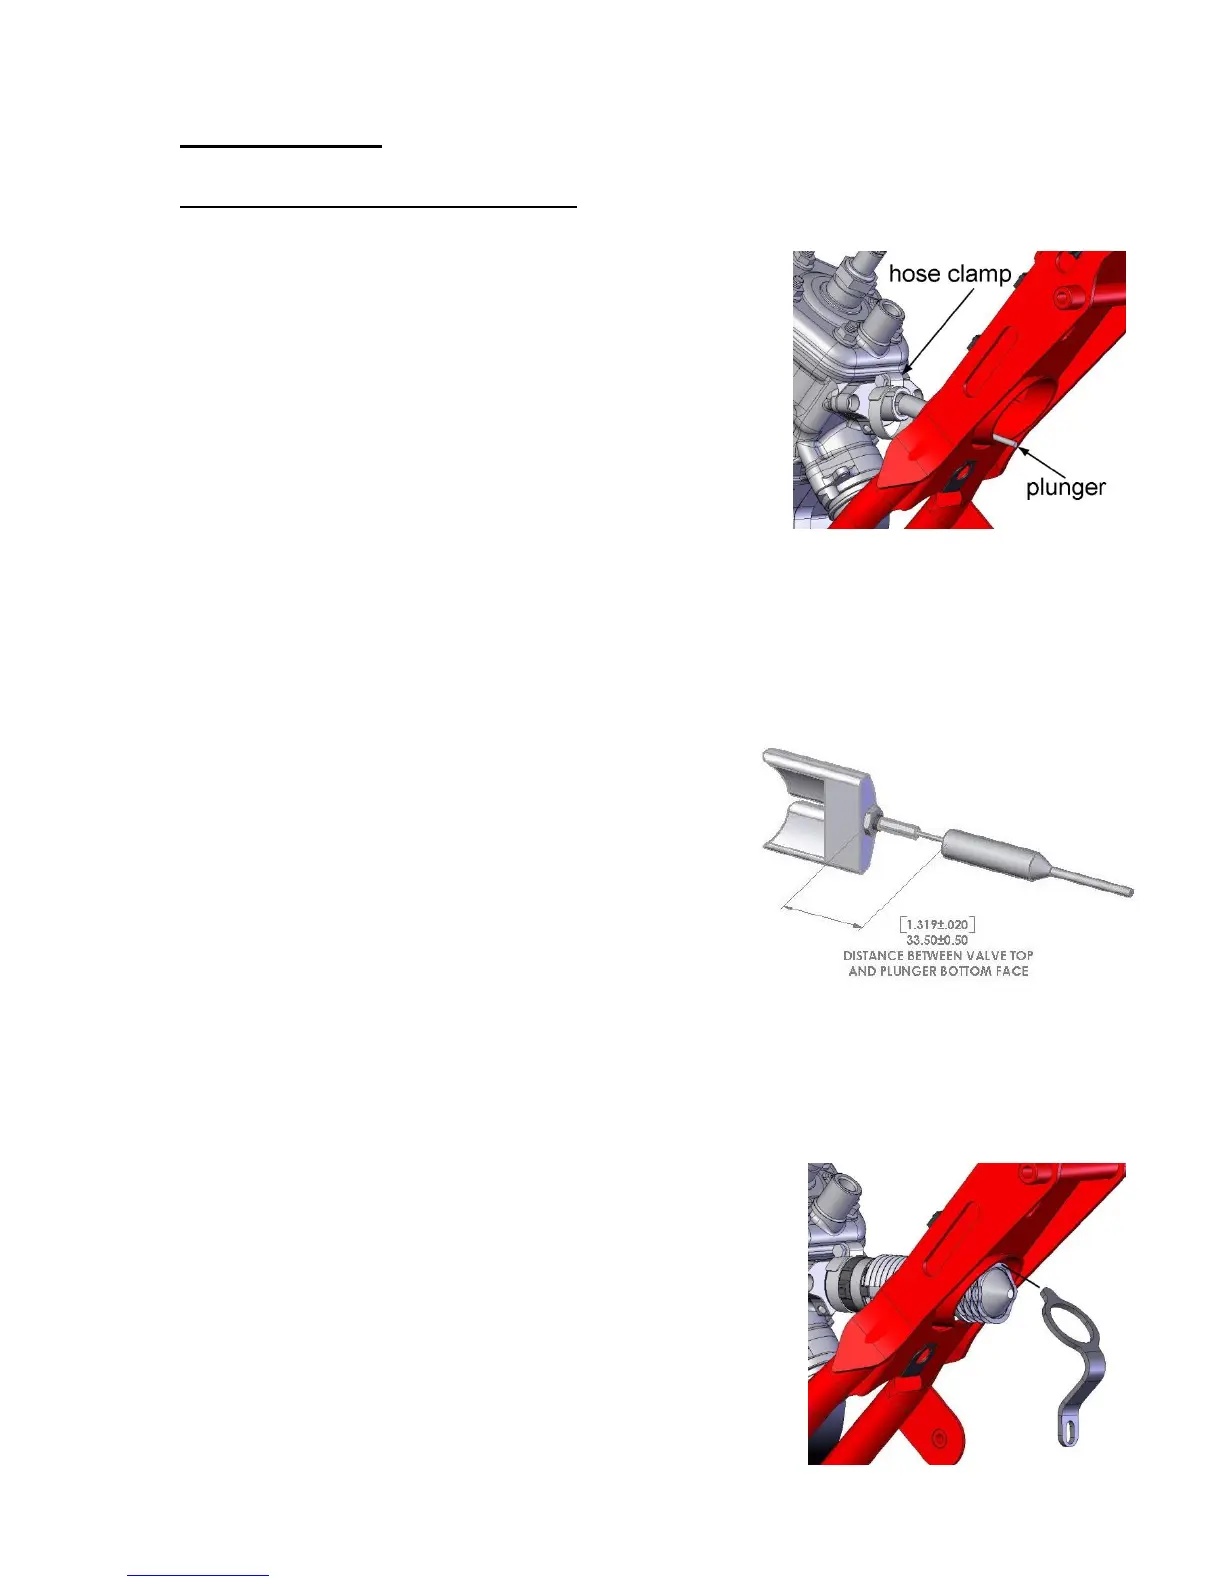
5. Loosen the hose clamp and slide the solenoid
assembly out through the frame leaving the hose
clamp hanging on the spigot of the PV cap
(shown at right).
6. Disconnect the valve cable from the PV plunger,
and remove the plunger.
7. Remove the two socket head cap screws holding the PV cover to the
engine.
8. Remove the return spring and the valve with cable assembly.
Clean inspect and assembly
1. Clean the components with mineral spirits.
2. The inside of the solenoid can also be
cleaned with mineral spirits.
3. Inspect
a. The cable for frayed wires.
b. The valve for cracks.
c. The boot for cracks.
d. The electrical cable for exposed wires
or breaks in the protective covering.
e. That the cable adjustment jam nut is secure (8 Nm, 6 ft-lb).
4. Proper cable to valve assembly should measure as shown at the right.
Installation
1. Apply some premix oil to the outside of the valve and install in the cylinder.
2. Install the valve return spring.
3. Install a new gasket and then the cover with the
two screws
4. Hang the hose clamp onto the valve cover and
also connect the plunger to the cable (as shown in
the picture above).
5. Slide the solenoid through the frame, over the pv
cover spigot and through the hose clamp (apply
pressure to the assembly to insure it is tight to the
engine).