Operation Firmware Updates
Ensure the camera is connected to a constant power source during the update process. Failure to
do so could result in your unit becoming non-functional. Your vehicles cigarette lighter socket or a
household outlet work best.
Using the Drive Smarter App
• View the current firmware version under the About menu item on the dash cam:
- Stop loop recording
- Press the MENU button, cursor down to the ABOUT item
- Note the firmware version shown on the screen
• Power up your camera by connecting to constant power source such as your vehicles CLA
adapter or a household outlet.
• When you Connect your camera, the app will check if a newer firmware update is available on the
server.
• Press ‘Download’ on the notification to download the latest Firmware.
• Follow the instructions on the Drive Smarter Mobile Application. If successful, the camera’s LED’s
will begin blinking while the firmware is being installed.
• To check that the Firmware update was successful, you can check the ‘About’ screen in your
camera’s settings menu.
Using a Mac or PC
For optimal performance, check www.drivesmarter.com periodically for software updates.
• View the current firmware version under the About menu item on the dash cam:
- Stop loop recording
- Press the MENU button, cursor down to the ABOUT item
- Note the firmware version shown on the screen
• Connect the dash cam to your computer using the included USB to Micro-USB cable.
• Power on the dash cam and select Connect to Computer using the record/select button.
• The camera will be listed in Windows Explorer/Finder.
•
Download the update file from www.drivesmarter.com and save it to your computer. It will end with
“.bin” as the file extension. Note: You do not need to double click or open this file on the computer.
• Copy/paste or drag the update file you downloaded .bin file into the root directory of the Camera’s
MicroSD Card.
• Wait for the file to transfer and then safely disconnect the dash cam from the computer. The dash
cam will turn off.
• Plug the Micro USB cord into a reliable power source such as your home’s outlet or your vehicle’s
CLA adapter. The dash cam will turn on and automatically boot into the Firmware Update Menu.
• Follow the directions on the camera display to update firmware if the unit has one. Units without
displays will update automatically.
• You can check if your camera is up to date by checking the firmware in your camera’s ‘About’
setting submenu in the camera or via the app.
19 20
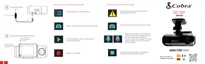
Volume:
Allows you to raise and lower the volume of notifications and button beeps from your camera.
WDR:
Enabling Wide Dynamic Range allows your camera to accurately capture footage in very bright conditions.
Enabling this feature is recommended for most recording conditions.
GPS Format:
Choose between Decimals and Degrees as the GPS format that is stamped in the watermark.
Frequency:
Choose between 50Hz and 60Hz as your operating frequency if you are experiencing flickering in your video.
Format Reminder:
Choose the recurrence at which you are reminded to format the MicroSD card. Formatting the MicroSD
card frequently ensures your videos are protected and the MicroSD card is saving content properly.
Delete Videos Reminder:
Set this to be periodically reminded to free up locked video content so that the camera does not run out of
“Emergency Recordings” and “Favorites” space.
Restore Defaults:
Resets the device to factory settings. Note: restoring defaults will NOT erase data on your memory card.
Format MicroSD Card:
Allows you to format the inserted MicroSD Card. NOTE: This action will permanently delete all data on the
card. It is recommended to format any new card and periodically format existing cards.
About
You can use this setting to view your cameras electronic serial number including FCC ID number and
Industry Canada number. You can also view the manufacture part number and firmware version.
 Loading...