EasyManua.ls Logo

Cochlear True Wireless Mini Microphone 2 - User Manual

Cochlear True Wireless Mini Microphone 2
3 pages
Print Icon
To Next Page IconTo Next Page
Loading...
Cochlear
True Wireless
Mini Microphones
Quick Guide for Cochlear implant users
Features of your Mini Microphone 2 / Mini Microphone 2+
Hear better over a distance and in noisy
listening situations, such as:
How:
in meetings
when travelling by car, bus or train
dining at a restaurant
participating in a class at the gym
Give the Mini Microphone to the person you want to listen to and ask
them to position it close to their mouth by placing it vertically on
their clothing using the clip on the back. Then activate streaming on
your sound processor (see instructions below).
Place your Mini Microphone 2+ on a table to listen to multiple
speakers in a group / conference setting.
Getting Started
Product overview
Charging the battery
When using for the first time, allow your Mini Microphone to
charge for at least 3 hours, even if the light indicates a full charge.
To charge your Mini Microphone:
1. Plug the Micro-USB charging cable into the Mini Microphone.
2. Plug the other end into a power outlet using the supplied
adaptor.
While charging, the LED indicator lights red.
When fully charged (and still connected to the charger), the LED
will turn solid red with green flashes every 2 seconds.
If battery level is low the Status indicator LED will blink yellow once
every second.
On average, the Mini Microphone will operate for up to 10 hours
between charges. Battery life may vary depending on use.
Up to
25 metres
Mini Microphone Sound Processor
Place vertically 10-30 cm
between mouth and microphone
Mini microphone 2+ used
as a table mic for group
discussions
ON/OFF button
Mute button
Clip
Volume down control
Volume up control
Micro-USB connector for
charging (2)
Micro-USB connector
for charging (2+)
Line input (2+)
Status indicator (LED)
FM connector (2+)
Question and Answer IconNeed help?

Do you have a question about the Cochlear True Wireless Mini Microphone 2 and is the answer not in the manual?

Overview

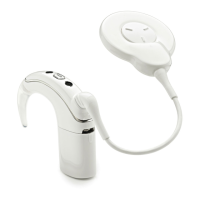
The Cochlear True Wireless Mini Microphones (Mini Microphone 2 and Mini Microphone 2+) are designed to enhance hearing for Cochlear implant users in challenging listening environments. These devices act as remote microphones, transmitting audio directly to the user's sound processor, thereby improving speech understanding over distance and in noisy situations.

Function Description

The primary function of the Mini Microphones is to capture sound from a source and wirelessly stream it to a Cochlear sound processor. This is particularly beneficial in situations where the sound source is far away, or when there is significant background noise that would otherwise interfere with direct hearing.

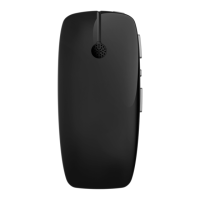
The Mini Microphone 2 is designed for individual use, typically clipped vertically onto the clothing of the person speaking, positioned 10-30 cm from their mouth. This ensures optimal sound capture from a single speaker.

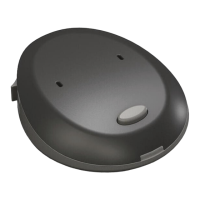
The Mini Microphone 2+ offers additional functionality as a "table mic" for group discussions. When placed on a table, it can pick up voices from multiple speakers in a conference or group setting, making it suitable for meetings, classroom environments, or family gatherings.

Users activate streaming on their sound processor to receive audio from the Mini Microphone. The device supports up to three channels, allowing users to switch between different Mini Microphones or other Cochlear wireless accessories.

Important Technical Specifications

  • Wireless Range: The Mini Microphones can transmit audio up to 25 meters (approximately 82 feet) from the sound processor, providing significant flexibility in various environments.
  • Battery Life: On average, a fully charged Mini Microphone can operate for up to 10 hours. Actual battery life may vary depending on usage patterns.
  • Charging Time: For first-time use, it is recommended to charge the device for at least 3 hours, even if the LED indicator suggests a full charge earlier.
  • Connectors:
    • Micro-USB connector: Used for charging the device. Both Mini Microphone 2 and 2+ feature this.
    • Line input (2+): Exclusive to the Mini Microphone 2+, this allows for direct connection to external audio sources.
    • FM connector (2+): Also exclusive to the Mini Microphone 2+, this enables connection to FM systems, often used in educational settings.
  • Controls:
    • ON/OFF button: Powers the device on and off.
    • Volume up/down controls: Adjust the streamed audio volume.
    • Mute button: Temporarily silences the microphone.
    • Pairing button: Used to initiate the pairing process with a sound processor.
  • Status Indicator (LED): A multi-color LED provides visual feedback on the device's status, including power, charging, battery level, and pairing mode.

Usage Features

  • Placement:
    • Vertical Clipping (Mini Microphone 2 & 2+): For individual speakers, the device should be clipped vertically onto clothing, 10-30 cm from the mouth.
    • Table Placement (Mini Microphone 2+): For group discussions, the Mini Microphone 2+ can be placed on a table to capture audio from multiple participants.
  • Pairing: The device is paired with a Cochlear sound processor by turning off the sound processor, powering on the Mini Microphone, and then pressing the pairing button on the Mini Microphone. The LED blinks yellow during pairing mode. Up to three Cochlear wireless accessories can be paired to a single sound processor, with specific button press sequences (once, twice, or thrice) to assign to different channels.
  • Streaming Activation: Streaming can be initiated in several ways:
    • Via Sound Processor: Pressing and holding a button on the sound processor for 2 seconds activates streaming. Repeated presses can switch between channels.
    • Via Remote Assistant: Using the Telecoil button on the Remote Assistant, pressing and holding for 2 seconds starts streaming. Repeated presses switch channels.
    • Via Remote Control: Turn on the Remote Control, and streaming will begin.
    • Via Nucleus Smart App: Within the app, users can select "Audio Sources" and then the "Mini Mic" icon to start streaming.
  • Volume Control: Dedicated buttons on the device allow users to adjust the volume of the streamed audio.
  • Mute Function: A mute button provides quick silencing of the microphone when needed.
  • Status Indicators: The LED provides clear visual cues:
    • Red light during charging.
    • Solid red with green flashes every 2 seconds when fully charged and connected.
    • Yellow blinking once per second for low battery.
    • Green LED when powered on.
    • Blue indicator light flashes when pairing is successful.
    • Blue light on sound processor indicates streaming is active.

Maintenance Features

  • Charging: The Mini Microphone is charged via a Micro-USB cable connected to a power outlet using the supplied adaptor. Regular charging is essential to maintain optimal battery performance.
  • Battery Monitoring: The LED status indicator provides real-time feedback on battery level, allowing users to anticipate when charging is needed.
  • User Guides: Comprehensive user guides are provided for the Mini Microphone, True Wireless Accessories, and the Cochlear Sound Processor. These guides contain detailed instructions for setup, operation, troubleshooting, and care.
  • Online Support: Cochlear's website (www.cochlear.com) offers further support and instructional videos, serving as a valuable resource for users.

Cochlear True Wireless Mini Microphone 2 Specifications

General IconGeneral
BrandCochlear
ModelTrue Wireless Mini Microphone 2
CategoryHearing Aid
LanguageEnglish

Related product manuals