AFTER SALES SUPPORT
1300 663 907 CUSTOMERCARE@WINPLUS.COM.AU MODEL: HE161192
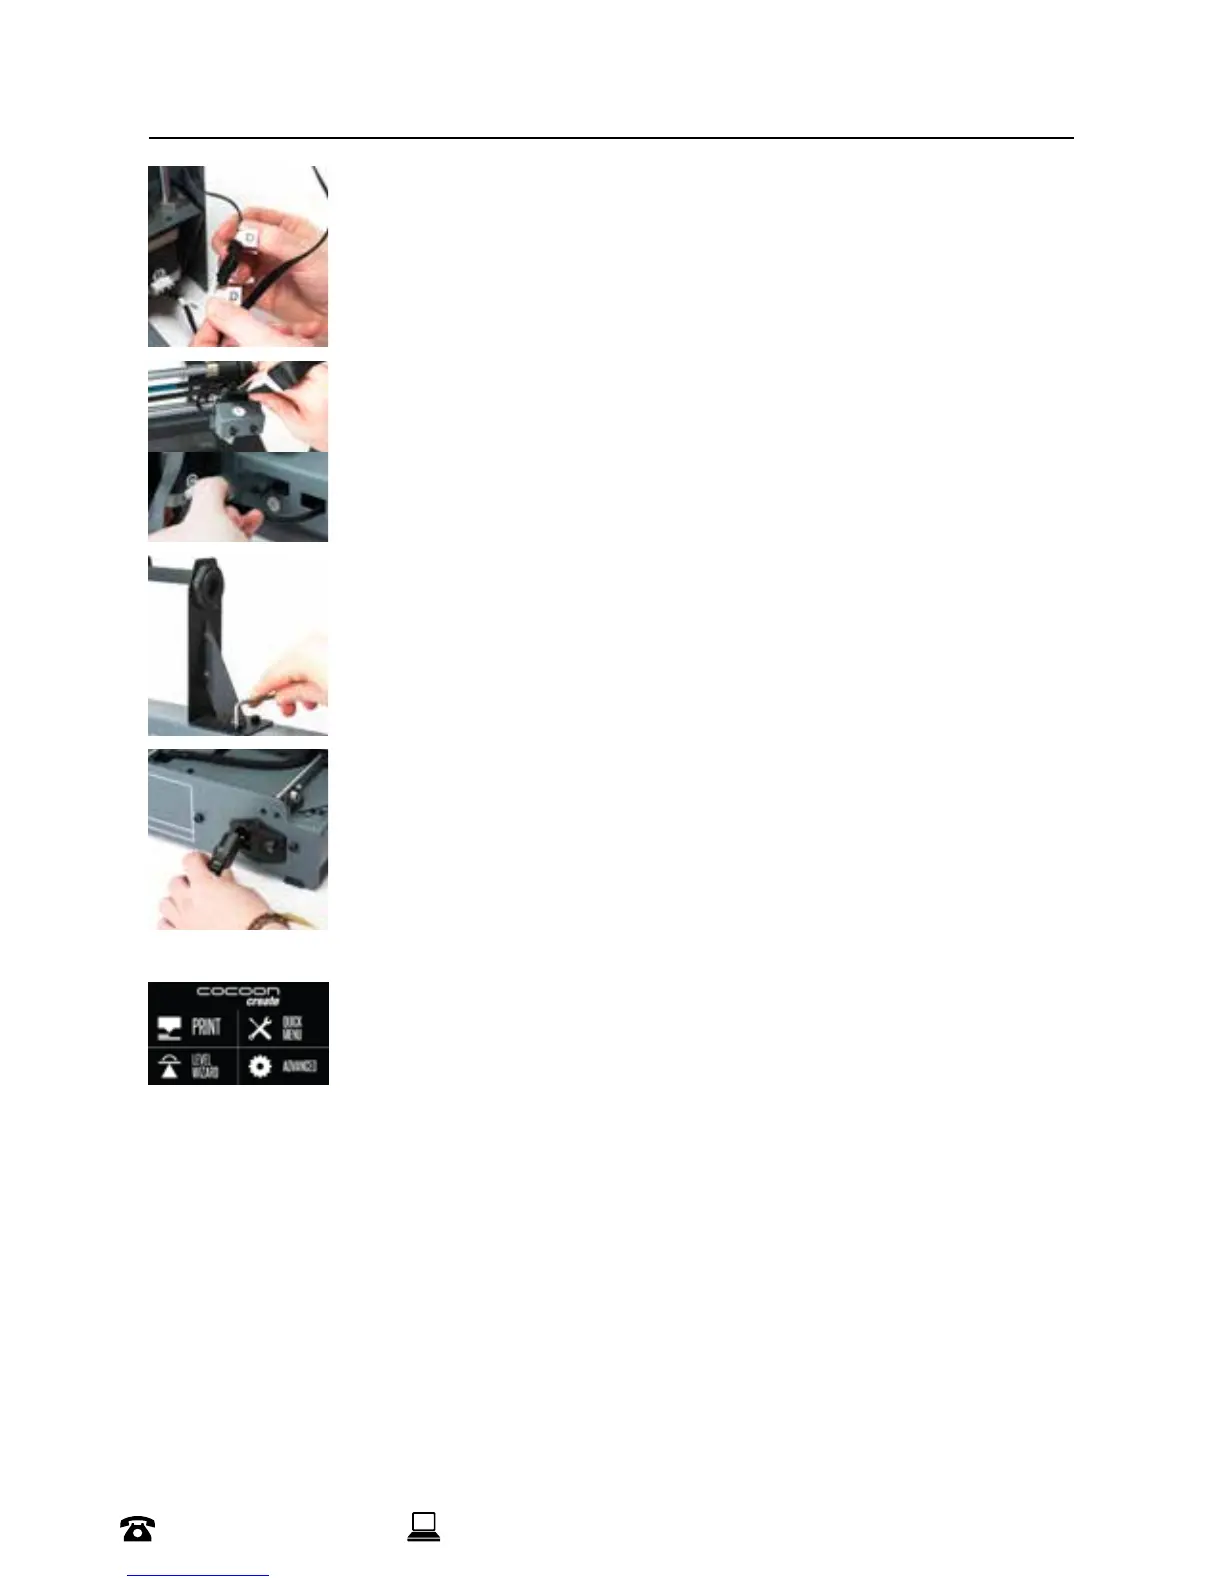
6. Insert the black connector marked ‘D’ into the black connector of the
Extruder Tower marked ‘D’
7. Insert one end of the black cable connector marked ‘E’ into the black
connector of the Extruder Tower marked ‘E’. Insert the other end to the
black connector marked ‘E’ into the black connector on the side of the
Heated Print Bed marked ‘E’
8. Attach the upper arm of the lament spool holder by unscrewing the
end cap, then reattaching. Position the Filament Spool Holder Stand on
top of the Extruder Tower, then insert the bolts and tighten with the Hex
Wrench
9. Ensure the power switch is in the OFF position, then insert the Power
Supply Cable into the back of the 3D Printer Base. Insert the other end
into a nearby mains power outlet. Turn on the power outlet, then turn on
the power switch at the back of the 3D Printer Base
10. Wait for the printer to initialise, with the home screen shown on the
Touch Screen.
You have successfully setup your Cocoon 3D Printer Touch
SETUP