This document is a user manual for the Cocopar Portable Monitor, Model #: J173FH10F. It provides comprehensive instructions and troubleshooting tips for operating and maintaining the device.
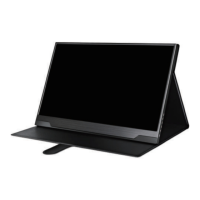
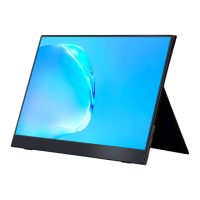
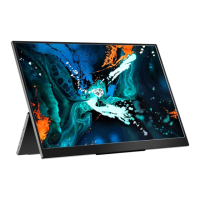
The Cocopar Portable Monitor is designed to extend or duplicate the display of various devices, including laptops, PCs, gaming consoles (PS4/Xbox), and smartphones. Its portability makes it suitable for on-the-go productivity, entertainment, or presentations. The monitor features multiple connectivity options, including two full-featured Type-C ports, a Mini HDMI port, an Audio Jack, and a Micro USB (OTG) port, allowing for versatile connections to a wide range of devices. Built-in speakers provide audio output for an integrated multimedia experience.
Usage Features:
Connectivity:
The monitor supports several connection methods depending on the source device:
- Laptop/PC with Type-C port: A single USB Type-C to USB Type-C cable can transmit both power and video signals. It is recommended to use the wall charger to power the monitor to prevent a black or flashing screen due to insufficient power supply from the laptop/PC. Some Type-C ports on devices like HP Elitebook, HP Pavilion, and Acer Aspire may only support charging and not video output. In such cases, users are advised to contact support.
- Laptop/PC with HDMI port: An HDMI cable is used for video signal transmission, while a USB-A to USB-C cable is used for power. External power supply via the wall charger is required to ensure stable operation and avoid display issues.
- Laptop/PC with (mini) DisplayPort: For devices with DisplayPort or Mini DisplayPort (e.g., Microsoft Surface, HP Elitebook), a (Mini) DP to HDMI adapter and an HDMI cable are required for video signal transmission. A USB-A to USB-C cable provides power. The manual notes that the adapter is not included and can be obtained by contacting Cocopar support.
- PS4/Xbox Connection: An HDMI cable connects the console for video, and a USB-A to USB-C cable provides power. As with other connections, using the wall charger for power is crucial to avoid display problems.
- Nintendo Switch Connection: The Switch connects via a USB-C to USB-C cable. However, the Switch cannot provide sufficient power for the monitor. Users must use the Switch's original PD charger plugged into the monitor's Type-C port for power. Using other chargers may not work.
- Android Phone Connection: For Android phones, a USB-C to USB-C cable connects the phone to the monitor. If the phone cannot provide enough power, a wall charger should be plugged into one Type-C port of the monitor, and the phone connected to another Type-C port. Some phones, like Google Pixel, do not support video output via Type-C. An Android to HDTV cable might be required for mirroring the screen, which can be obtained from support.
- iPhone Connection: An iPhone requires a Lightning to HDMI adapter to connect to the monitor via an HDMI cable. The adapter itself needs external power from a wall charger plugged into its Lightning port to function correctly. This adapter is also available from Cocopar support.
The OSD menu allows users to adjust various monitor settings:
- Navigation: The "Menu" button opens the OSD. The "+" and "-" buttons toggle between options. Pressing "Menu" again enters the slide bar for an option. The "Exit" button returns to the previous menu without saving, while "Menu" confirms settings.
- Picture Settings:
- Brightness: Adjusts the screen's brightness or backlight.
- Contrast: Adjusts the contrast between objects and the background.
- ECO: Offers 6 image modes: Standard, Game, Movie, Photo, Vivid, and User.
- DCR (Dynamic Contrast Ratio): Enables or disables dynamic contrast ratio.
- Sharpness: Adjusts the clarity of object outlines (Range: 0-4).
- Note: If brightness is set high, use the wall charger. Brightness/Contrast cannot be adjusted if DCR is enabled.
- Color Settings:
- Color Temp: Adjusts the screen tint to 9300k, 6500k, sRGB, or User.
- HUE: Adjusts the image hue (Range: 0-10).
- Saturation: Adjusts image saturation (Range: 0-10).
- Low Blue Light: Decreases blue light emission to reduce eye strain (Range: 0-10).
- FreeSync: Enables or disables FreeSync technology to eliminate screen tearing and reduce lag/latency.
- Audio Settings:
- Mute: Turns volume on/off.
- Volume: Adjusts the audio volume (Range: 0-10).
- Other Settings:
- Language: Selects the OSD language (English, German, French, Japanese, Korean, etc.).
- HDR: Sets HDR mode to AUTO, OFF, or 2084 (ON).
- Reset: Returns all settings to factory defaults.
- USB: When using HDMI for video, this selects USB1 or USB2 for data transmission with a laptop.
- Save Brightness: Automatically saves brightness settings when the monitor is powered by a device via a USB-C cable.
- Note: If "Save Brightness" is on and there's insufficient power, the monitor might not work. Brightness, Contrast, and ECO settings are locked if HDR is enabled (set to 2084 or Auto).
- Input Selection:
- Auto Select: Automatically detects and selects the active input (Type-C1, Type-C2, HDMI).
- Type-C1/Type-C2: Manually selects the respective Type-C input.
- HDMI: Manually selects the HDMI input.
- Shortcut Menu: Pressing "+" adjusts brightness, and pressing "-" adjusts volume.
Display Modes (Duplicate/Extend/Second Screen):
- MacOS: Access "System Preferences" > "Displays" > "Arrangement" tab. Uncheck "Mirror Displays" for Extend Mode or check it for Mirror Mode.
- Windows: Right-click desktop > "Display settings" > "Multiple Displays." Select "Duplicate these displays," "Extend these displays," or "Show only on 2." The Windows key + P shortcut also provides these options.
Portrait/Landscape Mode:
- MacOS: Access "System Preferences" > "Displays." Hold Cmd+Option(Alt) keys and click "Displays" to reveal the "Rotation" drop-down menu.
- Windows: Right-click desktop > "Display settings" > "Display orientation." Select "Landscape" or "Portrait."
Maintenance Features:
Troubleshooting:
The manual provides solutions for common issues:
- Black screen or No signal:
- Use original accessories (cables, charger). USB 3.0 A Male to USB Type C cables do not transmit video.
- Unplug and replug all cables.
- Verify if the device's Type-C port supports video output (some HP Elitebook, Acer Aspire models only charge). Contact support if unsure.
- Set display mode to "Extend" in Windows.
- Test the monitor with other devices.
- Contact support for assistance.
- Saving brightness settings:
- Settings are saved when the wall charger is connected.
- If no external power, enable "Save Brightness" in the OSD (Page 11).
- Note: "Save Brightness" with insufficient power may prevent phone connections.
- Monitor flashing/restarting:
- This usually indicates insufficient power.
- If using a single USB-C cable, some laptops/phones can't provide enough power. Plug in the wall charger or reduce brightness.
- Contact support for help.
- "No signal" with USB Type C to USB 3.0 A Male cable: This cable is for charging only and does not support video signal transmission.
- Only (mini) DisplayPort on device (no HDMI or full-featured Type-C): A (mini) DP to HDMI adapter is required. Contact support to get one for free.
- Android Phone Type-C not working:
- Phones may not provide enough power; plug in the wall charger to the monitor's Type-C port, then connect the phone to another Type-C port.
- Some phones (e.g., Google Pixel) do not support video output via Type-C. An Android to HDTV cable might be needed, available from support.
- Compatibility with Apple iPad and iPhone:
- iPad with Type-C works with a single USB-C cable.
- iPhone and iPad with Lightning port require a Lightning to HDMI adapter (refer to Page 8). Contact support for a free adapter.
- Brightness and contrast cannot be adjusted: This occurs if HDR or DCR is turned on. Reset settings and turn off HDR (Page 11).
- Nintendo Switch not working with USB-C: Use the original USB Type-C cable provided by Cocopar and the Switch's original PD wall charger to power the monitor (Page 7).
- Micro USB port function: It cannot power the monitor. It is used to connect a keyboard or mouse via an OTG cable.
Support:
Cocopar offers customer support via:
- Phone: +1-888-666-0082 (24/7 Toll-Free)
- Email: service@cocopar.net (replies within 8 hours)