14
Strobe Lighthead
Assembly
Filter
(if supplied)
Electronics Module Removal
In the event that the power supply or a strobe lamp assembly must be returned to the factory for service, mark each wire with a tag
to identify each function and note the proper location before disconnecting the wiring. Figure 9 can be used to mark the locations of
the individual connections as well.
Refer to Figure 9 for power supply removal. Remove the four (4) screws holding the power supply. Disconnect the wire leads, and
move the power supply to the side. Remove the 2 screws holding the capacitor assembly and lift the strobe power supply/capacitor
assembly from the lightbar as a unit. To reinstall the power supply reverse the above steps.
Caution: Verify that wires are not pinched or damaged when reinstalling power supply.
FIGURE 8
FIGURE 10
FIGURE 9
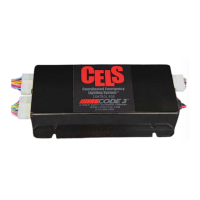
MAXIMUM 27W
4-Head Power Supply
6-Head Power Supply
+12VDC
(Red)
+12VDC
(Red)
Ground Wire
(Blk)
Ground Wire
(Blk)
Control Wire Harness
(Yel/Blk,Brn/Blk)
Control Wire Harness
(Yel/Blk,Brn/Blk)
Passenger's Side Front
(Org,Blk,Blk/Wht)
Driver's Side Front
(Brn,Blk,Blk/Wht)
Passenger's Side Rear
(Grn,Blk,Blk/Wht)
Driver's Side Rear
(Yel,Blk,Blk/Wht)
Rear Output
(Grn,Blk,Blk/Wht)
Rear Output
(Yel,Blk,Blk/Wht)
Rear Aux. Output
(Red,Blk,Blk/Wht)
Front Output
(Org,Blk,Blk/Wht)
Front Aux. Output
(Wht,Blk,Blk/Wht)
Front Output
(Brn,Blk,Blk/Wht)
1
2
3
4
5 N/C
FRONT
REAR
+12V(RED)
GND(BLK)
N/C(GREY)
FRONT(GRN)
REAR(BLUE)
RANDOM
FLASH
(YEL)
PSE 490E
FIGURE 10A