Page 2 of 8
Unpacking and Pre-Installation:
Carefully remove the product and place it on a at surface. Examine the unit for transit damage and locate all parts. If damage is found or
parts are missing, contact the transit company or Code 3. Do not use damaged or broken parts.
Ensure the product voltage is compatible with the planned installation.
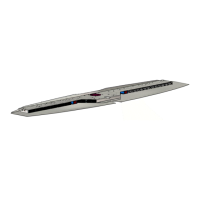
Thin SuperVisor vehicle specic mounting kits are available on our website. For information on how to mount the Thin SuperVisor using
vehicle specic kits, please refer to the installation instructions provided with those kits.
A universal mounting bracket (P/N: SFMTG-TSUNIV) is also available. See below for installation instructions.
Installation and Mounting:
Step 1. Consult your vehicles factory service manual to remove the sun visor and sun visor retaining clip from both driver and passenger
sides of the vehicle.
Step 2. Select the mounting brackets that best t the geometry of your vehicles sun visor mounting locations. Some modication may be
required to t your vehicle.
Step 3. Secure the mounting brackets into position by securing your sun visor and sun visor retaining clips with the mounting brackets
positioned between the sun visor plastics and the headliner. Use of the provided screws may be required due to the additional thickness of
the brackets. Leave the screws slightly loose for adjustment later.
Step 4. Mount the slotted mounting brackets to the newly mounted brackets using the provided 1/4-20 hardware. Leave the screws slightly
loose for adjustment later.
Step 5. Position the Thin SuperVisor onto the slotted mounting brackets and slide the unit until the gasketing makes full contact with the
glass.
Caution!!! When installing the unit do not push it too hard against the windshield. The unit only needs to just touch the glass
enough to fold the gasket ange back & block out as much ash back light as possible. A broken window can result if the unit is
installed too tight against the glass!
Step 6. Secure the Thin SuperVisor using the provided 1/4-20 hardware. Begin tightening all associated hardware while maintaining the
desired product positioning.
Step 7. Conceal the wiring between the driver and passenger sides inside the headliner.
Universal Installation Instructions: