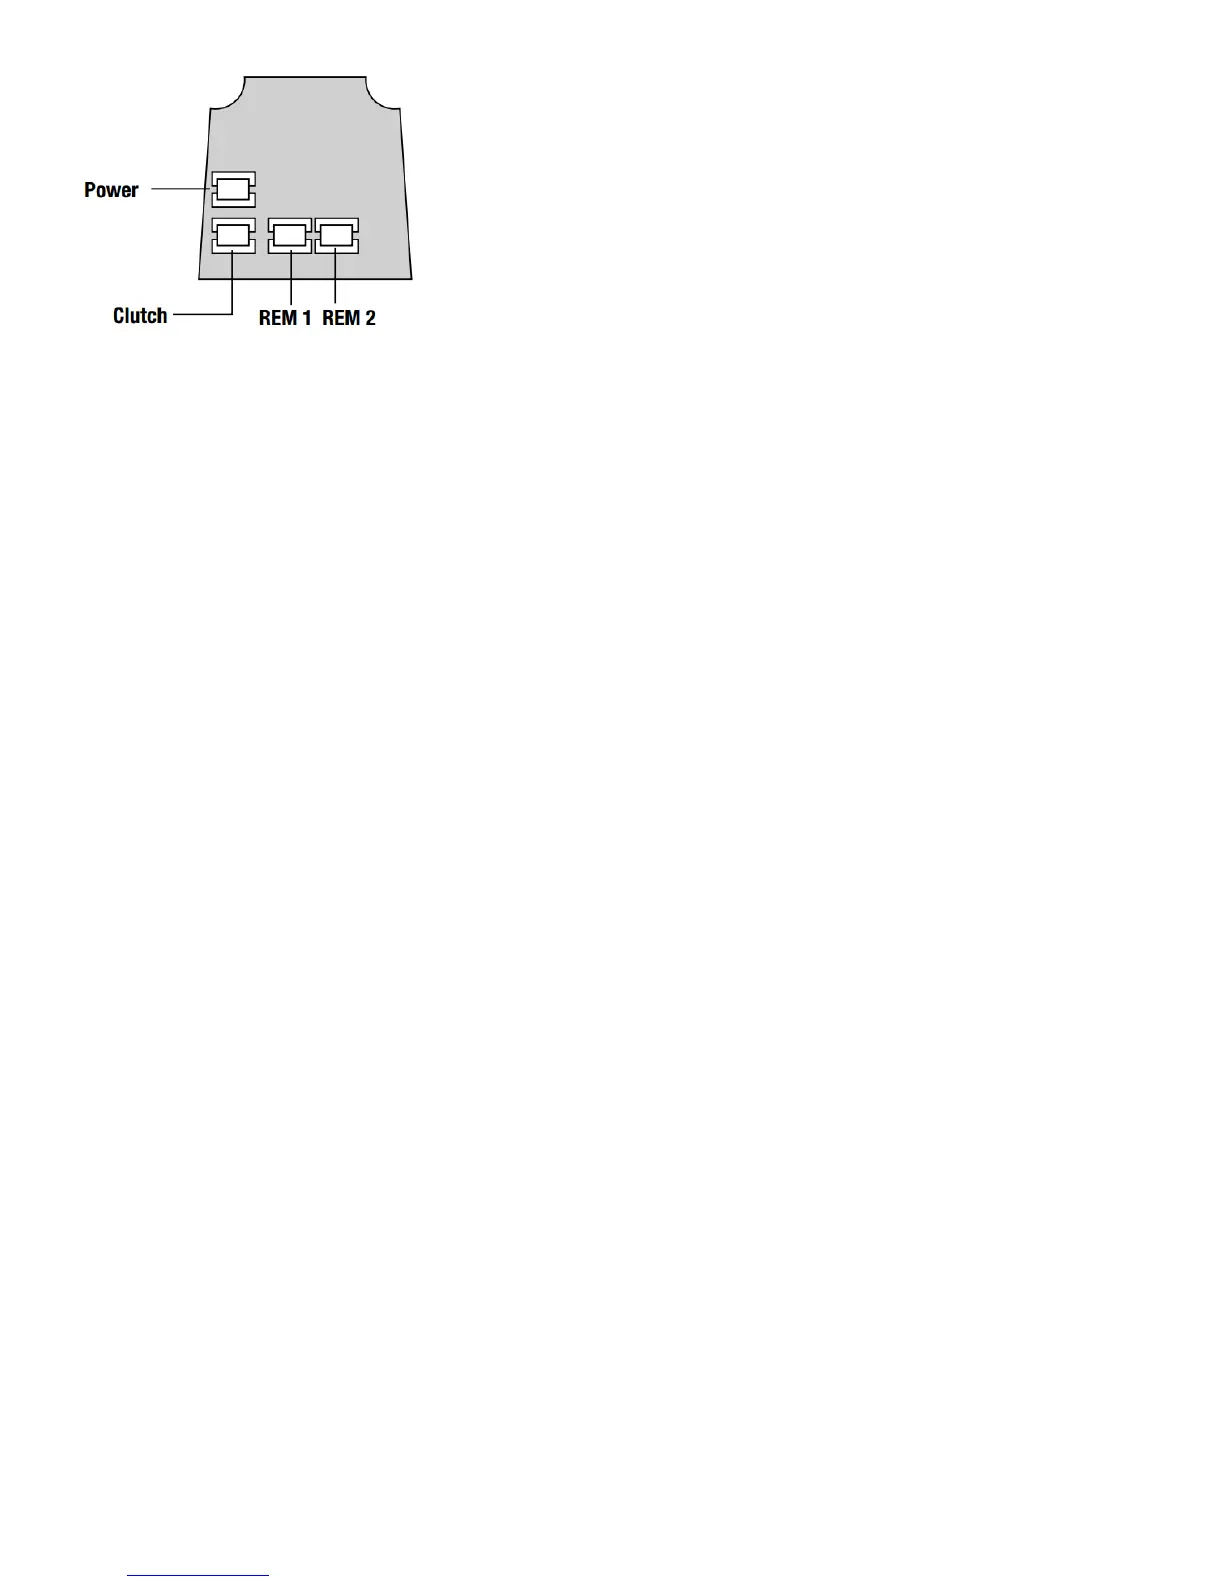
REM 1 is for connection to a reception desk push button or a door intercom system. Pressing the button
will cause the keypad to flash blue on the lock and release the lock for the pre-set time.
REM 2 is for connection to the building alarm system to release a door in an emergency. This allows
rooms, wards, offices to be easily checked to ensure that no person is trapped or overlooked during an
emergency evacuation. When activated REM 2 will maintain the unlocked condition for 30 minutes, the
keypad will flash red and BEEP during this time.
The lock will automatically lock again after 30 minutes. If necessary Program 7 can be used to re-lock
before the end of the 30 minutes.
REM 1 and REM 2 do not require additional power. They are normally open contacts requiring a
momentary or maintained signal to close.
INSTALLATION OF CL5510 LOCKS
Take time to be precise and finish the job quicker.
Installation holes must be drilled in exactly the correct positions and precisely at right angles to the door
surface. Lock components must be vertically and horizontally accurate in relation to each other and to the
door
WEDGE THE DOOR FIRMLY TO PREVENT MOVEMENT WHILST DRILLING AND CHISELLING.
1. Lightly mark a height line on the edge and both faces of the door, to indicate the top of the lock when
fitted. Crease the template along one of the dotted lines - 60mm (2 ⁄”) or 70mm (2 ⁄”) latch - and tape it
to the door with the top in line with the height line. Mark the holes to be drilled. Mark the centre line of
latch on to the door edge. Apply the template to the other side of the door precisely against the height line
and the centre line of latch mark. Mark the holes to be drilled again. (See diagram A).