Pag. 10
•
Step 3 - ASSIGN - Projectors’ assignment
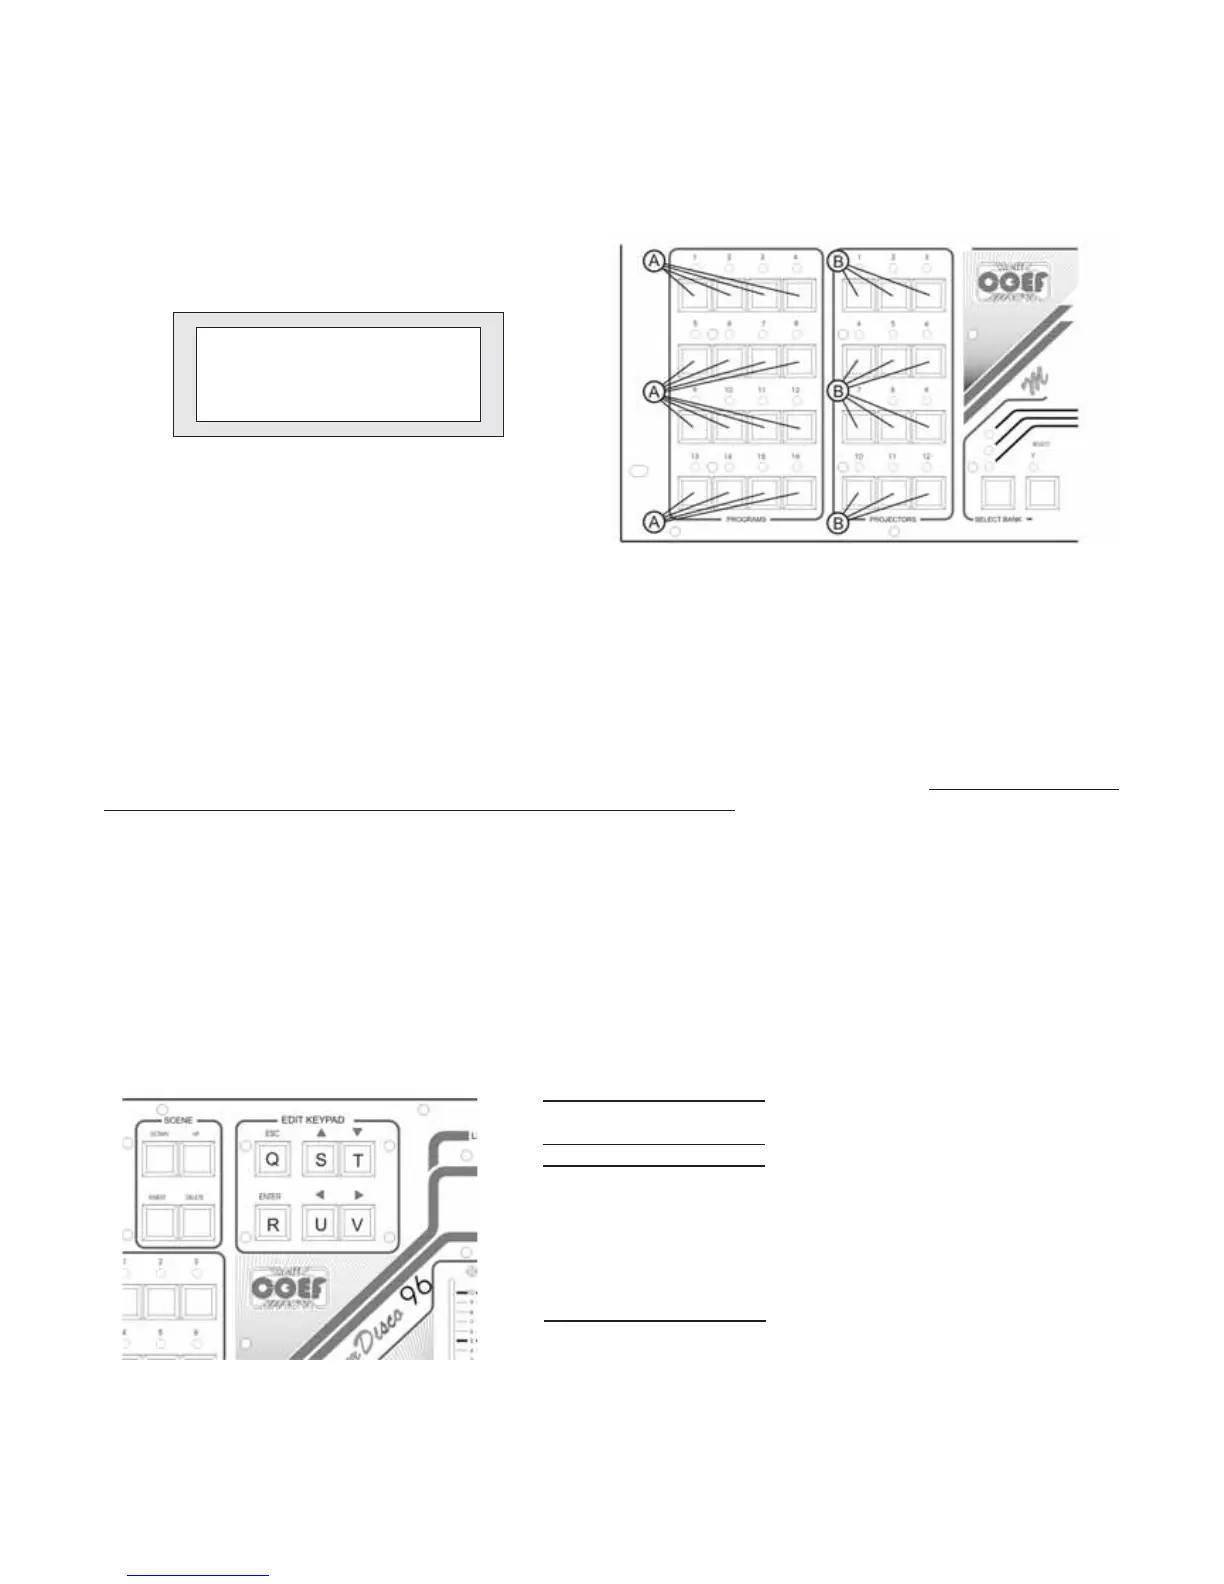
After pushing ENTER (part. R, fig. 17) with the word [ASSIGN] between flashing brackets, the display will give you other
indications and requests.
This stage is absolutely necessary to the Master Disco 96 functioning because it will be impossible to ‘edit’any program
till one projectors set will be at disposal.
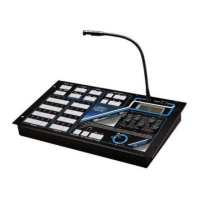
As soon as you enter this stage, the led of the PROJECTORS section, relevant to the n1 of the available projectors, will
flash (fig. 16).
By means of the S and T buttons you will select the type of projector to link to the selected number; if you have not yet done
the step 4 [TYPE] the choice, is limited to the whole series of COEF projectors, that will appear on the display together with in-
formations about:
- DMX starting channel of the projector “DMX St”
- number of channels occuped by the projector “DMX Len”
- total number of the channels used in Master Disco 96 “Channels Used:”
Continue to assign the installed projectors by pushing the button relevant to each projector (part. B, fig. 16) and repeating
the operations explained above.
Pressing ESC you will exit from “ASSIGN” (part. Q, fig. 17).
*PROJECTORS ASSIGN.*
Projector DMX:StÈ Len
Empty ---È ---
Channel Used:0
Figure 15
Figure 16
Figure 17
PROJECTORS COEF by NUMBER OF CHANNELS
CDisco SC
CDisco AL
Color Fr
Col Show
PERF I
PERF II
PERF III
PERF IV
PERF 200
200Disco
250RG
250Show
1k2 Disco
MP 250
MP 250 Fr
= Color Disco Scarica
= Color Disco Alogeno
= Color Fresnel
= Color Show
= Performance 1
= Performance 2
= Performance 3
= Performance 4
= Performance 200
= Performance 200 Disco
= Performance 250 RG
= Performance 250 Show
= Performance 1200 Disco
= MP-250 Optic
= MP-250 Fresnel
CH
2
3
5
6
8