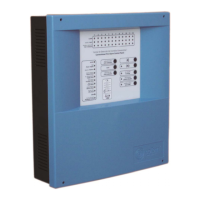
Digital fire detection control panel
COMPACT LYON
FIRE PRETECTION MANUFACTURER 45
Ctra. de Molins de Rei a Rubí, Km. 8,4 - 08191 RUBÍ (Barcelona) ESPAÑA.
Tlf.: +34 935 862 690 - Fax:+34 936 999 261 - cofem@cofem.com - www.cofem.com
3.2.2.4.- Monitor.
Option 1 of the main menu, MONITOR. It enables the readings and the configuration of the various
analogue sensors to be seen. By entering the loop and elements numbers, we can see the type (optical,
thermal, relays module, master module, etc), the label and the manufacturer’s programming number. In the
case of optical and thermal sensors we will also see the last five measurements.
Monitor message of an optical sensor:
L
ABEL Type : A30XHA
Loop: 001 Adress:001 N.Prog : 55826
Val ues : [000 000 000 000] Temp: 025
Di r t : 000%
verage :000 Sens i t i v :MED
In the case of a thermal sensor, the values are monitored in degrees.
L
ABEL Type : A30XTA
Loop: 001 Adress:001 N.Prog : 55826
Val ues : [025 025 025 025] Temp: 025
Dirt: ---%
verage: 000 Sens i t i v :MED
3.2.2.5.- Activate / Deactivate logical relays.
Option 2 of the main menu, LOGICAL RELAYS ACTIVATION. In this menu we have 5 submenus:
LIST TRIPPED RELAYS, ACTIVATE A SINGLE RELAY, DEACTIVATE A SINGLE RELAY,
ACTIVATE ALL SIRENS,ACTIVATE ALL SWITCHES.
Exactly as they suggest, the submenus enable us to activate groups of relays configured as switches
and sounders or make individual activations. Also there is the option to deactivate relays individually.
3.2.2.6.- Activate / Deactivate general relays.
Option 3 of the main menu, GENERAL RELAYS ACTIVATION. In this menu we have 2
submenus: GENERAL SIREN RELAY, FAULT RELAY. Within each of these we have 5 options:
ACTIVATE RELAY, DEACTIVATE RELAY, CHANGE DELAY, DISABLE RELAY and ENABLE
RELAY.
Exactly as they suggest the submenus enable us to activate or deactivate the relay, to configure its
delay between 0 and 9 minutes 59 seconds, and disabling or enabling the relay.
3.2.2.7.- System configuration.
O
ption 4 of the main menu, SYSTEM CONFIGURATION. From this option after entering the
password for level 3 access we are able to access the configuration menu. See chapter 3.2.3.
3.2.2.8.- Enable/ Disable elements and zones.
Option 5 of the main menu, PUT ZONES INTO/OUT OF SERVICE. In this menu we have 5
submenus: PUT POINT INTO SERVICE, SET POINT OUT OF SERVICE, PUT ZONE INTO SERVICE,
SET ZONE OUT OF SERVICE and LIST OUT OF SERVICE ZONES
Exactly as they suggest the submenus enable us to enable/disable zones or elements individually, and
to view a list of the out of service zones.
 Loading...