5)
Repeat the above procedure for the second beaterlauger
assembly.
Rotate the beater/auger until you feel the drive shaft engage
6)
Finally, insert the beaterlauger into the freezer cylinder.
Halding the beaterlauger horizontally, slide it straight into
the cylinder until it can go no further.
IMPORTANT: Before installing the beaterlauger, make certain
the beater lip seal is in place and the idler is properly
7)
Insert the second beaterlauger. Once installed, make certain
the flat portion of the idler is in a vertical position. The idlers
should spin freely and are counter weighted to naturally rest
in a vertical position.
B)
Assembling
the
Dispensing Head
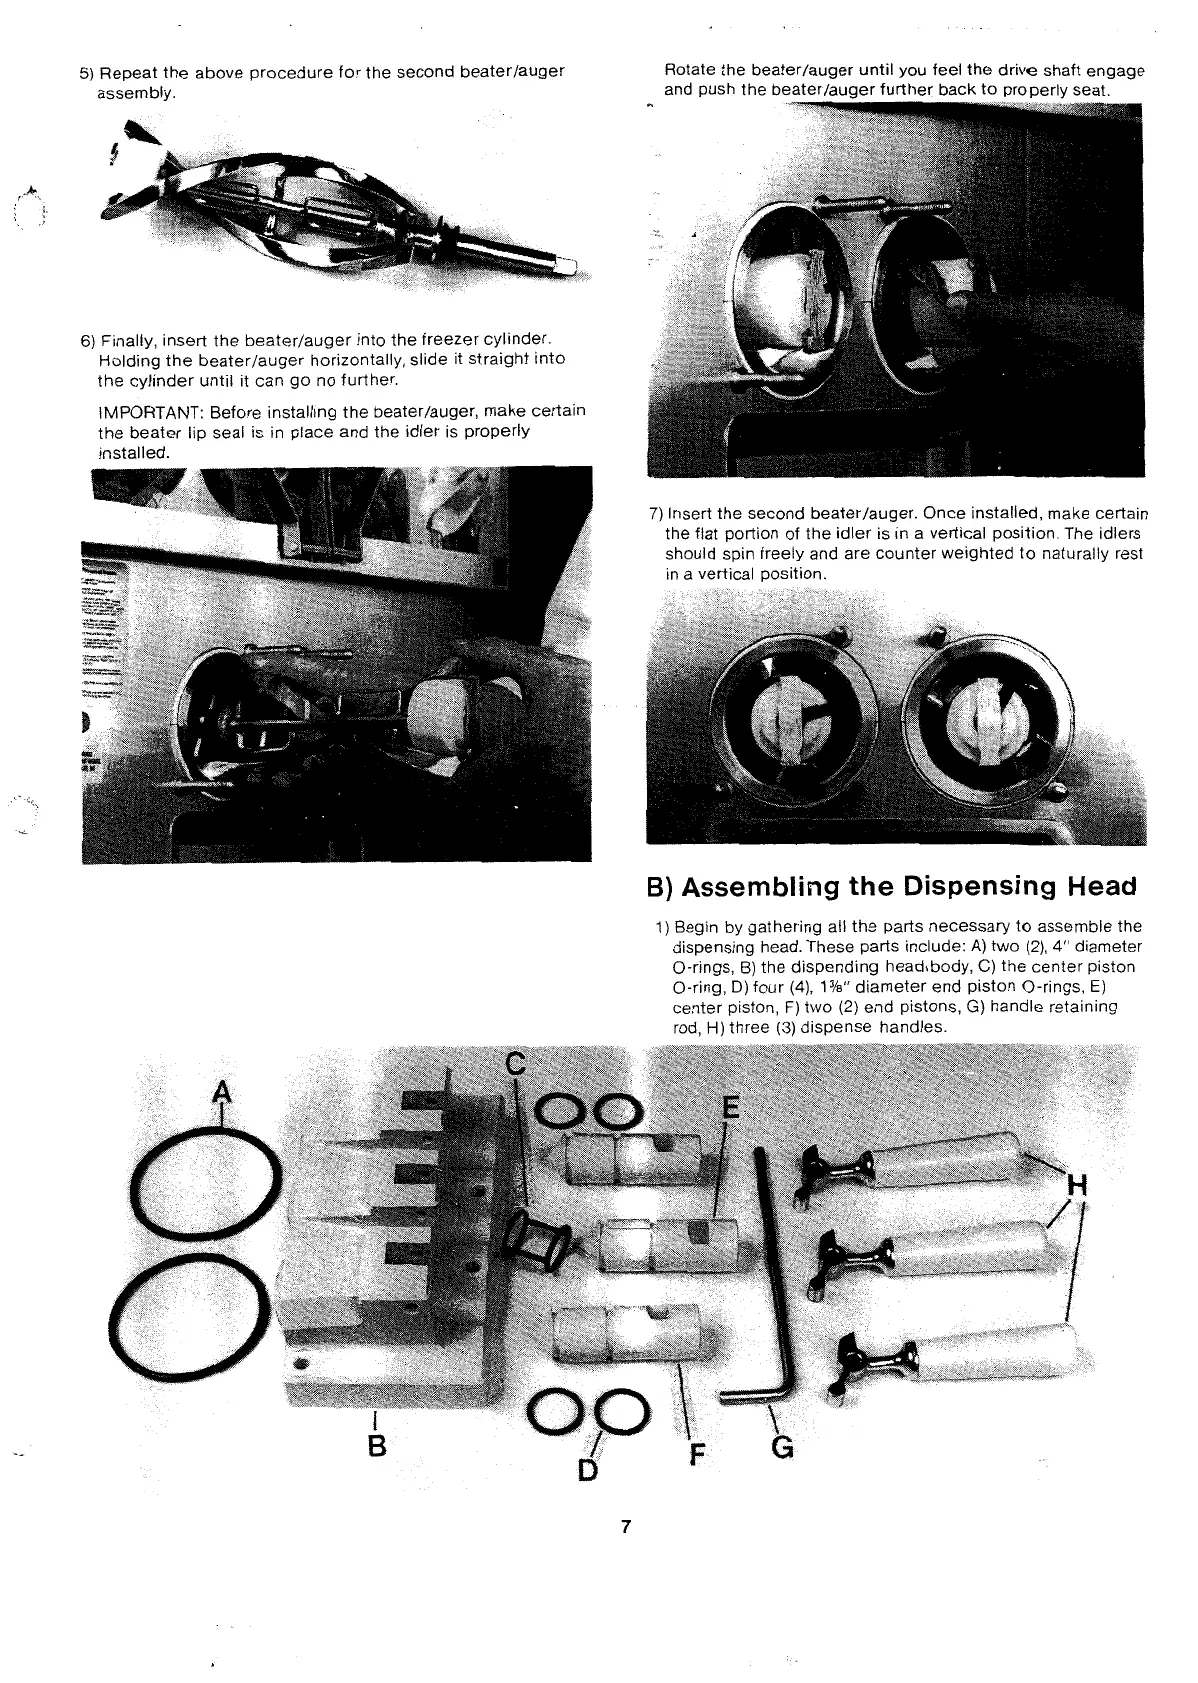
1)
Begin by gathering all the parts necessary to assemble the
dispensing head. These parts include: A) two (2),
4"
diameter
O-rings,
B)
the dispending head<body,
C)
the center piston
O-ring,
D)
four
(4),
1
3/d'
diameter end piston O-rings,
E)
center piston,
F)
two (2) end pistons,
G)
handle retaining
rod.
H)
three
(3)
dispense handles.
 Loading...