12
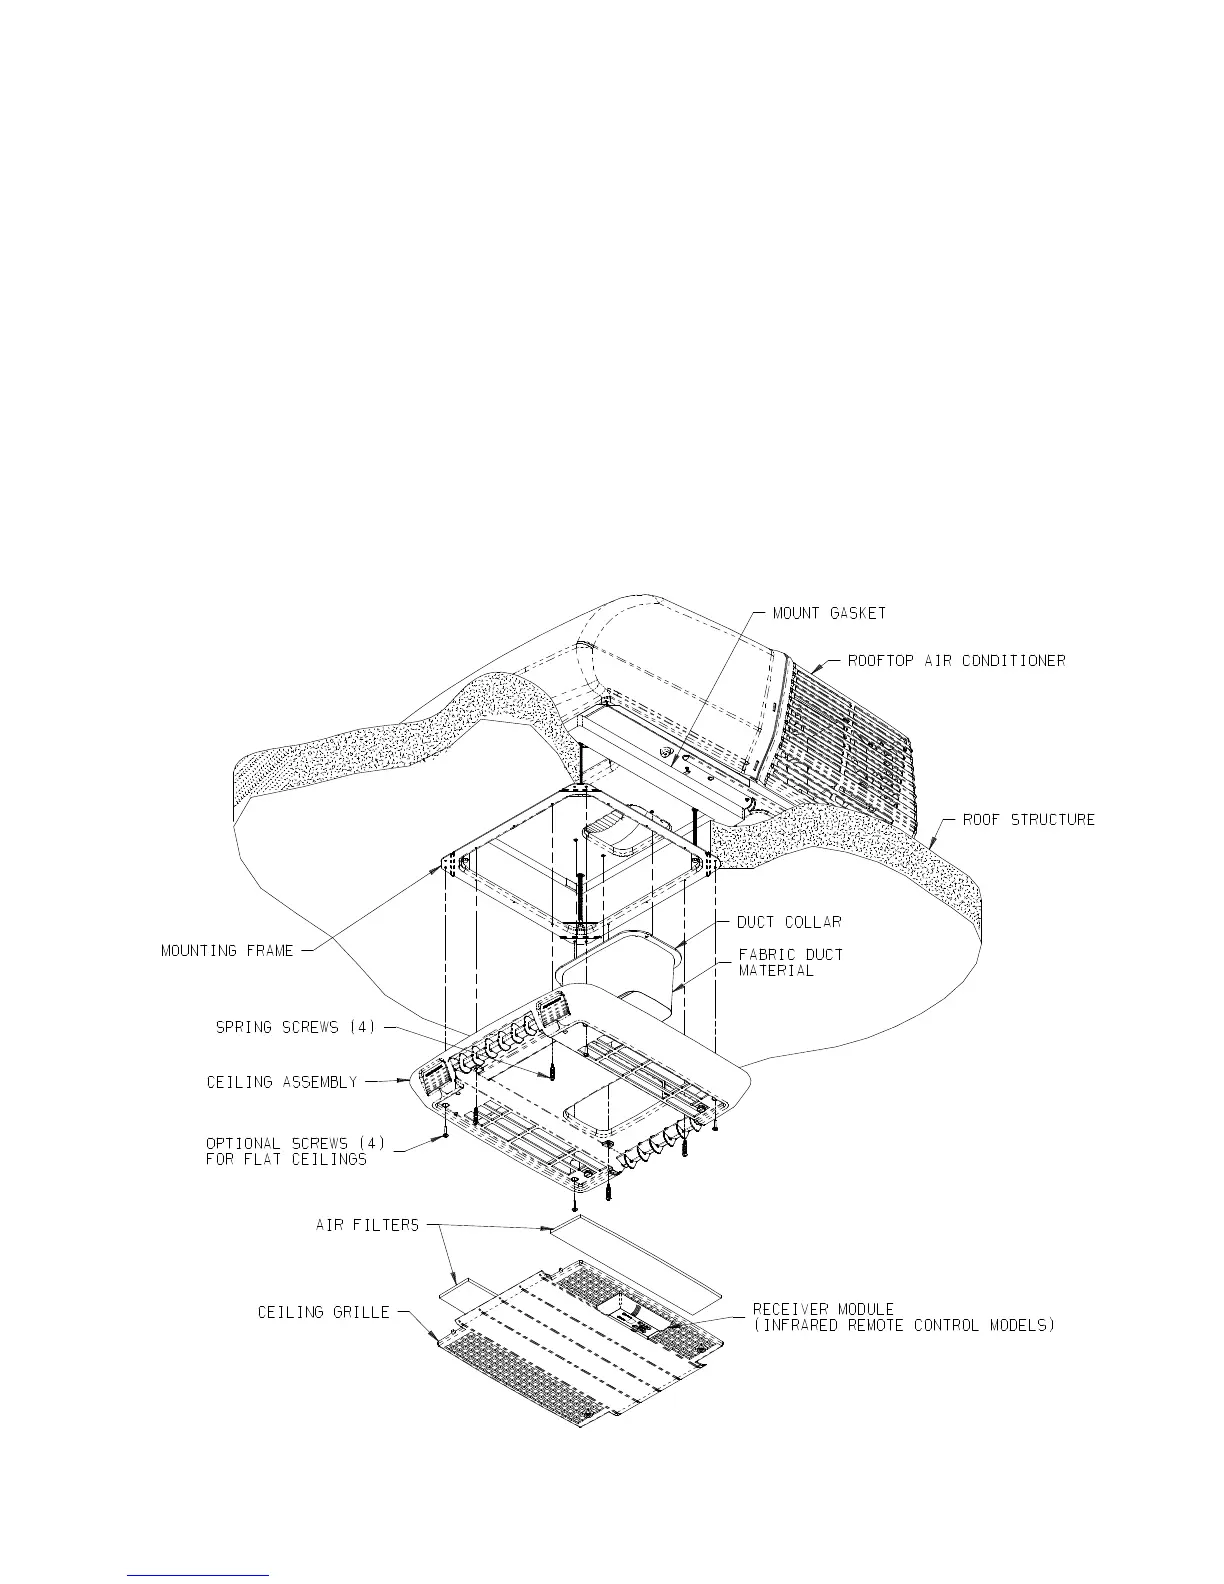
16. INSTALLING THE CEILING ASSEMBLY
A. Fasten the duct collar to the basepan of the air
conditioner with three (3) screws (See Figure 8).
B. Raise the ceiling assembly and secure to the
mounting frame with four (4) provided shoulder
screw/spring assemblies (See Figure 8).
C. The ceiling assembly shroud is curved to contour to
a crowned ceiling. If installation is to a flat ceiling
and gaps are present on the sides of the shroud,
insert the four optional 3/4 inch screws (provided)
through the mounting posts and secure them to the
mounting frame above. See Figure 8 for screw
locations.
D. Pull fabric duct material through ceiling assembly
discharge opening. Peel the release liner from the
adhesive strip around the discharge opening. Press
the fabric duct material firmly in place around
opening. Cut off excess fabric on inside of ceiling
assembly chute with a box knife taking care not to
tear the fabric beyond the adhesive strip.
E. Make sure the non-allergenic filters are properly
positioned in the ceiling grille. Install the ceiling
grille by positioning on the bottom of the shroud
and engaging the two 1/4 turn fasteners.
F. Turn the selector switch to OFF position.
G. Turn ON the power supply to the roof top air
conditioner.
H. Follow the “System Operation and Checkout” guide
in the thermostat installation instructions to insure
proper operation.
FIGURE 8
 Loading...