Do you have a question about the Coleman CT200U and is the answer not in the manual?
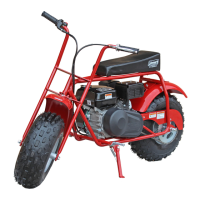
Read and understand the Owner's/Operator's manual before operating the Mini Bike.
Key document for understanding safety, parts, functions, and maintenance.
Essential tools and fasteners provided for assembly.
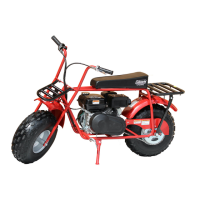
Component for carrying items, to be installed on the front.
Protective component for the front wheel.
Hardware required for installing the front fork.
Protective casing for the clutch mechanism.
Includes wheel, axle, washers, and lock nut for the front.
Step-by-step guide for inserting the steering bolt through the assembly.
Tighten the front fork nut to 30 ft.lbs. (41Nm).
Secure the front rack to the steering column using bolts and nuts.
Install the front fender with bolts, washers, and nuts.
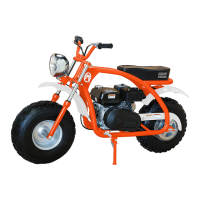
Ensure the arrow on the front tire faces forward.
Insert axle bolt with washers between forks and wheel.
Install and tighten the 14mm lock nut to 30 ft.lbs. (41Nm).
Ensure wires are not kinked and secure them with zip ties.
Attach the clutch cover securely over the bracket tabs.
Drain and replace engine oil with SAE 10W-30 motor oil.
Use clean unleaded regular gasoline with an octane rating of 86 or higher.
Maintain front and rear tire pressure at 10psi.
Adjust chain slack to 1/2 - 3/4 in. (15-20mm).
Adjust front brake lever free play to 2.0 - 4.0mm (0.08 - 0.16 in).
Adjust rear brake by turning the adjustment nut clockwise or counter-clockwise.
Set idle speed to 1700 ± 150 RPMs using the adjustment screw.
Adjust throttle grip free play to 0.078 - 0.24 in (2-6 mm).
Ensure smooth steering and proper brake lever play.
Verify tire pressure, fuel level, cap security, and hose condition.
Confirm throttle operation, stop switch function, and correct oil level.
Check chain tension, lubrication, and overall bolt tightness.
Follow steps for fuel valve, choke, ignition, and starter recoil.
Always start and run the Mini Bike outdoors or in a well-ventilated area.
| Engine | 196cc |
|---|---|
| Horsepower | 6.5 hp |
| Starting System | Recoil Start |
| Frame | Steel |
| Weight Capacity | 200 lbs |
| Transmission | Automatic centrifugal clutch |
| Tires | 19x7-8 |