EasyManua.ls Logo

Coleman KVIKA 2000001059 User Manual

Coleman KVIKA 2000001059
2 pages
To Next Page IconTo Next Page
Page #1 background imageLoading...
Page #1 background image
3. Assemble remaining interlock-
ing shock-corded gray pole.
4. Fold back vestibule on front of
tent to locate sleeve on under
side of rainfly. (Fig. 9)
5. Slide gray pole through sleeve
in rainfly. (Fig. 9)
STITCH LINE
KVIKA
TM
TENT 8’ X 8’ MODEL 2000001059
Before you begin
Read all instructions before set up.
• Select a level campsite clear of rocks, branches, and other hard
or sharp objects, to install your tent.
WARNING: Keep clear of overhead power lines.
Do not set up your tent under trees.
For best results in windy conditions, position end of tent into
the wind.
Enlist the help of at least one other person to assist you when
it is time to assemble the tent.
Fig. 2
Fig. 3
To Set Up Tent
1. Unfold tent and spread out on a clean, level surface with the
door facing the desired direction. Unzip door. (Fig. 1)
4. Insert one end of each black pole into
pins in front corners oftent. (Fig. 3)
5. Go to opposite end of each pole and gradually apply pressure
to the pole forming an arch. Insert the pin into the pole end
at the tent corners.
(Fig. 4)
6. Stretch corners of
tent until floor is taut
then hammer stakes
through loops to
secure.
Fig. 4
Parts and Components
Description Part Number
Main Poles, Black (2) 5010000360
Side Poles, Gray (2) 5010000361
Rainfly 5010000362
7. Attach frame clips along edges
of tent to black main poles
(Fig. 5)
8. Assemble first interlocking
shock-corded, gray pole.
Fig. 5
9. Slide the gray pole through sleeve on front of tent. (Fig. 6)
Fig. 7
Fig. 6
10. Pull down on pole and insert into
center pin location on side of tent.
(Fig. 7)
11. Go to opposite side of tent and
gradually apply pressure to the
pole to form an arch. Insert the
pin into the pole, then drive stake
through metal ring to secure.
12. Attach frame clips on both sides
of tent to gray pole.
To Attach Rainfly
1. Drape rainfly over tent with vestibule centered over the door
on the front of tent (Fig 8).
NOTE: Hook and loop
fasteners, located on
seams of underside
of rainfly, should be
centered over black
and gray poles.
Fig. 10
Fig. 9
To Set Up Tent (continued)
(continued on other side)
2. Assemble main tent poles by interlocking both longer, black
shock-corded, poles.
3. Insert black poles through sleeves, with the black seams, in
top of tent forming an “X” as shown. (Fig. 2)
Fig. 1
Door
Sleeves with
black seams
Fig. 8
Vestibule
on Rainfly
Front on Tent
Sleeve
in Rainfly
2. Secure rainfly with velcro hook
& loop fasteners, on underside
of rainfly, around black poles at
the back of tent and gray pole
on both sides. (Fig. 9)
Question and Answer IconNeed help?

Do you have a question about the Coleman KVIKA 2000001059 and is the answer not in the manual?

Coleman KVIKA 2000001059 Specifications

General IconGeneral
BrandColeman
ModelKVIKA 2000001059
CategoryTent
LanguageEnglish

Summary

Setting Up The KVIKA Tent

Initial Tent Setup Steps

Unfold tent, assemble main poles, insert into sleeves, and secure to front corners.

Forming Tent Arches and Securing

Form tent arches by applying pressure to poles and inserting pins, then stretch floor taut and stake.

Attaching Frame Clips and Gray Pole

Attach frame clips to main poles and slide gray pole through front sleeve.

Securing Tent Poles to Base

Pull down poles, insert into center pins, apply pressure to form arches, and secure with stakes.

Attaching the Rainfly

Draping and Initial Securing

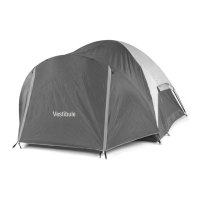
Drape rainfly over tent, center vestibule, and secure with velcro fasteners to poles.

Assembling and Inserting Gray Pole

Assemble remaining gray pole and slide it through the rainfly sleeve.

Securing Rainfly to Front

Insert gray pole ends into front corner pins, form arch, and secure.

Final Rainfly Fastening

Fasten hook/loop fasteners at front and clip elastic loops to tent corners.

Securing Vestibule and Guylines

Extend vestibule straps, stake web straps, tie guylines, and secure with stakes.

Managing Vestibule Flap

Unzip vestibule flap, roll it up, and tie with attached straps.

Tent Features and Storage

Overhead Storage Installation

Insert toggles at the top of the tent through loops on the storage net.

Electrical Cord Access

Use the lower right corner access panel for electrical cords.

Proper Tent Storage Procedure

Store poles and stakes in the bag, ensure tent is clean/dry, fold neatly, and store in a clean, dry area.

Important Usage Information

Condensation Management

Condensation is normal; minimize it by removing wet items and ensuring ventilation.

Tent Care and Maintenance

Always dry tent thoroughly before storing, do not pack items inside, and avoid prolonged sun exposure.

Stake and Pole Handling

Remove stakes by pulling the stake itself, not the tent; do not leave poles telescoped.

Flammability Warning

Keep flame and heat sources away; fabric may burn if in contact with flame.
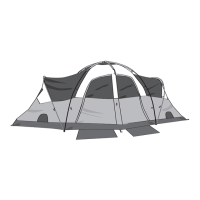
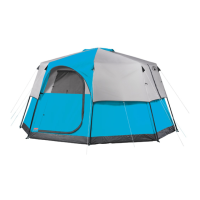
Related product manuals