EasyManua.ls Logo

Coleman Kenosha Pass 9278-137 User Manual

Coleman Kenosha Pass 9278-137
2 pages
To Next Page IconTo Next Page
Page #1 background imageLoading...
Page #1 background image
Connect Frame to Tent
–Locate the Pin & Ring Systems on
either side of the front door and the
corresponding Pin & Rings on the back
side of tent.
–Insert one end of black Frame Pole
onto Pin on tent stake loop on either
side of front door (illus. 3)
–Go to opposite end of pole and gradually
apply pressure to the pole, forming an
arch until you are able to insert the Pin
into pole end.
–Repeat for second pole
–Attach tent frame clips to poles (illus. 5)
Kenosha Pass™ 13’x7’
1
Layout & Positioning
of Tent, Pole Assembly
–Lay out and position tent with door
facing desired direction. (illus. 1)
–Unzip door
–Stake down tent corners, using the
tent stake loops. Keep the floor taut.
(illus. 2)
–Assemble black, Frame Poles by
interlocking the shock-corded sections.
–Insert the poles into center Pole
Sleeves.The poles should cross
forming an “X” in the middle of tent.
(illus. 1).
2
When You Are Ready To
Set Up Your Tent
–Select a level campsite clear
of rocks, branches and other
hard or sharp objects.
–Do not set up your tent
under trees.
–See owners manual for
more tips.
Side Tent
Poles
Rainfly Pole
Rainfly Part No. 9278-135
Main Tent Poles
POLE ASSEMBLY PARTS
Front Door
Instructions apply to Part Number 9278-137
illus. 1
illus. 2 Tent
stake through
stake loop
illus. 4
Center section upright
Part No. 9278-132
Part No. 9278-133
Part No. 9278-134
Illus. 3
Pin & Ring System
located on the front &
rear of tent
Black poles
Black poles
Question and Answer IconNeed help?

Do you have a question about the Coleman Kenosha Pass 9278-137 and is the answer not in the manual?

Coleman Kenosha Pass 9278-137 Specifications

General IconGeneral
ModelKenosha Pass 9278-137
Pole MaterialFiberglass
Number of Doors1
Floor MaterialPolyethylene
RainflyYes
MaterialPolyester
Tent Fabric68D Polyester
Seasons3 Season

Summary

Tent Setup Guide

Layout and Positioning

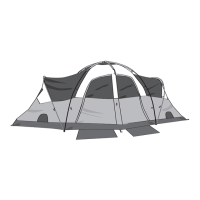
Position tent, unzip door, stake corners, and assemble frame poles into center sleeves.

Connect Frame to Tent

Attach frame poles to tent's pin and ring systems, forming arches, then secure frame clips.

Raise Ends of Tent

Insert gray poles into sleeves, connect to pins, arch, and attach frame clips.

Attach Rainfly

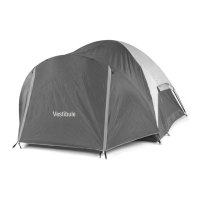
Assemble rainfly pole, insert into pockets, tie to tent, drape over, and secure with velcro and hooks.

Important Usage and Care Information

Condensation and Ventilation

Condensation can form due to humidity; minimize by removing wet items and ensuring ventilation.

UV Exposure and Storage

Avoid prolonged UV exposure; dry tent thoroughly before storing, do not telescope poles.

Flame and Heat Source Warning

Keep flame and heat sources away from tent fabric; fabric will burn if in contact with flame.

Stake Removal and Seam Sealing

Remove stakes by pulling the stake itself, not the fabric; consider seam sealing for waterproofing.
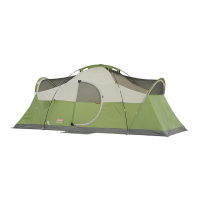
Related product manuals