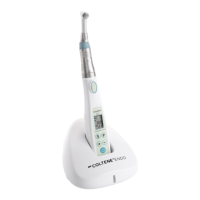
CAUTION
1. Remove the rubber cap on the backside of the motor
handpiece body with slotted bit screw driver and insert the
connection cord clip (g. 1).
2. Mount CanalPro CL Head to the motor handpiece. Pull out
the head straightly when removing/replacing the head.
3. Insert the connection cord into the slit of the connection
cord clip. Adjust the tension of the connection cord between
the head and the connection cord clip not to be slack (g. 2)
4. Connect the CanalPro CL Head connection cord with the clip
of the apex locator (g. 3).
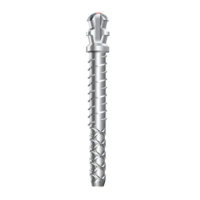
5. Insert the endodontic le in the
CanalPro CL Head. Slightly turn the le
until it engages with the lock
mechanism (g. 4). Push it inward to
click (g. 5)
Removing the le:
Push the push-button with a thumb and remove the le
(g. 6)
Read this Operation Manual carefully before use for safety and le for future reference.
1. Mounting procedure
1. Entfernen Sie die Gummiabdeckung an der Rückseite des
Motorhandstücks mit einem Schlitzschraubenzieher und
legen Sie den Clip des Verbindungskabels ein (Abb. 1).
2. Montieren Sie den CanalPro CL Kopf auf dem
Motorhandstück. Ziehen Sie den Kpof gerade heraus, wenn
Sie ihn entfernen/austauschen.
3. Führen Sie das Verbindungskabel in den Schlitz des
Verbindungskabel-Clips ein. Passen Sie die Spannung des
Verbindungskabels zwischen Kopf und
Verbindungskabel-Clip so an, dass dieses stra sitzt (Abb. 2).
4. Verbinden Sie die das Verbindungskabel des CanalPro CL
Kopfes mit dem Clip de Apexlokators (Abb. 3).
5. Setzen Sie die Endo-Feile in den
CanalPro CL Kopf ein. Drehen Sie die
Feile leicht, bis Sie im
Haltemechanismus einrastet (Abb. 4).
Drücken Sie sie vollends in den
Haltemechanismus (Abb. 5).
Feile entfernen:
Drücken Sie den Druckknopf mit einem Daumen und ziehen
Sie die Feile heraus (Abb. 6)
Lesen Sie diese Gebrauchsanweisung sorgfältig durch und bewahren Sie sie gut auf.
1. Anbringen des Kopfes
6. Slide the le clip holder to the head direction in order to
establish a contact between the endodontic le and the le
clip (g. 8).
6. Schieben Sie den Feilenclip-Halter nach oben, um einen
Kontakt zwischen der Feile und dem Feilenclip-Halter
herzustellen (Abb. 8)
After the le is locked in place, slightly pull out the le to
make sure the le is locked (g. 7).
VORSICHT
Wenn die Feile im Haltemechanismus eingerastet ist, ziehen
Sie leicht daran um sicherzustellen, dass die Feile sicher sitzt
(Abb. 7).
CAUTION
• Be sure that the endodontic le and the connection cord end have
conduction of electricity before starting to probe the root canal.
• Slide back the le clip holder to motor direction when replacing the
endodontic le and/or when not using the apex locator function.
• Do not bend the le clip.
VORSICHT
• Stellen Sie sicher, dass Feile und das Verbindungskabel elektrische
Konduktion haben, bevor Sie mit der Wurzelkanalmessung beginnen.
• Schieben Sie den Feilenclip-Halter in Richtung des Motor-Handstücks, wenn
Sie die Feile ersetzen und/oder Sie die Wurzelkanal-
Längenmessungsfunktion nicht nutzen wollen.
• Den Feilenclip-Halter nicht verbiegen.
Contra Angle 16:1 AL
OPERATION MANUAL
Contra Angle 16:1 AL
GEBRAUCHSINFORMATION
ENGLISH DEUTSCH
OM-CZ491E
1
2
3
6
7
8
54