The CX418 is a logistics thermal label printer manufactured by Comer, designed for efficient and cost-effective label printing. This user guide provides comprehensive instructions for installation, operation, and maintenance, ensuring optimal performance and longevity of the device.
Function Description
The CX418 is a thermal direct label printer capable of printing various types of labels, including express waybills, logistics labels, commodity price tags, and barcode labels of different sizes. It aims to save time and money on label costs by offering a reliable and user-friendly printing solution. The printer features a paper absorption function, which automatically feeds the paper into the channel once inserted, and includes a label detector for efficient operation.
Important Technical Specifications
- Brand: Comer
- Method: Direct Thermal
- Resolution: 203 dpi
- Max Printing Speed: 150 mm/s
- Connection: USB
- Printing Width: 50-108 mm
- Paper Width: 50-118 mm
- Power Adapter: 1.5A
Usage Features
Package Contents and Components
The standard accessories include the printer unit, a power cable, a USB line, and a quick installation guide.
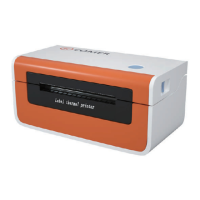
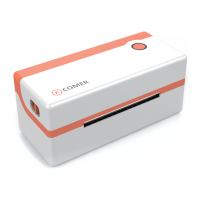
The printer's front view shows the upper cover, paper out button, and uncap button pole. The rear view includes the paper feed, power button, USB interface, and power interface. The inner view reveals the printer head mechanism, top cover bracket lock, removable paper roll holder, glue roll, and removable label detector.
Quick Printer Installation
- Cable Connection:
- Ensure the printer is powered off (0).
- Connect the power line to the printer.
- Connect the other end of the power line to a socket.
- USB Connection:
- Confirm the printer is powered off (0).
- Connect the USB B-Type line to the printer.
- Connect the other end of the USB B-Type line to the PC mainframe.
- Turn on the printer power (I).
Consumables Installation
- Facing the back of the printer, use both hands to adjust the paper guide space according to the paper size.
- Insert the thermal paper into the paper guide.
- Slowly feed the thermal label into the paper channel; the paper will be automatically absorbed by the detector.
- Ensure the thermal label paper is in place, and the machine automatically absorbs a small part of the paper.
- Align the hook of the external paper roll holder with the hook at the bottom of the printer.
Driver Installation & Print Test
For Windows:
- Ensure the printer is ON.
- Download the Windows driver from http://printer.kuaimai.com.
- Unzip the downloaded software.
- Find the driver and follow the prompts to install it.
- Once installed successfully, connect the computer to the printer and place a direct thermal label.
- Start to print a test page by navigating to "Device and Printer" on your computer to find the installed printer.
- Check the test page; if not satisfied, you can reset the label size and print density.
For Mac:
- Ensure the printer is ON.
- Download the Mac driver from the provided website or USB disk.
- Unzip the Zip/Rar format file using an unzip tool.
- Run the downloaded software and follow the prompts to complete the installation.
- Confirm the CX418 printer is installed.
- To find the installed printer, locate the printer driver in the launchpad of your Mac.
- Click "System Preference," then select "Printer and Scanners," and add the printer drive.
- If the page displays your printer information, the installation is successful. For any issues, contact sales01@raycloud.com.
- Standby (Press): Feeds a blank paper automatically.
- Standby (Long press blue light flashes twice): Enters into the learn mode of the cover sheet.
- Power on (Long press blue light): Prints out a self-test page.
- Continuous printing/Print (Press): Prints pause.
- Print pause (Press): Resumes printing.
Indicator Light Instruction
- Blue light on: Printer standby.
- Purple light on: Printer head overheated.
- Red light on: Upper cover problem.
- Red light flash slowly: Lack paper.
- Red light flash quickly: Label learn mode problem.
- Yellow light flash slowly: Paper jam/Paper detection problem.
- Green light on: On printing.
- Green light flash slowly: Print pause.
Maintenance Features
- Optimal Print Quality: To ensure optimal print quality, always use the original factory power adapter.
- Paper Quality: Avoid using poor quality paper, as it can cause excessive wear on the printer and damage the print head.
- Print Head Cleaning: Regularly clean the print head, especially if print quality becomes unclear, to maintain high-quality print results.
- Paper Specification Changes: When replacing paper with different specifications (including thickness and quality), it is recommended to perform "Automatic identification label" to calibrate the printer.
- Print Effect Adjustment: If print quality remains poor despite using good quality paper and a clean heating element, you can adjust the print concentration (range 0 to 15 levels) to meet requirements.
- Paper Absorption Function: The product has a paper absorption function; always load paper in the rear suction mode. Opening the cover during this process will cause paper waste.
The Comer thermal printer is covered by a one-year warranty. For any issues, troubleshooting tips, or replacements, contact Comer customer service at service01@raycloud.com. Further information can be found at http://dyj.kuaimai.com/.