15
EN
If it trips, proceed as follows:
- move the master switch (1) to “0” position and remove the plug from the power socket;
- press the spray gun lever (19), so as to release any residual pressure;
- wait 10÷15 minutes for the high-pressure cleaner to cool down;
- make sure the instructions for connection to the power supply are complied with (refer to the
INSTRUCTION MANUAL - SAFETY PRECAUTIONS
), with special reference to the extension used;
- t the plug back in the socket and repeat the start procedure described in the paragraph
“OPERATION”
.
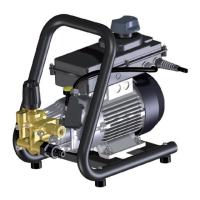
•Pressureunloader/regulationvalve.
Valve suitably set by the Manufacturer, which permits regulating the operating pressure by means of
the knob (6) and which allows the pumped uid to return to pump suction, preventing the occurrence
of hazardous pressures when the spray gun is closed or whenever an attempt is made to set pressure
values above max. allowed pressure.
•Spraygunleverlockdevice.
Safety stop (18) which allows locking the lever (19) of the spray gun (9) in closed position, thus preventing
accidental operation
(fig. 2, posiTion s)
.
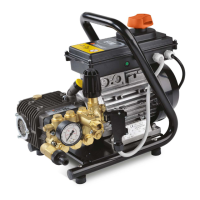
STANDARD FITTINGS
Make sure the following are contained in the purchased product pack:
• high-pressurecleaner;
• high-pressuredeliveryhosewithquickcoupling;
• spraygun;
• lancehose;
• suctionconnectionkit;
• externaldetergentsuctionhosekit;
• instructionmanual-safetyprecautions;
• instructionmanual-operationandmaintenance;
• warrantycerticate;
• after-salescentrebooklet;
• ECdeclarationofconformity;
• nozzlecleaningpin.
In case of problems, contact your dealer or an authorised after-sales centre.
OPTIONAL ACCESSORIES
The standard ttings of the high-pressure cleaner can be integrated with the following range of accessories:
•
BA
type water mains disconnector: mandatory for connecting up to the drinking water mains.
• sandblastinglance:designedtocleansurfaces,eliminatingrust,paint,scale,etc.;
• draincleaningkit:designedtounblockpipesandducts;
• rotating-nozzlelance:designedtoremoveresistantdirt;
• foamlance:designedformoreeectivedetergentdistribution;
• lancesandnozzlesofvarioustypes.
INSTALLATION - FITTING ACCESSORIES
• Connectthequickcoupling(15)ofthehose(14)tothewateroutletconnection(7)
(refer To fig.1 and2)
until a click is heard.
operaTion e in fig. 4.
• Screwuptheconnection(13)ofthehigh-pressurehosetothethreadofthespraygun(9)andtighten
well using two 22 mm xed wrenches (not supplied).
operaTion d in fig. 4.
• Fitthelter(21)inthewaterinletconnection(20).Fittheseal(22)inthewaterinletquick-tconnection(23)
and screw up to the connection (20).
operaTion a in fig. 3.
OPERATION - PRELIMINARY ACTIVITIES
• Movethehigh-pressurecleanertoworkposition.
• Completelyunwindthehigh-pressurehose(14).
• Fastenasupplyhosewithinnerdiameter19mm/0.75inchestothewaterinletquick-tconnection(23).
operaTion f in fig. 4.