CTK04 ComfortNet™ Communicating Thermostat
11
I/O-CHTSTAT03 69-2688—07
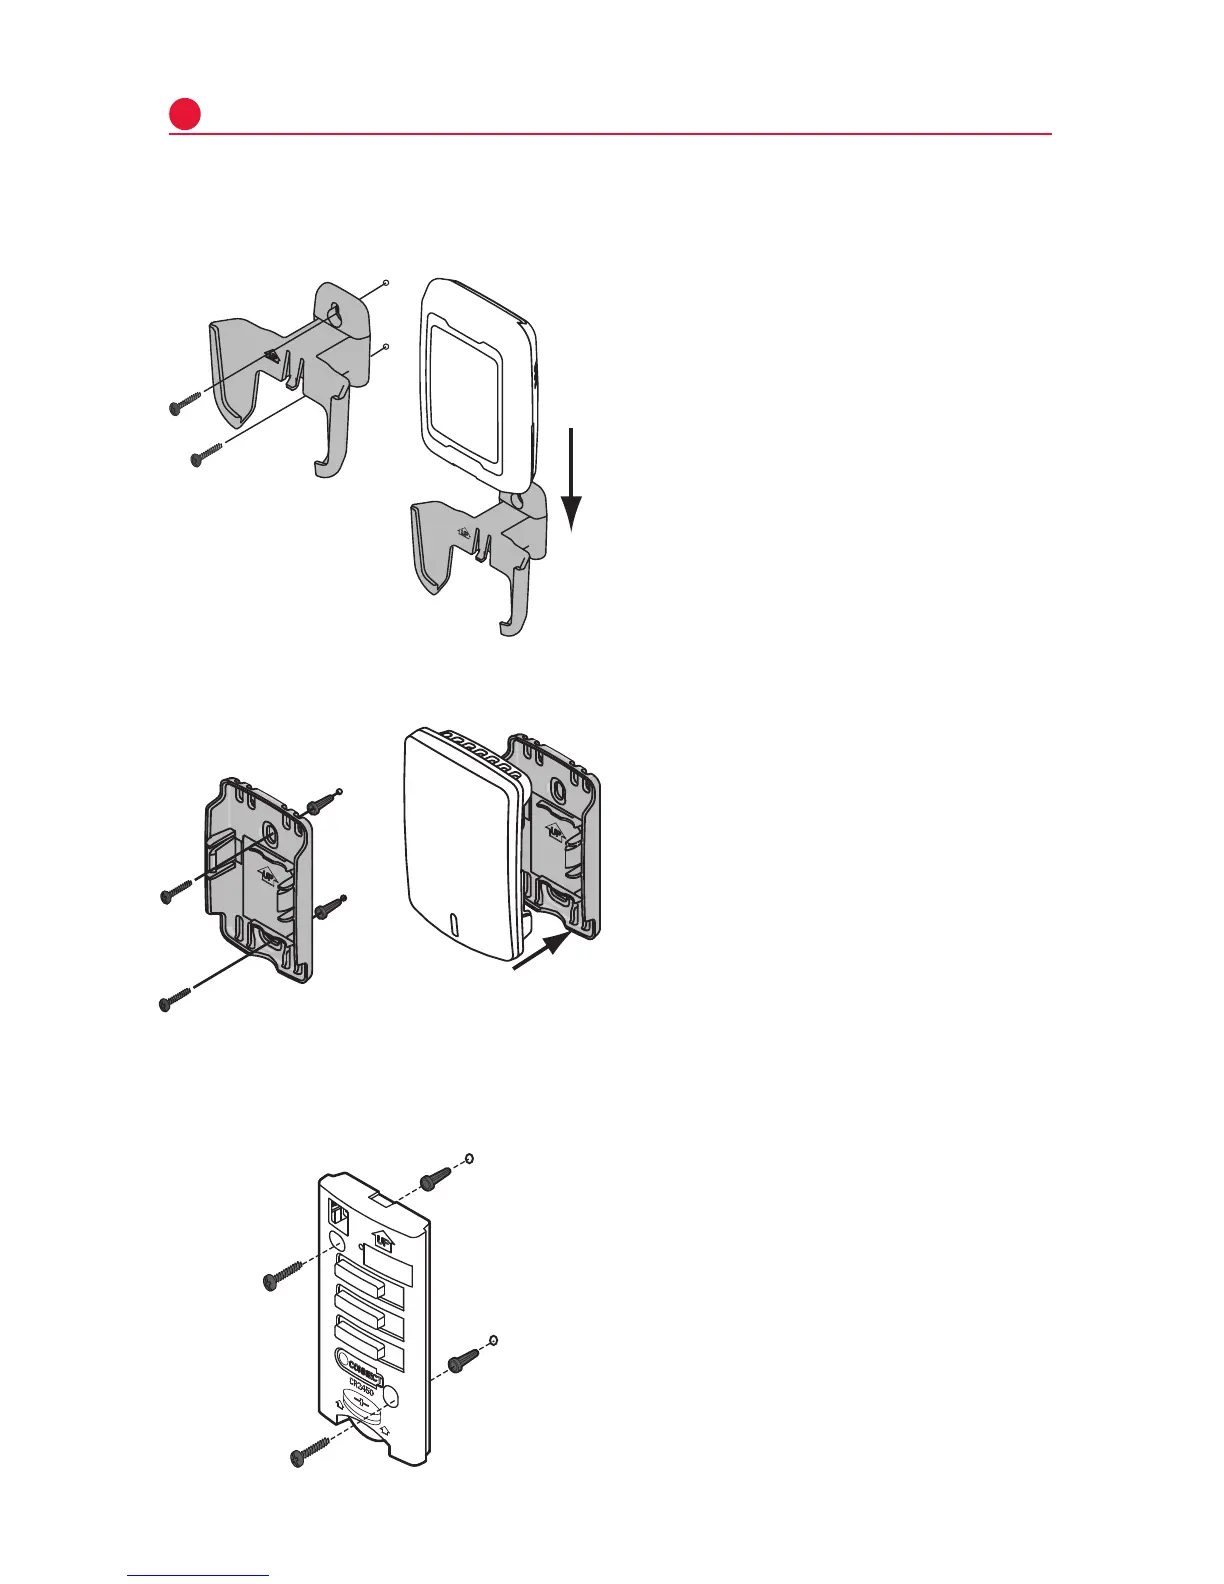
Mount optional accessories
1 Mountthesensoronaverticalexterior
wall,atleast6inchesbelowany
overhang. Choose a location protected
from direct sunlight.
2 Placesensorsecurelyinbracket,facing
awayfromwall.
5
M28491
M28849A
[If no sensors are used, skip to Section 6.]
To install outdoor air sensor
To install indoor air sensor
To install Entry/Exit Remote or Vent Boost Remote
1 Removethewallplateandmountit4
to6feetabovetheflooronaninterior
wall.Drill3/16-inchholesfordrywall,
7/32-inch for plaster.
2 Attachsensorsecurelytowallplateas
shown.
Mounting the remote is optional.
1 Removethefrontcoverfromthe
remote.
2 Useprovidedscrewsandwallanchors
tofastentheremotetothewall.Drill
3/16-inchholesfordrywall,7/32-inch
for plaster.
3 Replacethecoverontheremote.
M32936B
M33095
Do not install the indoor air sensor where it can be affected by:
• Drafts or dead spots behind doors and in corners.
• Hot or cold air from ducts.
• Radiant heat from sun or appliances.
• Concealed pipes and chimneys.
• Unheated (uncooled) areas such as an outside wall
 Loading...