Regulator Valve Seal Replacement
Remove the Old Regulator Valve
Seals
1. De-gas the dispenser (see page 40).
2. Open the dispenser access doors.
3. Unscrew the spring tube by placing a 1 ¼" spanner on the machine hex nut
at the top of the spring tube.
Do not unscrew the valve adjustment nut. The spring remains at
the set tension.
1. Unscrew the bottom plug in the regulator body.
2. Using a hex key inserted into the base of the piston to stop the piston from
twisting sideways and being damaged, push the piston downwards out the
bottom of the regulator body.
3. Hold the piston by the 8 mm flat and remove the M6 cap screw from the
bottom.
The M6 cap screw has a special hole through it. Never substitute
it for a normal cap screw.
Install New Regulator Valve Seals
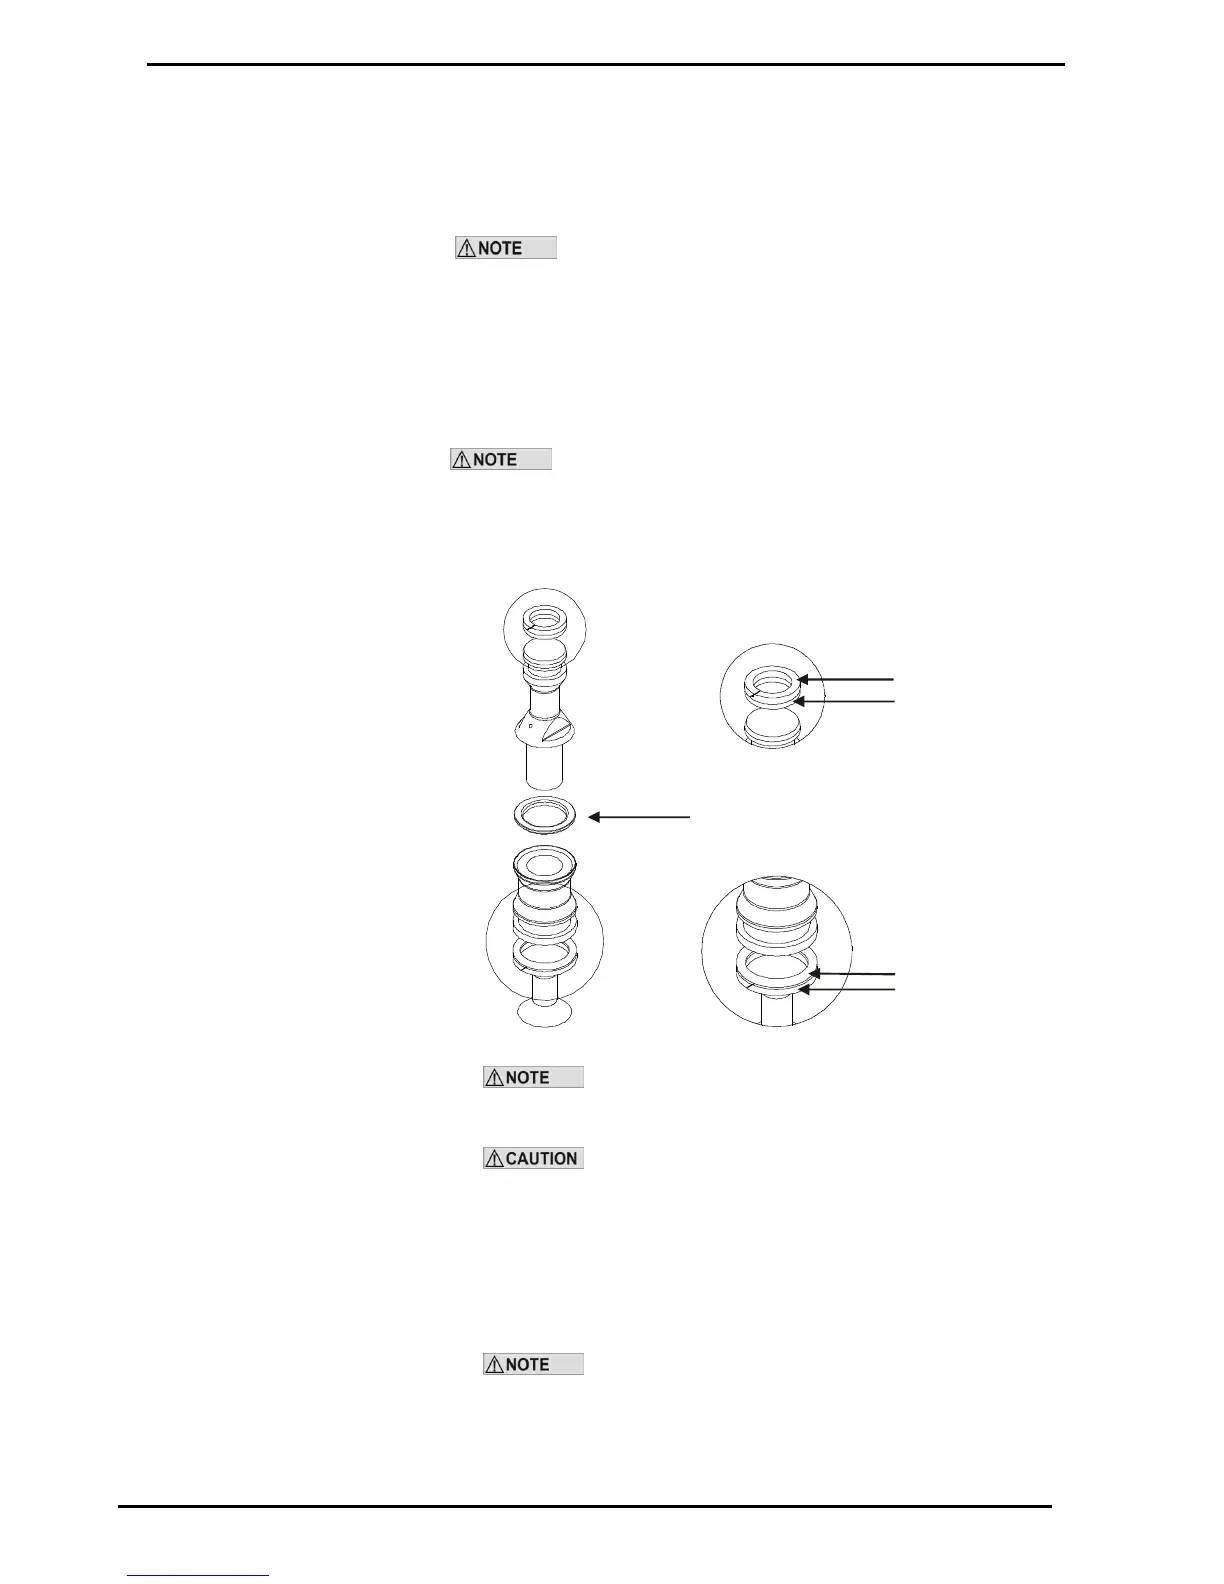
1. Install the new valve seal. Make sure that the larger flat side of the seal
faces upwards.
A
B
DETAIL B
Regulator O-Ring
Teflon Back-Up Ring
DETAIL A
Teflon Back-Up Ring
Regulator O-Ring
Make sure that the
flat face of the seal
faces up
O-rings that are subjected to natural gas at high pressure
swell when exposed to air. Once swollen, they cannot be reused and must
be replaced.
The Nitrile O-rings have a life span of over 10 years from
cure date but improper handling of these O-rings before use can shorten
their useful life. O-rings will deteriorate if exposed to ozone or ultraviolet
light so keep in original packaging and away from UV light. If in unsure
about their condition, do not use old O-rings and order new ones.
2. Lever off the two regulator O-rings and two Teflon back-up rings.
3. Install two new regulator O-rings and two new Teflon back-up seals.
The back-up rings go on the outside of the O-rings.
Always use O-ring lubricant on the O-rings to increase the
service life.
4. Reassemble the piston.
5. Push the piston back up into the regulator body with a hex key.