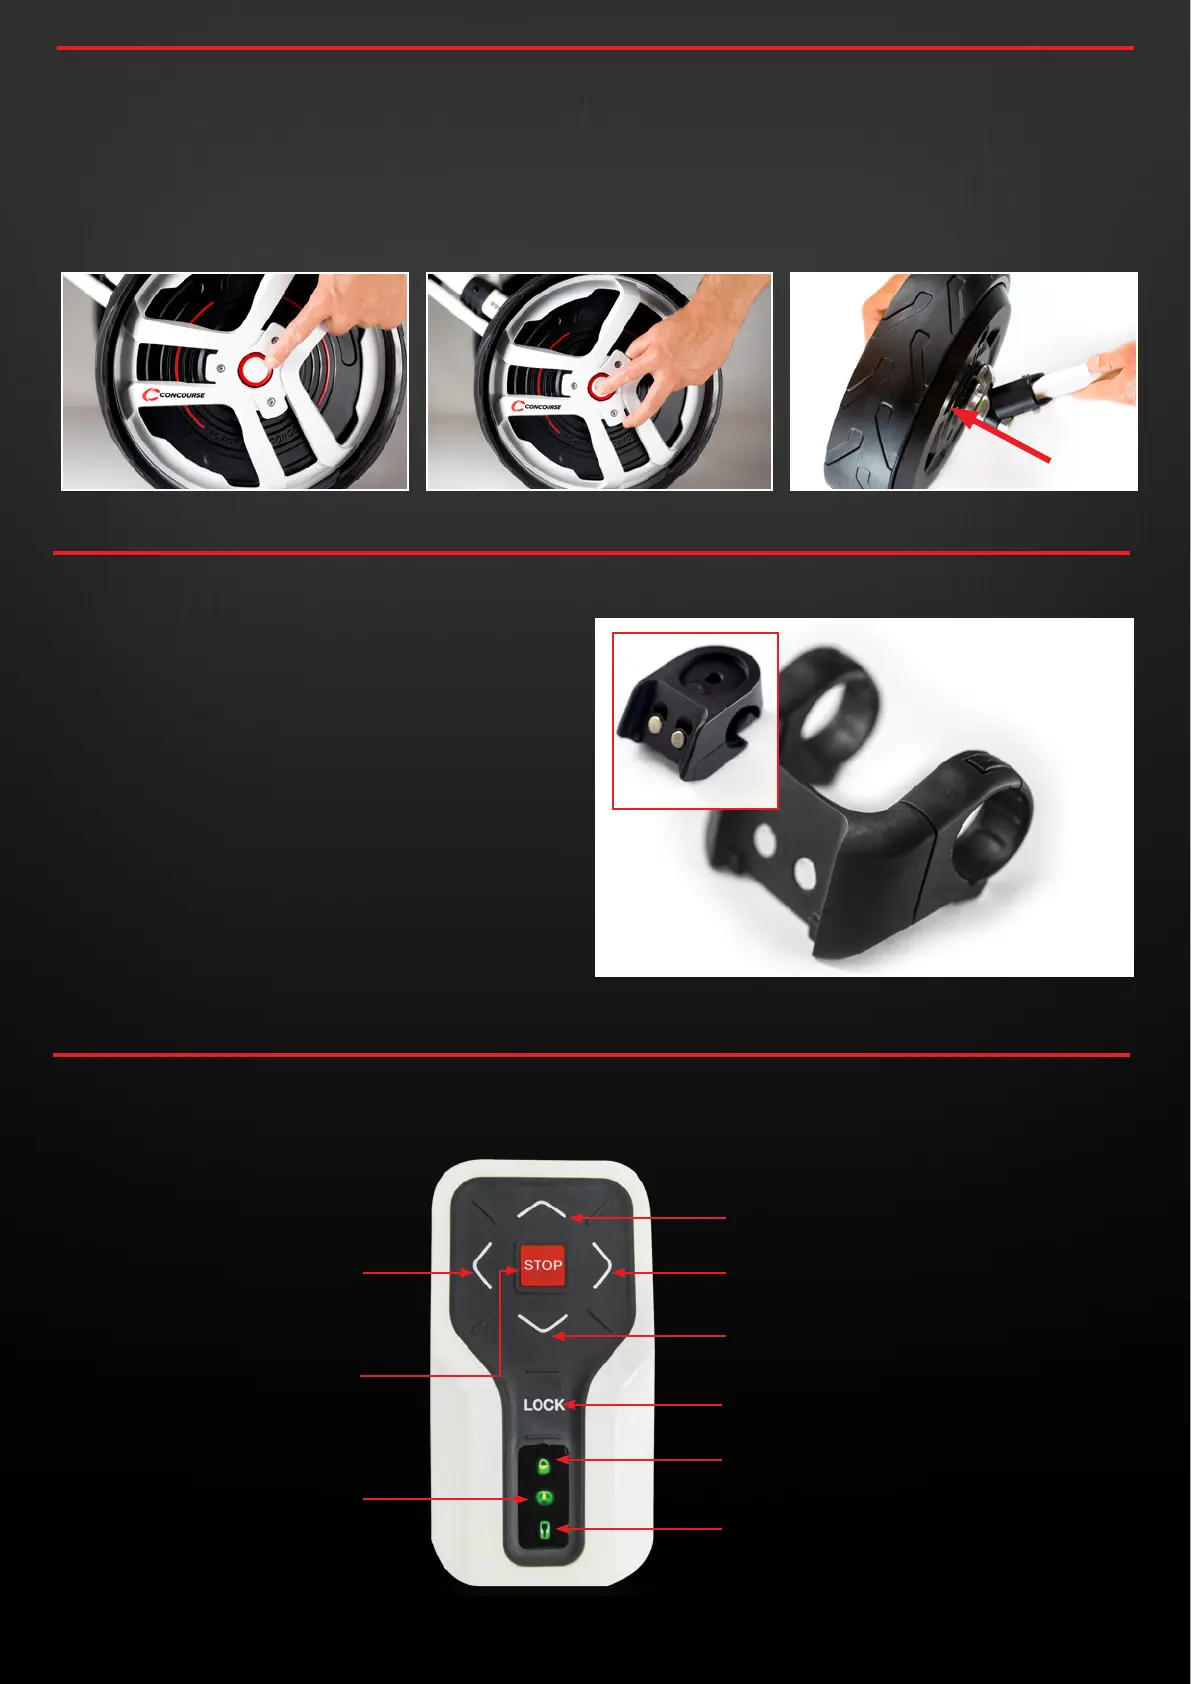
12
UP: Increase forward speed
DOWN: Slow down / Reverse speed
LOCK: Initialise / Shut Down / Lock
LED INDICATOR: Locked/Unlocked
RIGHT Steer to the right
LEFT: Steer to the left
STOP: Stop
6.0
REMOVING YOUR SMART WHEELS
6.1 You can release each of the Smart Wheels by locating the
button in the middle of the outside facing side of the Smart
Wheel.
6.2 To completely remove the Smart Wheels from your buggy,
depress and hold down the button in the middle of the outside
of the wheel and guide the wheel off it’s axle completely.
7.0
REMOTE CONTROL MOUNT
7.1 To attach your remote control mount to your Buggy Handle
use the Allen key provided in the kit.
7.2 Fix the Mount on the centre of your push buggy handle
so you can reach the controls using either your left or
right thumb.
7.3 Undo the mounting bracket, position the mount around the
handle and then finger tighten the screws so they thread
cleanly back into the mount.
7.4 Once positioned suitably, moderately tighten the mounting
screws so that the remote control mount is securely in
position.
8.0
REMOTE CONTROL OVERVIEW
CBM3 MOUNT
LED INDICATOR: Remote Status
LED INDICATOR: Wheel Status
concoursegolf.com
12
User Instruction Manual | Version 7.0