This document describes the Retro Fit Barrier Kit, designed for Confer Plastics ladder models #6000, #6100, #7000, and #7100. This kit enhances the safety and functionality of existing swimming pool ladders by adding a barrier.
Function Description
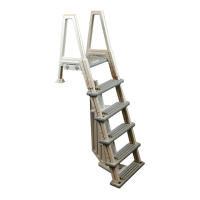
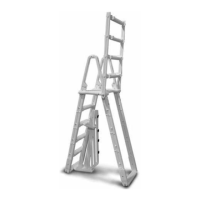
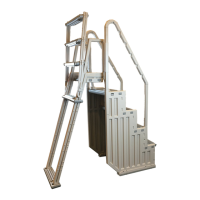
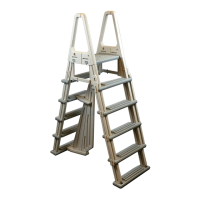
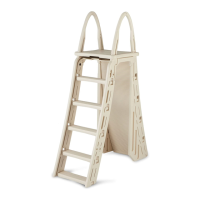
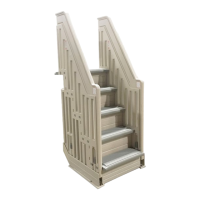
The Retro Fit Barrier Kit serves as an add-on safety feature for specific Confer Plastics swimming pool ladders. Its primary function is to create a physical barrier, likely to prevent unauthorized access or to guide users more safely when entering or exiting the pool. The barrier is designed to be installed on an already assembled ladder, requiring the ladder to be removed from the swimming pool for installation. Once installed, the barrier sections must be filled with water to prevent them from floating, ensuring stability and proper operation.
Important Technical Specifications
The kit includes several components necessary for its assembly and attachment to the ladder:
- Fasteners: 4 - #10 x 1-1/4" Sheet Metal Screws are provided for securing the barrier components to the ladder treads. These screws are installed at a slight angle, first into the Upper Brace and then into the Lower Base.
- Structural Components:
- 1 – Upper Brace: This component helps secure the top portion of the barrier sections to the ladder.
- 1 – Lower Base: This component provides the foundation for the barrier sections at the bottom of the ladder.
- 1 – Small Barrier Section: One of the main vertical barrier components.
- 1 – Large Barrier Section: The other main vertical barrier component, which also receives the self-adhering foam strips.
- Padding: 1 – Strip of 4 Foam Pads: These self-adhering foam strips are installed on the Large Barrier Section, likely to provide cushioning or to protect the ladder or pool liner from abrasion.
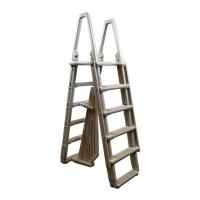
The barrier components are designed to snap into slots on the Lower Base, indicating a modular and relatively straightforward assembly process. The Upper Brace features "fingers" that spread and slide into position on the Large Barrier Section, further securing the structure.
Usage Features
The installation process is designed to be user-friendly, although it requires the ladder to be out of the pool. The steps are clearly outlined:
- Initial Assembly: The Small and Large Barrier Sections are snapped into designated slots on the Lower Base. This suggests a tool-free initial assembly for these main components.
- Upper Brace Attachment: The Upper Brace is positioned over the Small Barrier Section, and its "fingers" are spread to slide into position on the Large Barrier Section. This step secures the top portion of the barrier sections together.
- Ladder Integration: The assembled Base and Brace unit is then placed onto the ladder, centered on the bottom and fourth treads. This precise positioning ensures the barrier aligns correctly with the ladder's structure.
- Securing the Barrier: The 4 sheet metal screws are installed, first in the Upper Brace and then in the Lower Base, at a slight angle. This mechanical fastening ensures a secure and stable attachment of the barrier to the ladder.
- Foam Pad Installation: The self-adhering foam strips are applied to the Large Barrier Section. This is a final step before the ladder is returned to the pool, indicating their protective or cushioning role.
- Water Filling: Crucially, after installation, the barrier sections must be filled with water. This prevents the barrier from floating when the ladder is placed back into the swimming pool, ensuring its stability and effectiveness.
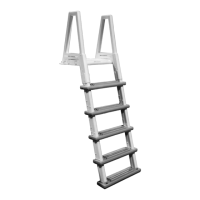
The kit is specifically designed for Confer Plastics ladder models #6000, #6100, #7000, and #7100, indicating a tailored fit and compatibility. The requirement to remove the ladder from the pool for installation emphasizes that this is a modification to an existing setup rather than an integrated feature of a new ladder.
Maintenance Features
While the document does not explicitly detail ongoing maintenance for the barrier kit itself, several points can be inferred:
- Water Filling: The instruction to fill the barrier sections with water implies that this condition must be maintained. Regular checks might be necessary to ensure the sections remain filled, especially if there are concerns about leaks or evaporation.
- Fastener Checks: As with any bolted or screwed assembly in a wet environment, periodic inspection of the 4 sheet metal screws for tightness and corrosion would be prudent to ensure the barrier remains securely attached to the ladder.
- Foam Pad Integrity: The self-adhering foam strips might require occasional inspection for wear, detachment, or degradation, especially given their exposure to water and chemicals. Replacement might be necessary over time to maintain their intended function.
- Material Durability: The components are likely made from durable, pool-compatible plastics, given the manufacturer's expertise in pool accessories. However, exposure to UV light, pool chemicals, and general wear and tear could necessitate eventual replacement of parts if damage occurs.
The manufacturer, CONFER PLASTICS, INC., provides contact information (97 WITMER ROAD, NORTH TONAWANDA, N.Y. 14120-2421 and www.conferladders.com), which would be the primary resource for obtaining replacement parts or further maintenance guidance. The "DANGER" label visible in one of the images, though not directly explained in the text, suggests that safety considerations are paramount in the design and use of the product, reinforcing the importance of proper installation and maintenance.