WebRelay-10 Plus™ Users Manual
Xytronix Research & Design, Inc. Page 22
Appendix B: Installing New Firmware
From time to time, updates are made to the module’s rmware. As an industrial device and unlike many consumer
products, rmware updates are recommended only on an as-needed basis. The rmware can be updated in the
eld. The procedure for updating the rmware is outlined below. Please note that it is important that this procedure
is followed precisely.
Requirements
The rmware update software requires Windows 7/8/10.
Setup
1. Updating rmware will not automatically save settings, scripts, etc. Before proceeding with the rmware
update, please back up all settings les and Basic scripts.
2. Contact technical support if a rmware update is needed and a download link will be provided. Only a
module’s image can be installed on the module, so make sure the correct image is being downloaded.
3. bootloader.exe will connect to the module using default IP address 192.168.1.2, not the address
currently assigned to the module. After the update, all settings will be lost and the device will return to its
default IP address of 192.168.1.2. Congure the PC to the same subnet as the IP address 192.168.1.2,
such as 192.168.1.10. For instructions on doing this see Section Establishing Communications for
Setup.
Note: The IP address of the module will automatically be set to the default 192.168.1.2 during the update
process. Since the module supports Auto Negotiation, a crossover cable is not necessary.
4. Open the bootloader.exe utility on the computer by double clicking on the downloaded le.
5. Within the ControlByWeb™ Programmer utility programmer, select File, then Open. Specify the rmware
image downloaded from the ControlByWeb™ web site.
Device Upgrade Procedure
Carefully follow the following steps to put the module into bootloader mode and perform the upgrade:
1. Remove DC power from the module.
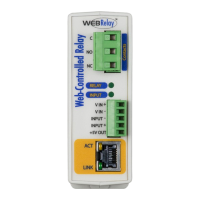
2. Using a small, non-conductive tool, press and hold the reset button.
3. While holding the reset button, apply power to the module. The LINK and ACT lights will ash. Continue
to hold the reset button for the next step.
4. While holding the reset button, press the Upload Firmware button at the bottom of the ControlByWeb™
Programmer window. After the programming process begins, the reset button can be released.
5. Programming will take approximately 60 seconds, the LINK LED will stop ashing and remain lit. The
module will be set to factory defaults with an IP address of 192.168.1.2.
6. Refer to Section Establishing Communications for Setup to recongure the device. Verify the
new version of rmware has been installed by viewing the default setup page with a web browser
(http://192.168.1.2/setup.html).