WaveLinx Networked Relay Panel Quick Start (Version 15)
www.cooperlighting.com 3
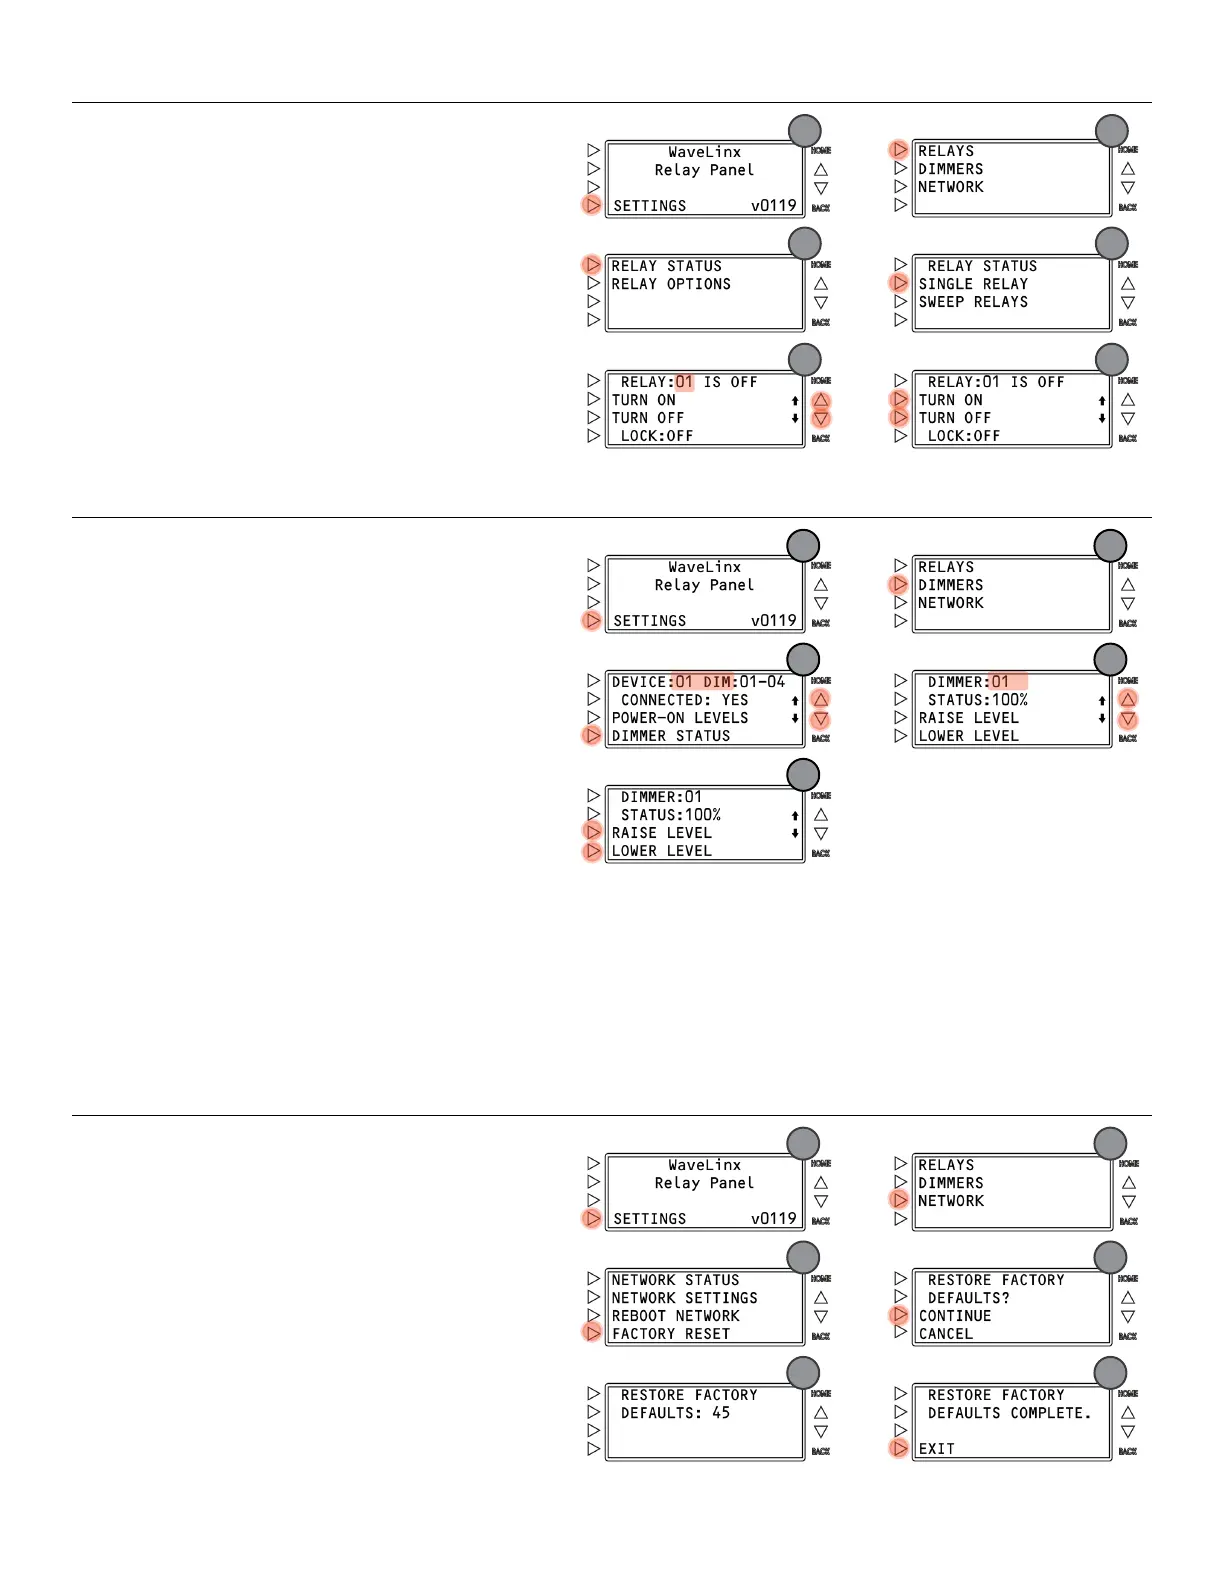
Commanding Relays from the Onboard Display
HOME screen:
Press
SETTINGS.
Press
RELAYS.
Press
RELAY STATUS.
Press
SINGLE RELAY.
Press the scroll buttons
until the desired relay
number is displayed.
Press one of the command options:
TURN ON to force the relay ON.
TURN OFF to force the relay OFF.
Commanding Dimmers from the Onboard Display
HOME screen:
SETTINGS.
DIMMERS.
3: Press the scroll buttons
until the desired dimmer
card address is displayed. Press
DIMMER STATUS.
4: Press the scroll buttons
until the desired dimmer
number is displayed.
RAISE LEVEL or
LOWER LEVEL
Press and release the button to adjust the level of the
selected dimmer in 1% increments.
Press and hold the button to adjust the level more
quickly.
Initial Configuration
Follow the steps in this section to configure the initial settings of the WaveLinx Network Relay Panel and the WaveLinx Area Controller.
Configure the WaveLinx Network Relay Panel
To prepare the relay panel for its connection to the WaveLinx Controller, perform the following steps:
Step 1: Factory Reset the Panel
Before any further configuration, perform a
Factory Reset to
ensure that the panel is operating from a clean configuration.
This
will factory default the relay pole configuration, power-up
states/levels, relay lock settings, and network settings.
HOME screen:
Press
SETTINGS.
Press
NETWORK.
Press
FACTORY RESET.
Press
CONTINUE.
Wait for the panel to restore.
Press
EXIT.