WaveLinx Networked Relay Panel Quick Start (Version 15)
www.cooperlighting.com 4
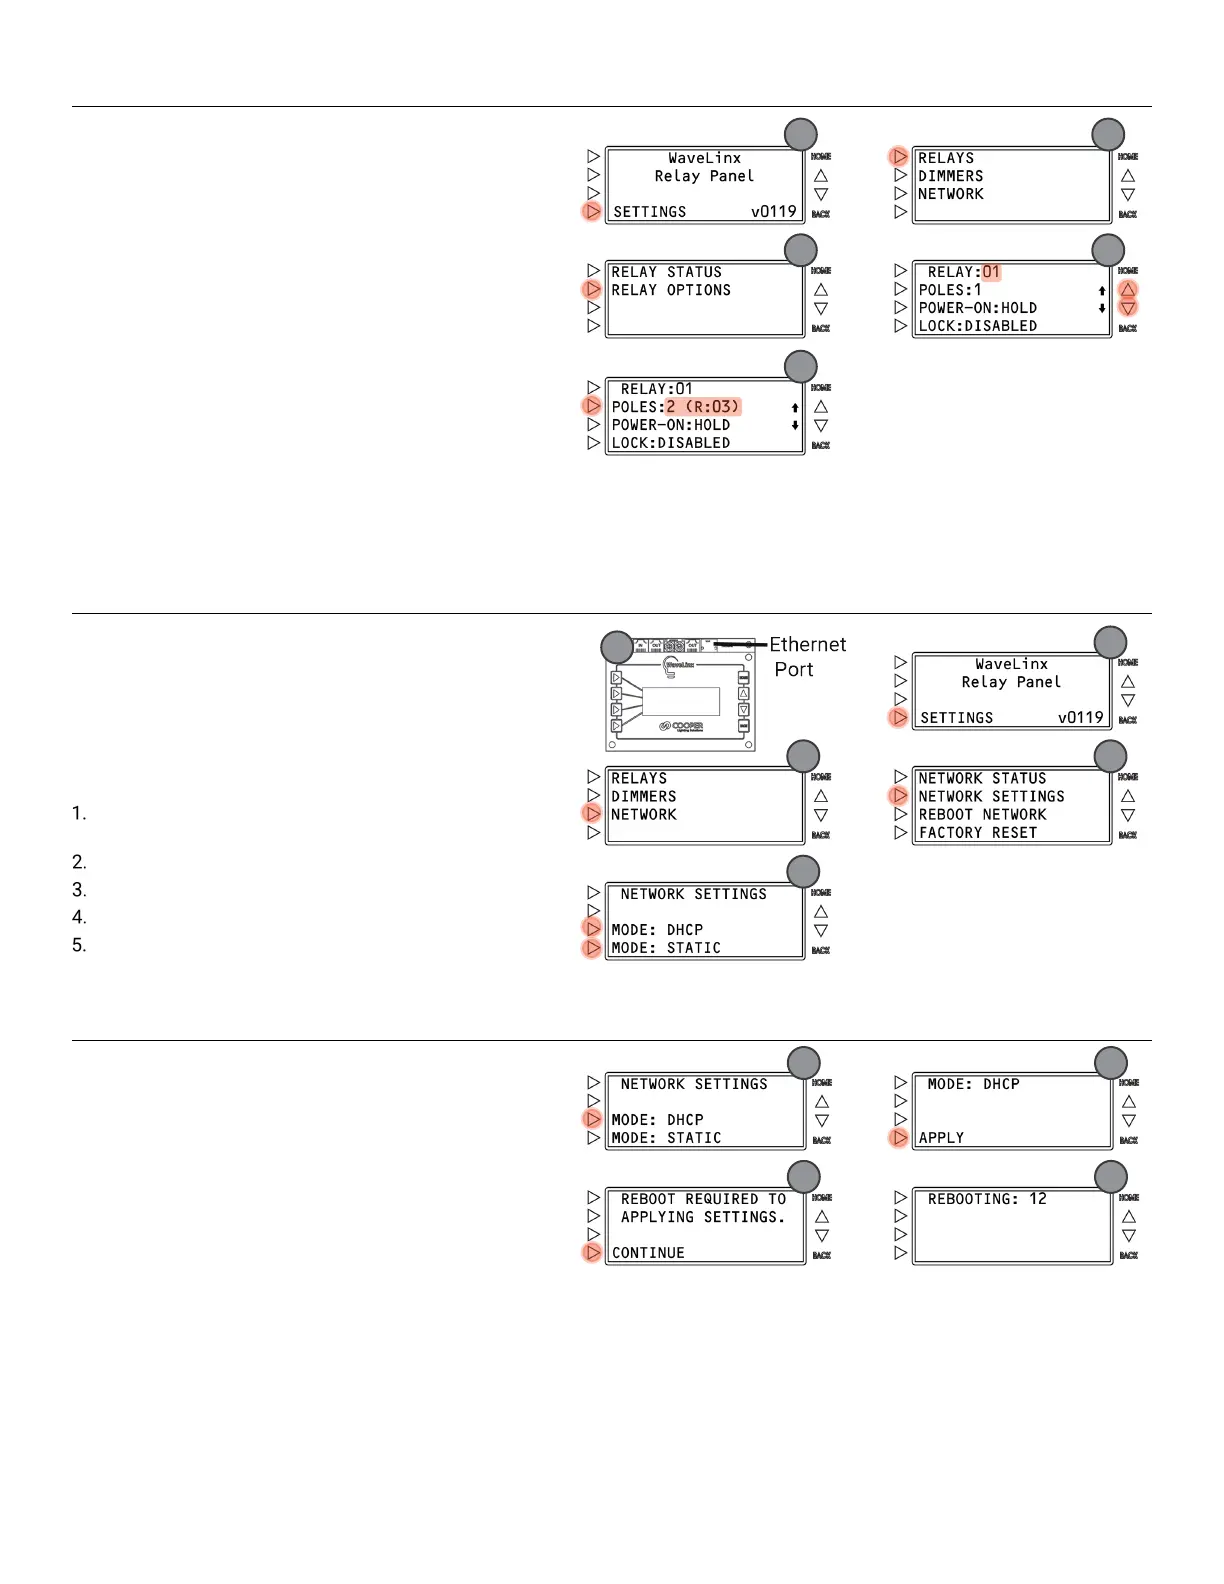
Step 2: Configure Relay Poles
Relays are set for single pole relay configuration by default. If
two
or three pole relays are being used, they must be
configured using the onboard display. Two and three pole
relays will always operate from
the top relay position.
HOME screen:
Press SETTINGS.
Press
RELAYS.
Press
RELAY OPTIONS.
Press the scroll buttons
until the desired relay
number is displayed (For 2 or 3 pole relays, select the top
relay number).
Press
POLES consecutively to toggle between 1, 2, or 3.
If 2 or 3 pole is
selected, the associated relay numbers will
be displayed in brackets.
Step 3: Configure Network Settings
IMPORTANT NOTE: If using DHCP to assign the IP address, reserve the IP for the relay panel on the DHCP server to prevent
communication issues if the address is changed.
The WaveLinx Networked Relay Panel communicates with the
WaveLinx Area Controller over the building LAN.
The relay
must be configured with a unique IP address within the
same network range as the WaveLinx Area Controller. By
default, the Ethernet port is disabled. The Ethernet port must
be set to use either DHCP or a static IP address.
HOME screen:
Make sure that the relay panel Ethernet port is connected
to the Building LAN.
Press SETTINGS.
Press NETWORK.
Press NETWORK SETTINGS
Select either MODE: DHCP or MODE: STATIC.
Using DHCP (continue step 6)
Press
MODE: DHCP.
Press
APPLY.
Press
CONTINUE.
Wait for the reboot to occur.
Once rebooted, if a DHCP server is online, the panel will
acquire an IP address.
For static IP addressing, see next page