WaveLinx Networked Relay Panel Quick Start (Version 15)
www.cooperlighting.com 5
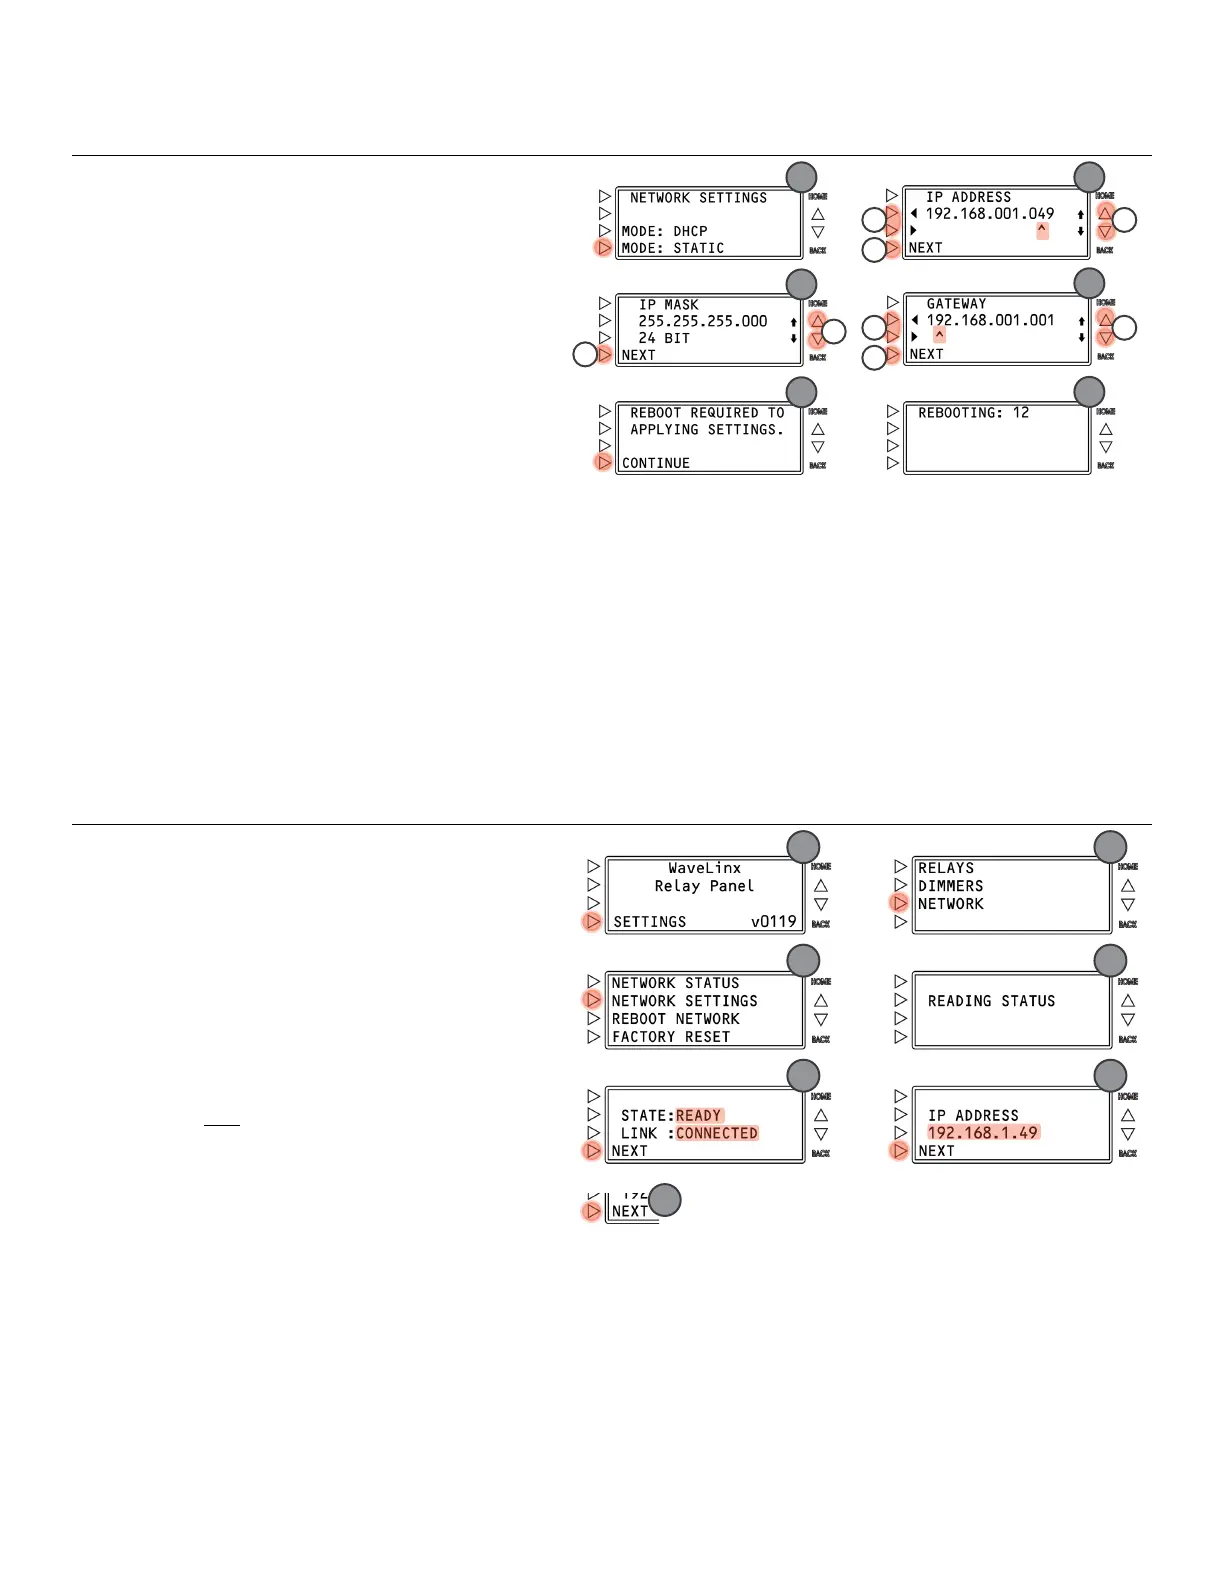
Using a Static IP (continue step 6)
MODE: STATIC.
IP ADDRESS:
a. Press
or
to move the cursor point
beneath the desired address segment.
b. Press and release
to increment or
to
decrement one digit at a time. Press and hold
to increment or
to decrement more quickly.
c. Press
NEXT.
IP MASK:
a. Press and release
to increment or
to
decrement the number of subnet bits one number
at a time until the correct subnet mask is
displayed (refer to table).
b.
Press
NEXT.
GATEWAY ADDRESS:
a. Press
or
to move the cursor point
beneath the desired address segment.
b. Press and release
to increment or
to decrement one digit at a time. Press and hold
to increment or
to decrement
more quickly.
c. Press
NEXT.
CONTINUE.
11: Wait for the reboot to occur.
Once rebooted, the relay panel should be ready for connection via the assigned static IP address.
Step 4: Verify the Network Status and Note the IP Address
In this step, verify that the network port is enabled and ready
for
connection. During this step if DHCP was used, note the IP
address given to the panel.
HOME screen:
SETTINGS.
NETWORK.
NETWORK SETTINGS.
4: Wait for the relay panel to read the network status.
Verify that the network STATE is READY and that the LINK
is CONNECTED and then press
NEXT.
note the IP ADDRESS and then press
NEXT.
NEXT through the remaining screens
to exit the Network Status screens.